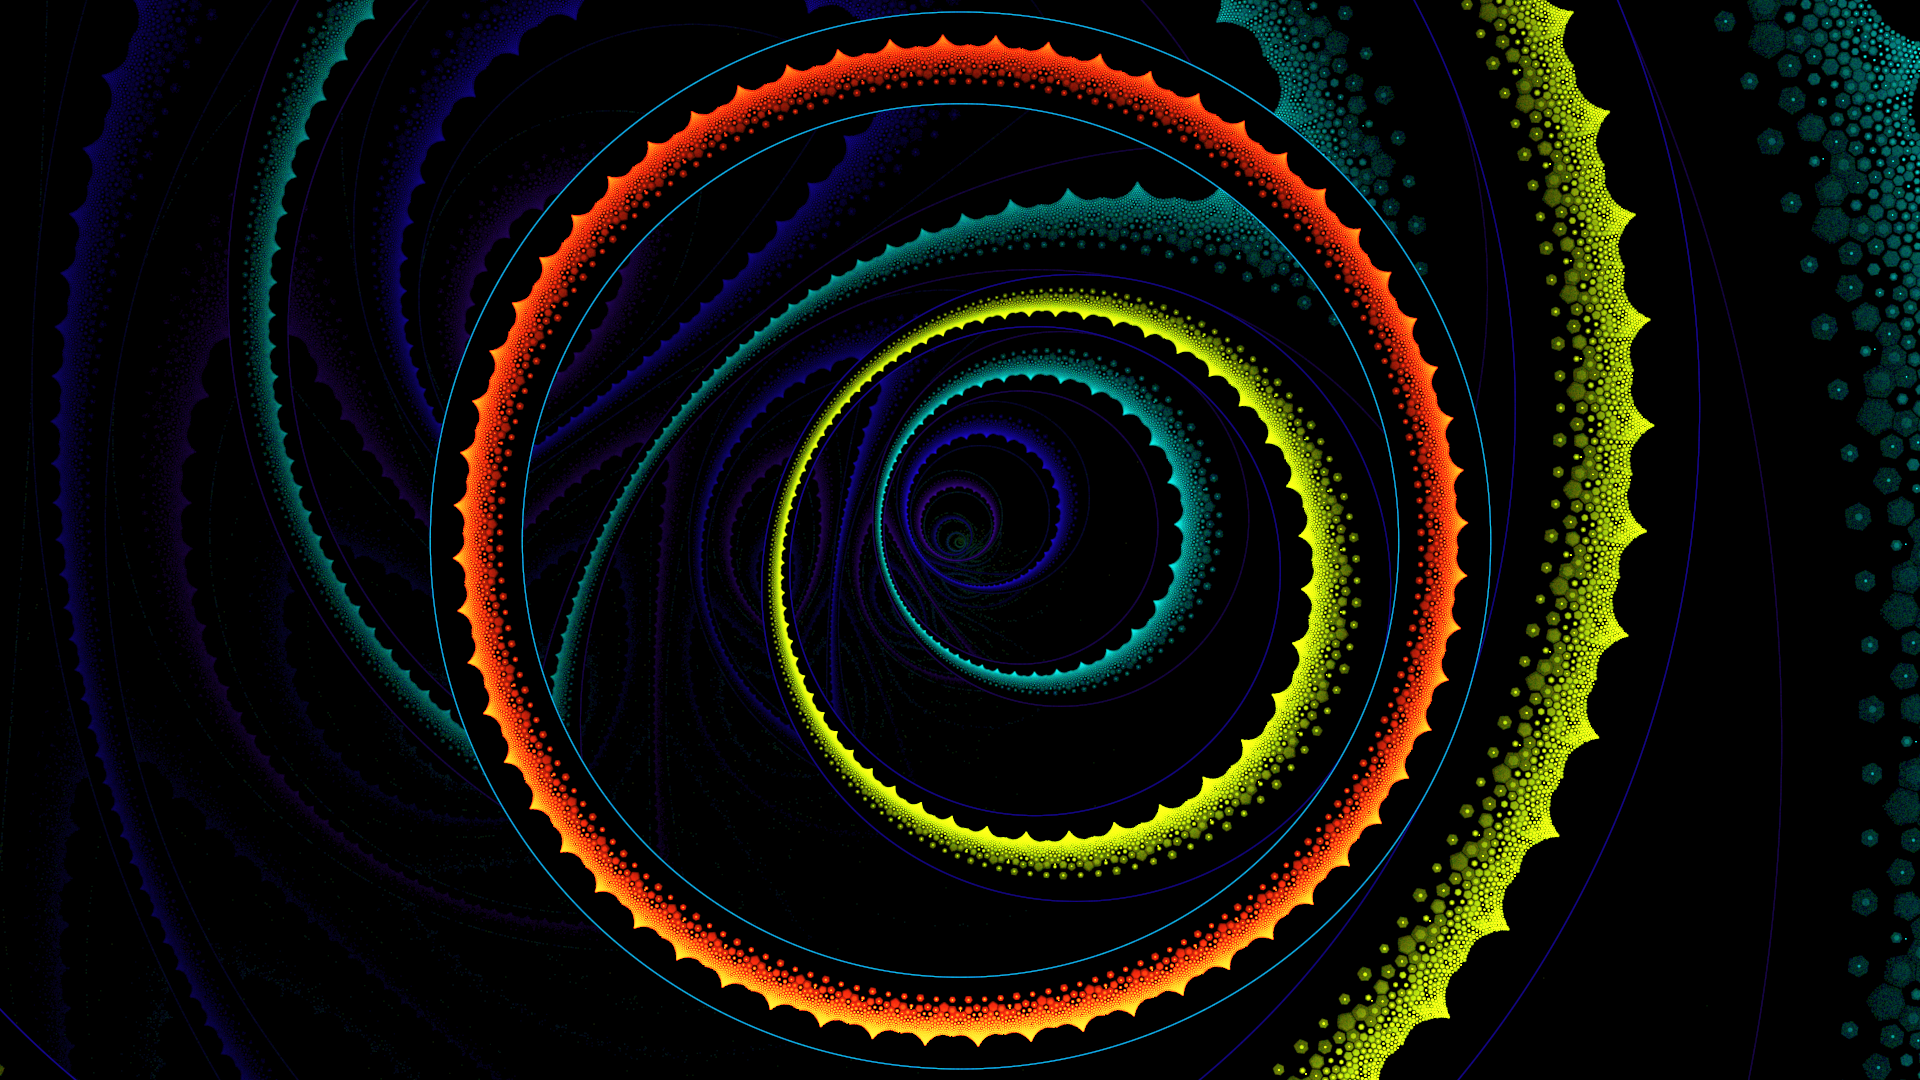
<?xml version="1.0" encoding="utf-8"?><feed xmlns="http://www.w3.org/2005/Atom" ><generator uri="https://jekyllrb.com/" version="3.10.0">Jekyll</generator><link href="https://www.pug.fyi/feed.xml" rel="self" type="application/atom+xml" /><link href="https://www.pug.fyi/" rel="alternate" type="text/html" /><updated>2026-10-16T20:15:51+00:00</updated><id>https://www.pug.fyi/feed.xml</id><title type="html">Pugnacious Blog</title><subtitle>This blog expresses the thoughts and sentiments of an individual namely the administrator, though other individuals may occasionally author information here.  It should be taken as the opinion of the author.</subtitle><entry><title type="html">Chaotica: Pixelated Style</title><link href="https://www.pug.fyi/chaotica/pixel-style" rel="alternate" type="text/html" title="Chaotica: Pixelated Style" /><published>2022-10-30T00:00:00+00:00</published><updated>2022-10-30T00:00:00+00:00</updated><id>https://www.pug.fyi/chaotica/Chaotica-Pixelated-Style</id><content type="html" xml:base="https://www.pug.fyi/chaotica/pixel-style"><![CDATA[<p><a href="/assets/images/chaotica-pixel-style/mobius_eyes.png"><img src="/assets/images/chaotica-pixel-style/mobius_eyes.png" alt="Intro Image" /></a></p>
<h1 id="credits">Credits</h1>
<p>A huge thanks to the fractal community is in order.</p>

<blockquote>
  <p><em>If I have seen further than others, it is by standing upon the shoulders of giants. - Isaac Newton</em></p>
</blockquote>

<h2 id="introduction">Introduction</h2>

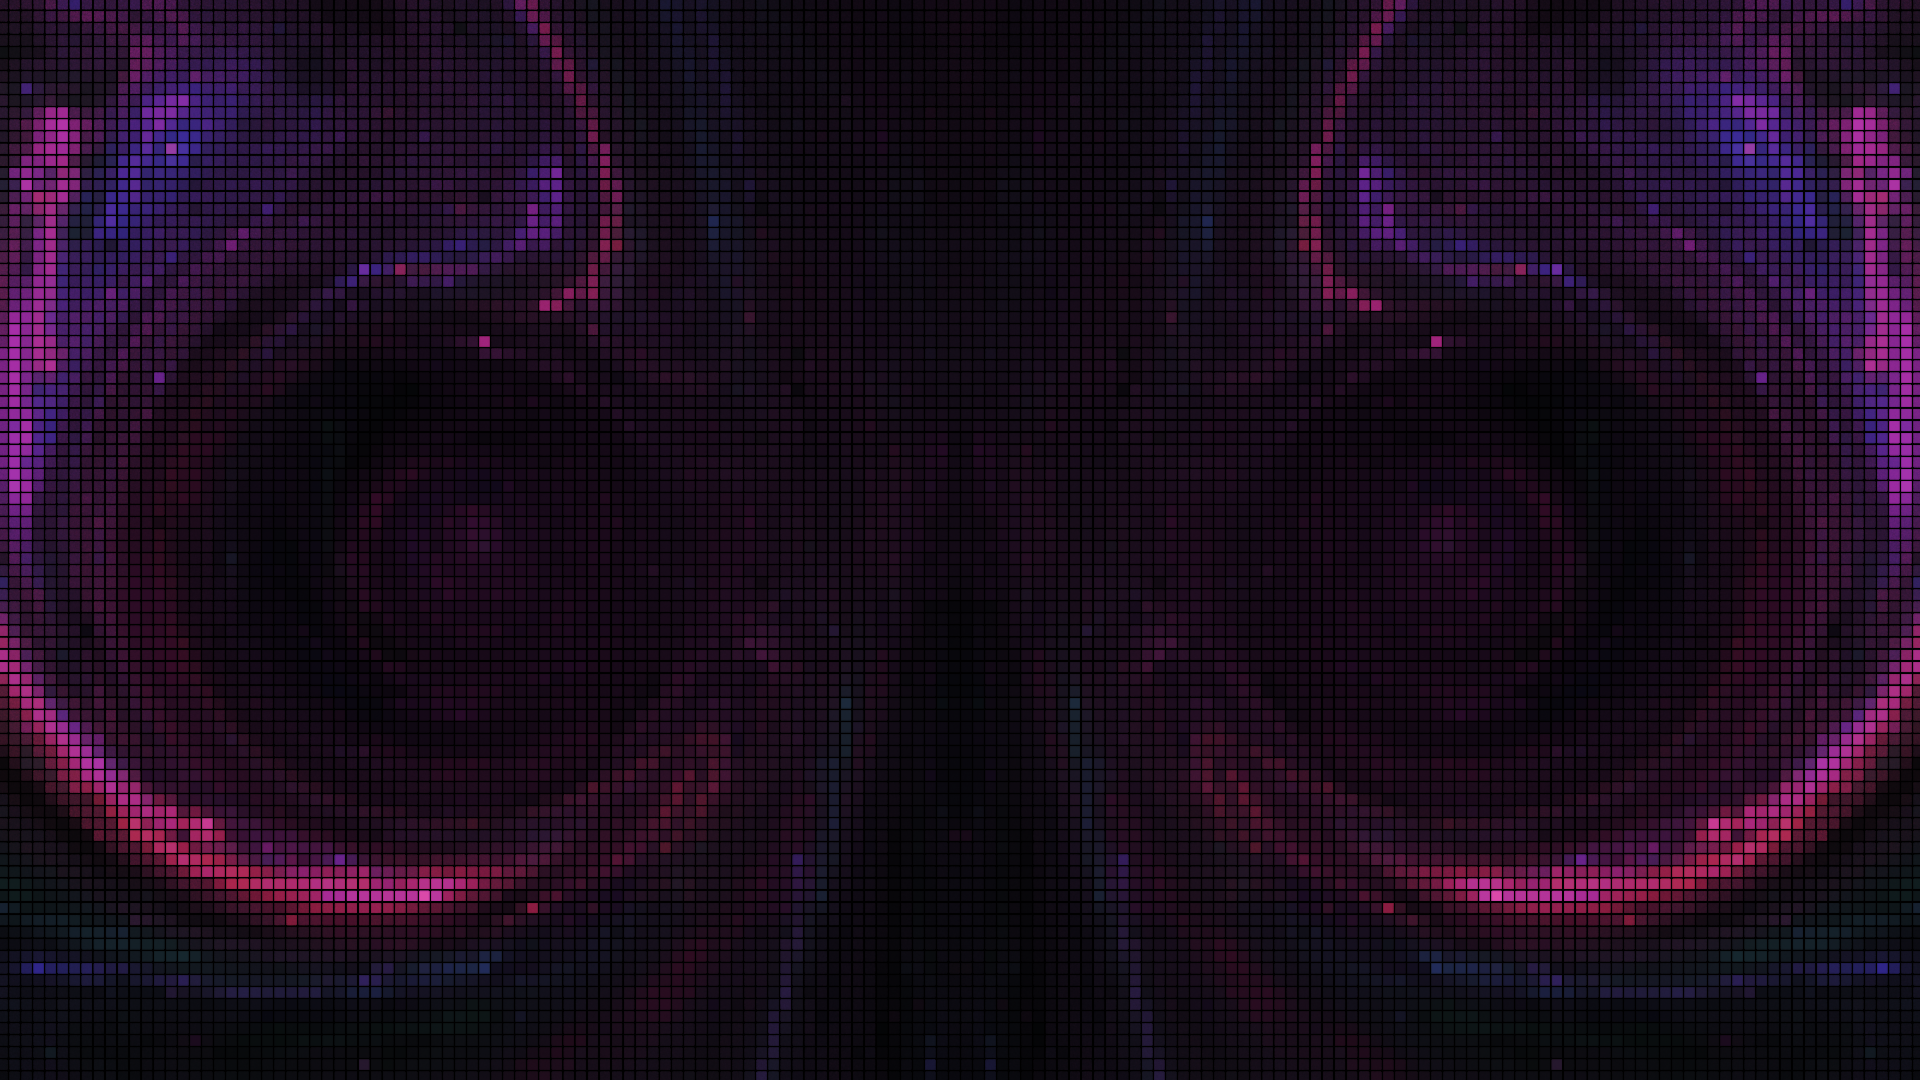
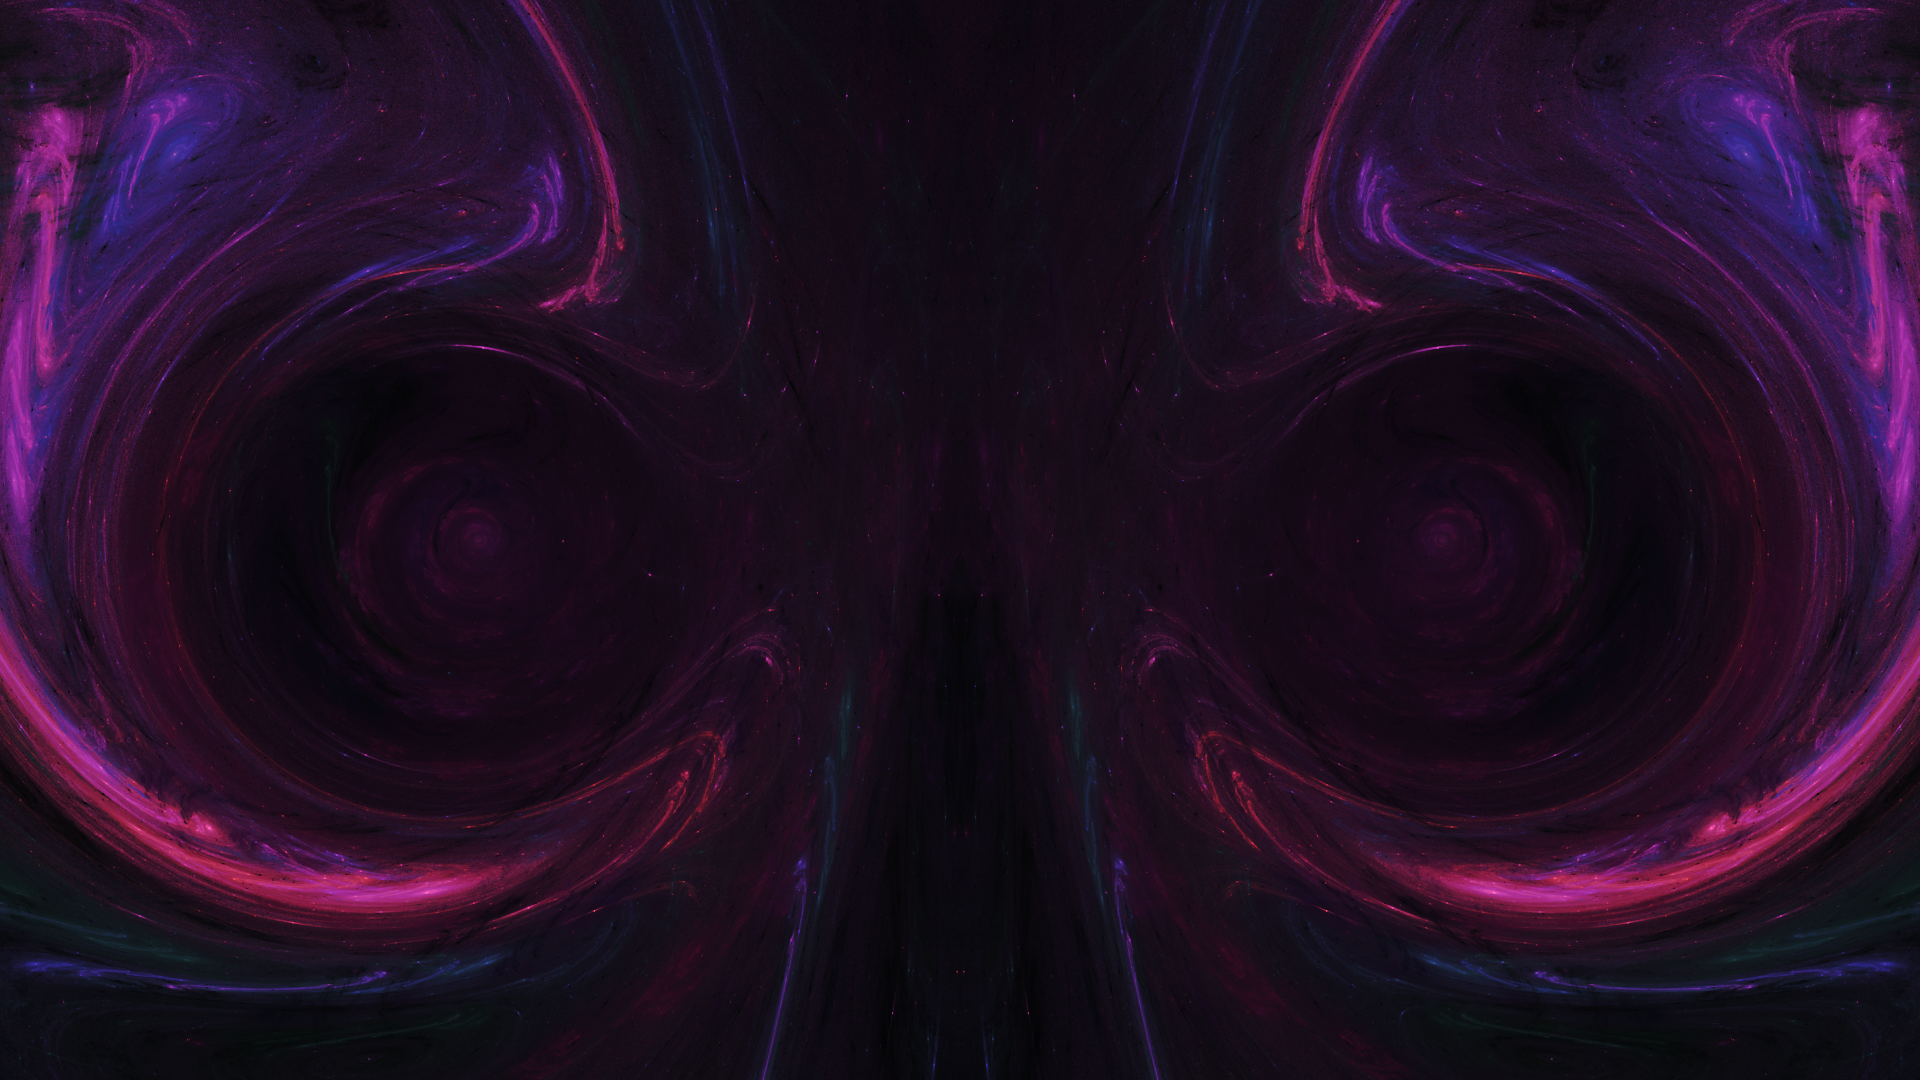
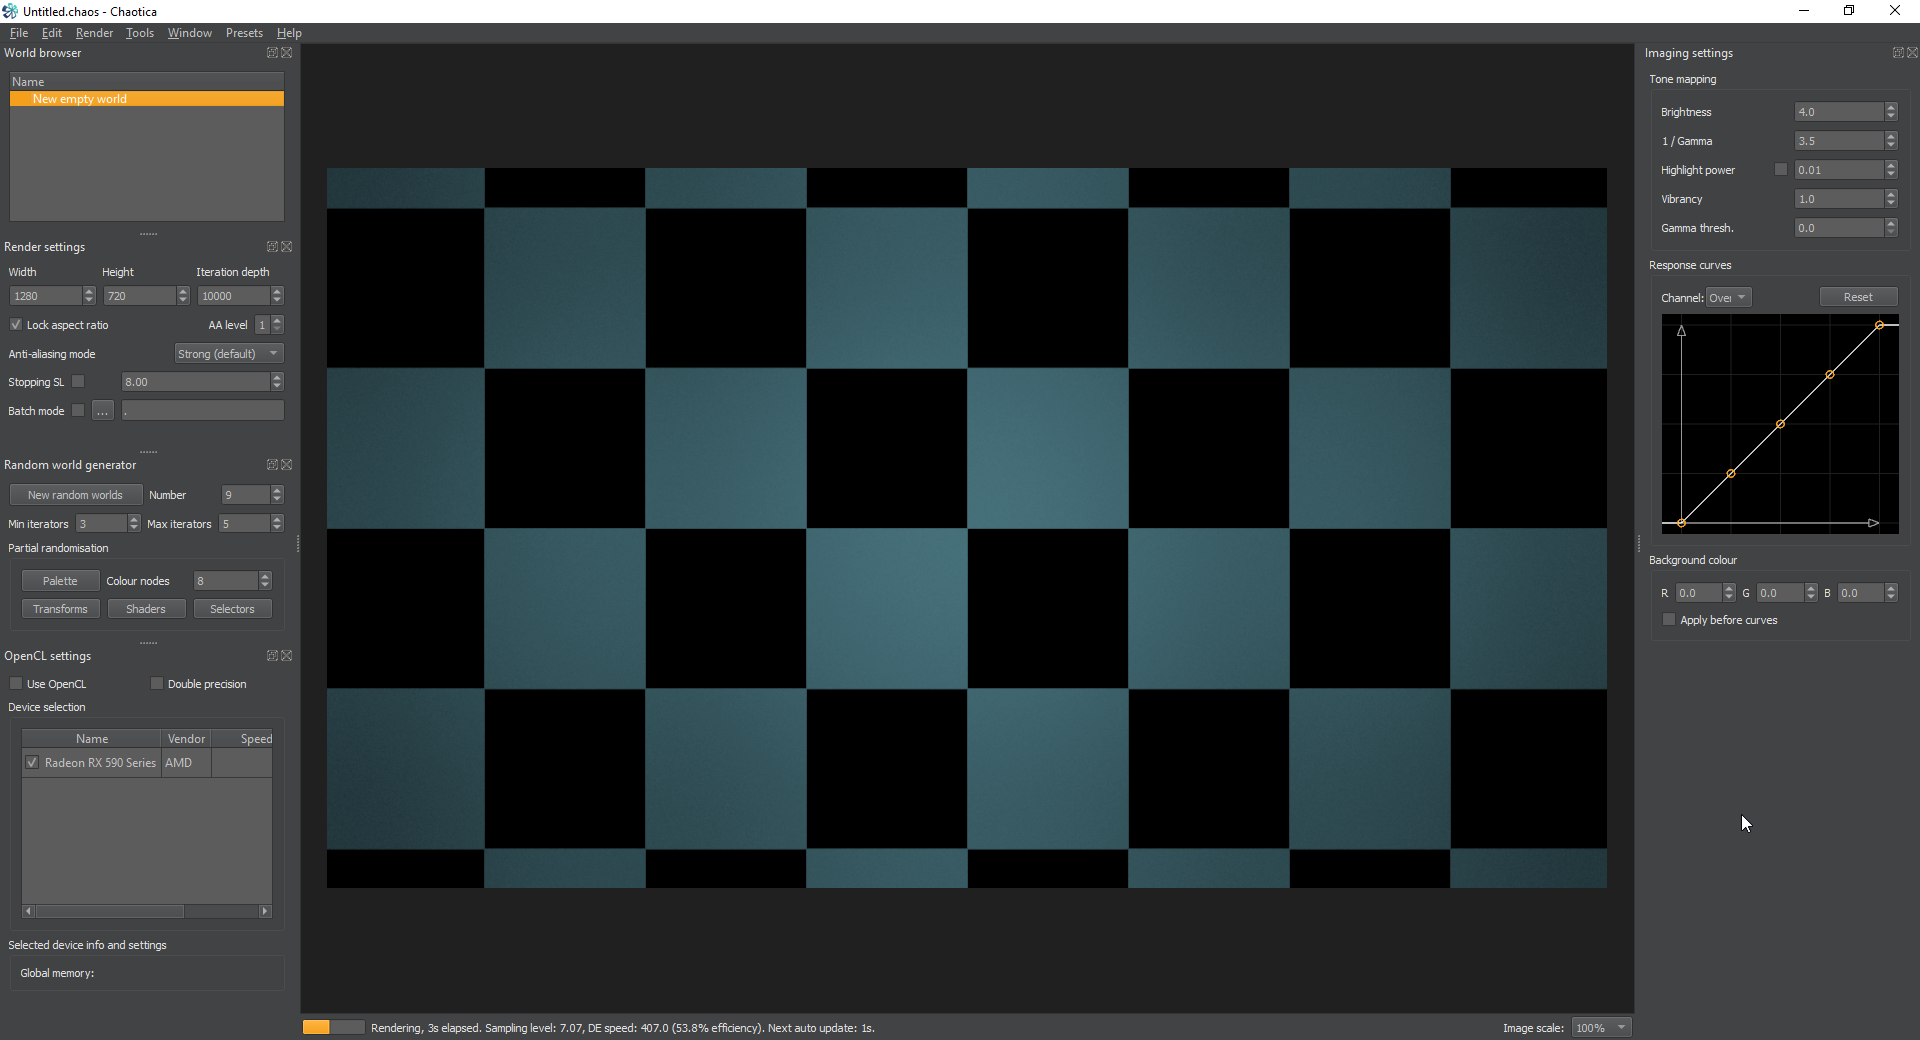
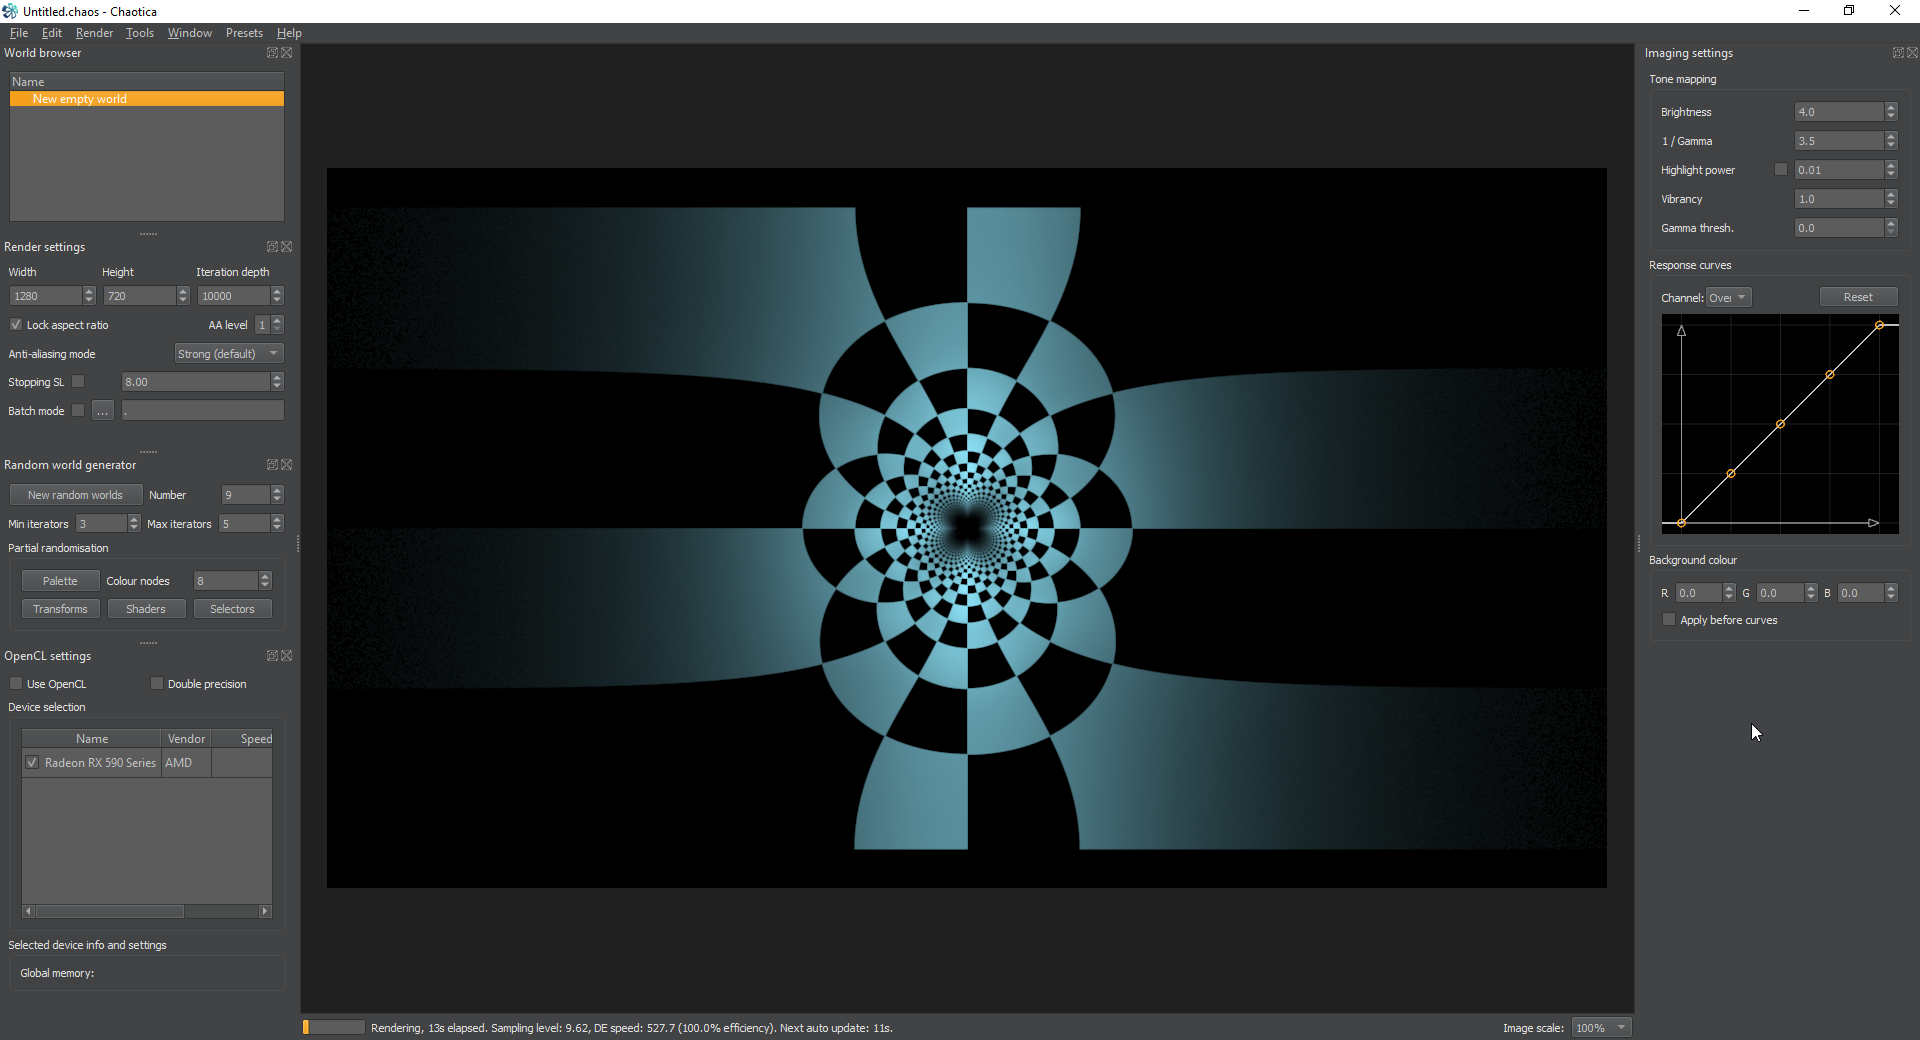
<p>I’ve been asked to provide a tutorial on how I created a pixelated style using chaotica.  The method is incredibly simple and can work with any already created image.  In this case, we can use an image that I’ve been working on, but didn’t consider up to my usual standards of publishing.</p>

<p><a href="/assets/images/chaotica-pixel-style/mobius_eyes_normal.png"><img src="/assets/images/chaotica-pixel-style/mobius_eyes_normal.png" alt="Basic Image" /></a></p>

<p>Once you have your image picked out, go to the camera transform.  If you already have a camera transform, that’s fine.  Add a new post-transform to the camera and set it to blur_pixelize.</p>

<p>This will run the entire image through a pixel filter.  Now to explain the settings in that transform.</p>

<h3 id="settings">Settings</h3>

<p>The main settings are as follows:</p>

<h4 id="blur_pixelize">blur_pixelize</h4>

<p>This is the size of the overall transform.  Raising or lowering this value will increase or decrease the overall size of the image as a whole.  This applies to the camera and is not always going to be this way if you use it outisde of this method.</p>

<h4 id="blur_pixelize_size">blur_pixelize_size</h4>

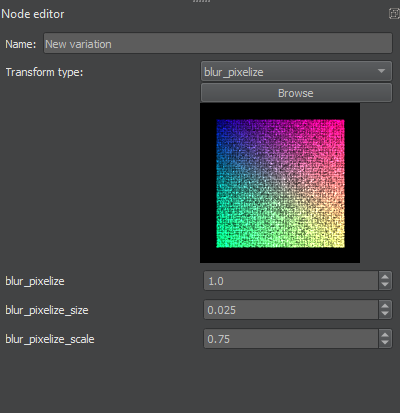
<p>This is the size of the pixels.  I find that 0.025 is a good size for me, but you might find that bigger or smaller pixels suits your needs.  Play with this at will and enjoy yourself.  This is similar to the next value but not exactly the same.</p>

<h4 id="blur_pixelize_scale">blur_pixelize_scale</h4>

<p>This will control the scale of the pixels.  The previous value controls how big the pixels are initially while this value controls the individual pixel scale.  Think of it like the size is how many pixels there are per inch, and the scale is how big each one is and how big of a gap there is between pixels.  Personally, I like a little gap in between them.  That’s just my taste though.  I set my value to 0.75, but you can set it to 1 and have no gap between the pixels.  Make sure you play with the values until you’re happy.</p>

<h3 id="my-settings">My Settings</h3>

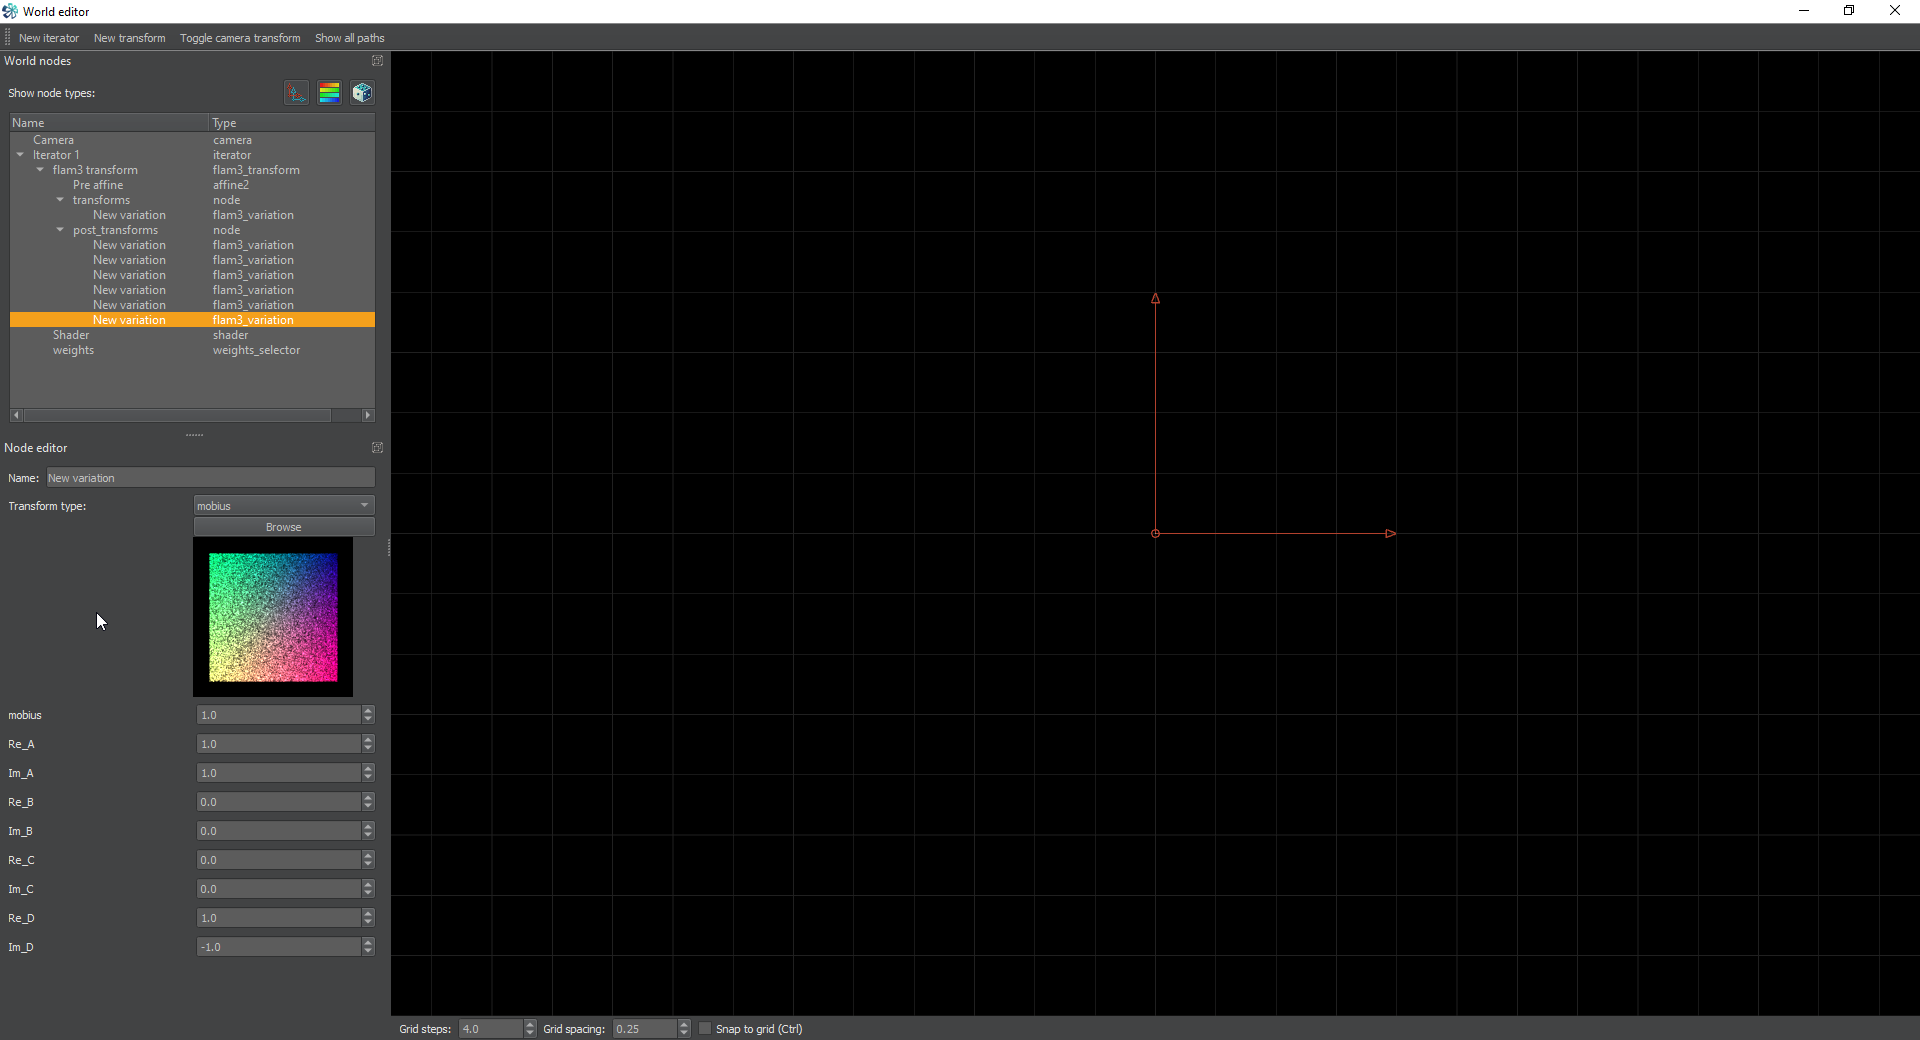
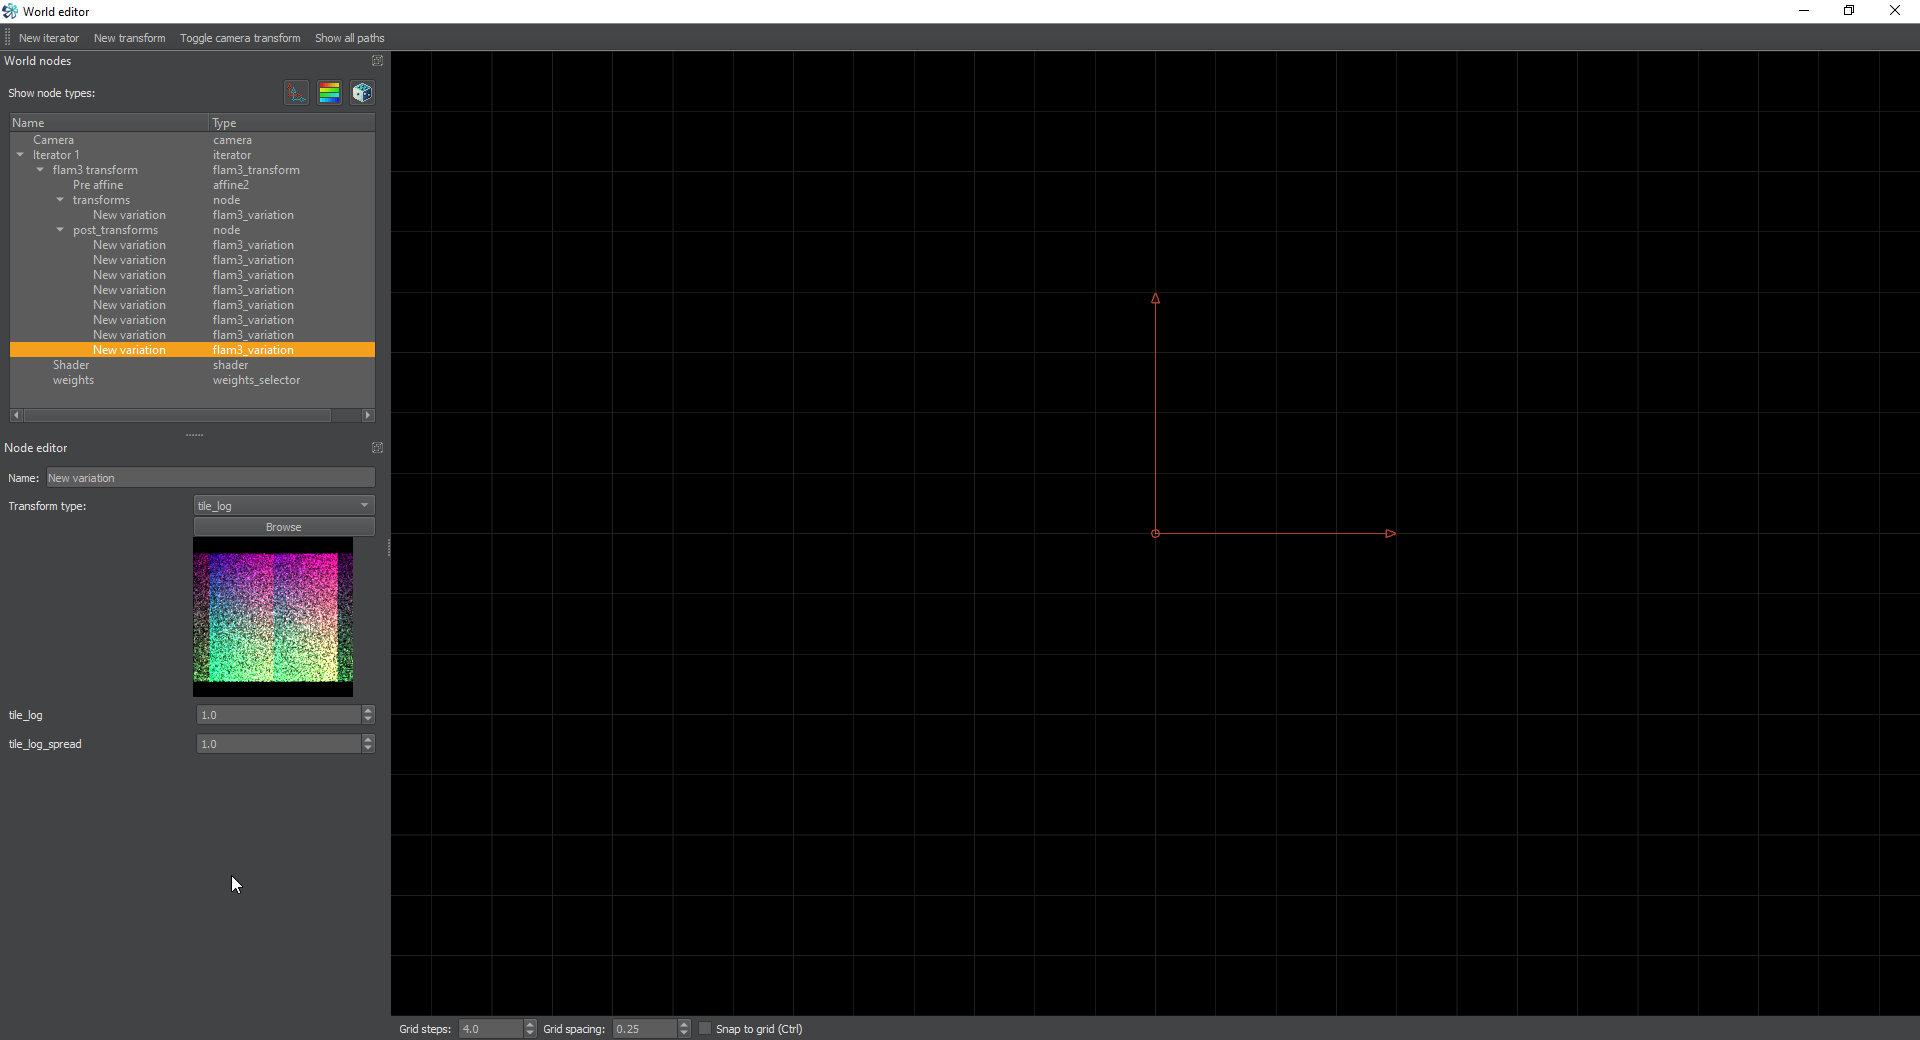
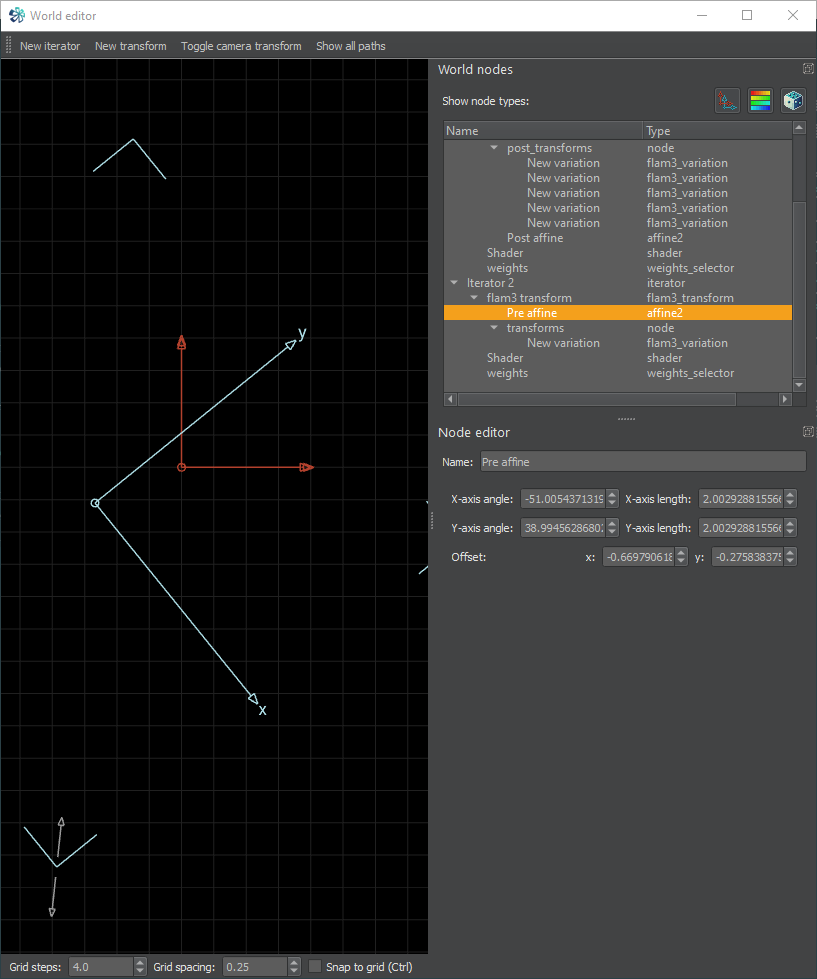
<p><a href="/assets/images/chaotica-pixel-style/node_editor_pixelize.png"><img src="/assets/images/chaotica-pixel-style/node_editor_pixelize.png" alt="My Settings" /></a></p>

<p>It’s really that simple.  Have fun and keep learning!  As always, if you create something awesome with this, let me know so I can see it and shower you with favorites.</p>

<p>-PugnaciousOne</p>]]></content><author><name>Pugnacious</name></author><category term="fractal" /><category term="chaotica" /><summary type="html"><![CDATA[This is a tutorial on using a pixelated style with chaotica.]]></summary></entry><entry><title type="html">Chaotica: Intermediate Linear Tiles</title><link href="https://www.pug.fyi/chaotica/intermediate-linear-tiles" rel="alternate" type="text/html" title="Chaotica: Intermediate Linear Tiles" /><published>2022-07-18T00:00:00+00:00</published><updated>2022-07-18T00:00:00+00:00</updated><id>https://www.pug.fyi/chaotica/Chaotica-Intermediate-Linear-Tiles</id><content type="html" xml:base="https://www.pug.fyi/chaotica/intermediate-linear-tiles"><![CDATA[<p><a href="/assets/images/chaotica-intermediate-linear-tiles/Intermediate_linear_tile_tutorial.png"><img src="/assets/images/chaotica-intermediate-linear-tiles/Intermediate_linear_tile_tutorial.png" alt="Intro Image" /></a></p>

<h1 id="credits">Credits</h1>

<p>A huge thanks to the fractal community is in order.</p>

<blockquote>
  <p><em>If I have seen further than others, it is by standing upon the shoulders of giants. - Isaac Newton</em></p>
</blockquote>

<h2 id="introduction">Introduction</h2>

<p>In this tutorial, we’re going to create a more advanced linear tile and then explore some possible camera modifications to it.  If you haven’t seen the rest of my tutorials, make sure you check them out.  You can find them at the top right of the page, or click <a href="https://www.pug.fyi/tutorials">HERE</a></p>

<h3 id="planning-phase">Planning Phase</h3>

<p>First, you decide what you want to tile.  Usually my personal method is to start with a broad idea of what I want to accomplish and then get more detailed as time goes on.  To start with, let’s create a tile that’s a bit different than a standard 1x1.  Lets try a 1x2 tile instead.</p>

<p><em>It’s been asked for me to provide this information, so here it is.  My development usually occurs at 1280x720 resolution so even the free version of Chaotica can load the file.</em></p>

<h3 id="creating-a-tile">Creating a Tile</h3>

<p>First, I’m going to set up the base structure.  Just to keep things organized, we will create two squares and stack them on top of each other and then once we have the right size setup, we can start modifying them and filling them out with interesting constructions.  So I can see everything, I’m going to change the camera sensor width to something like 6.  That way everything is in view.  Feel free to adjust as needed.</p>

<h4 id="opening-blurs">Opening Blurs</h4>

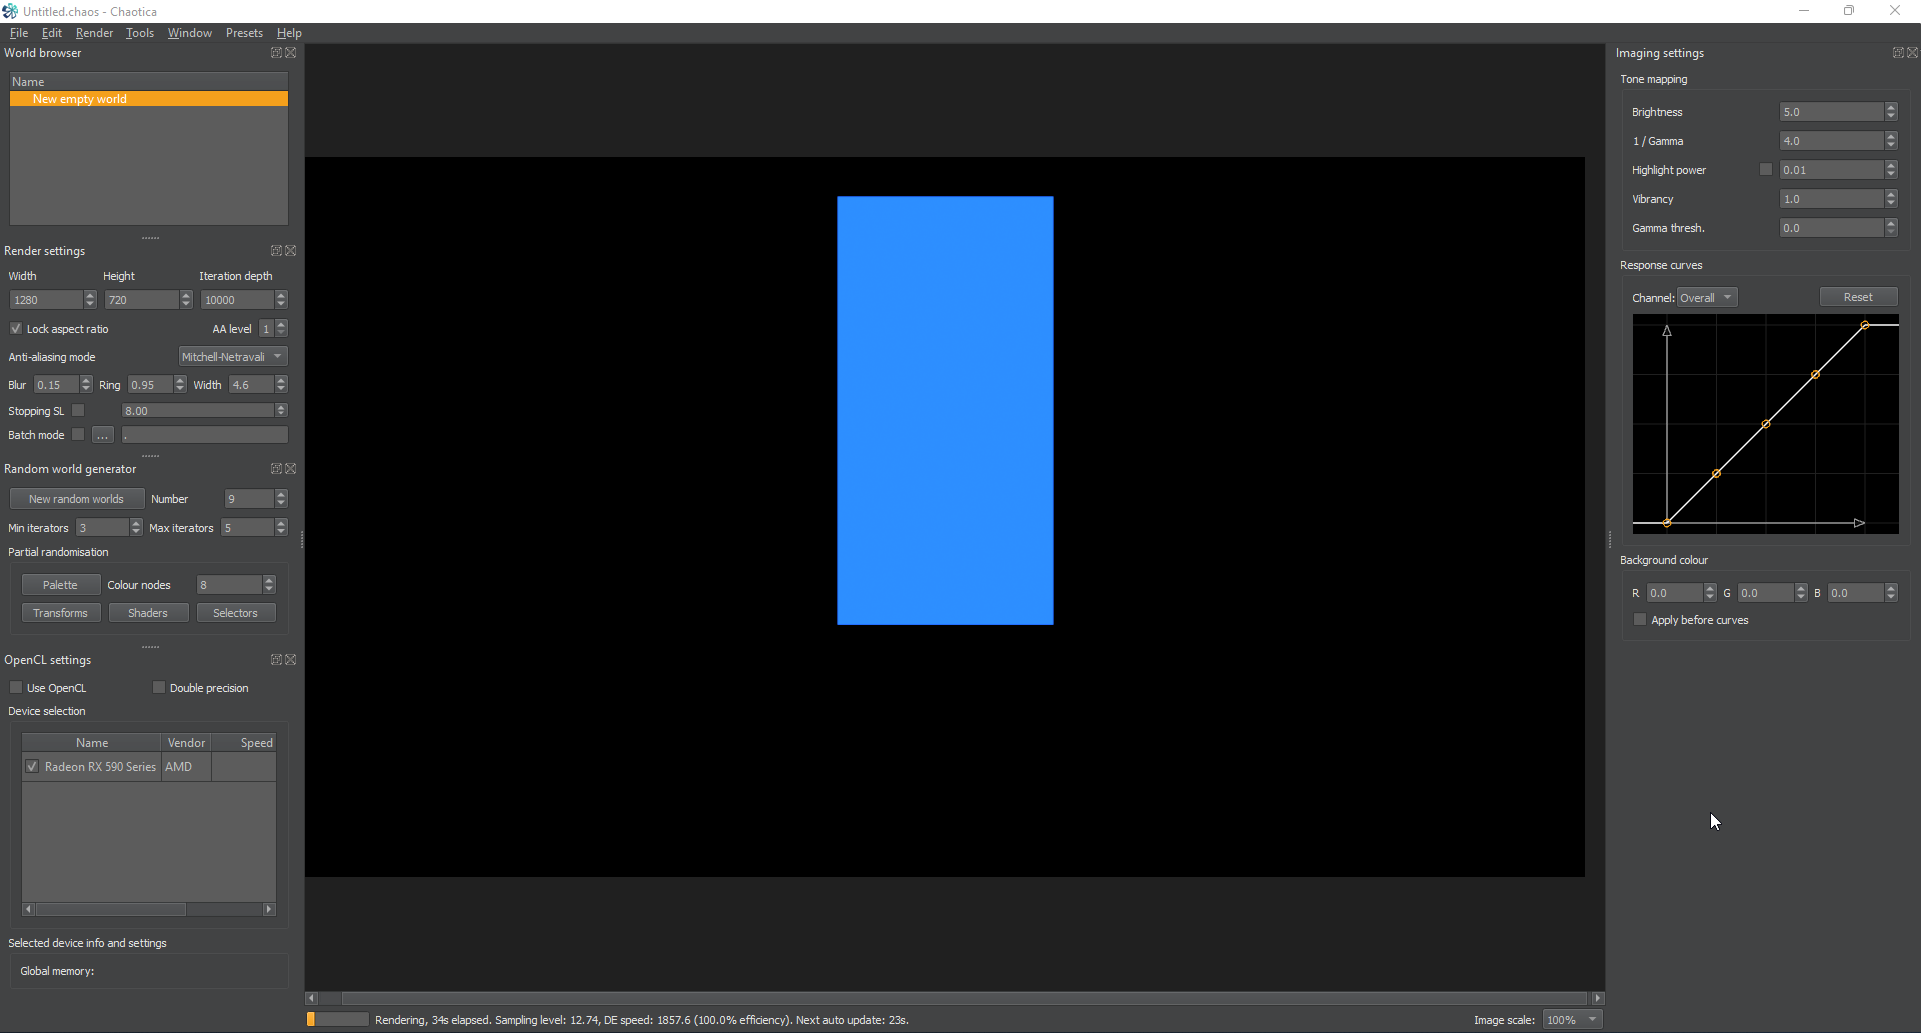
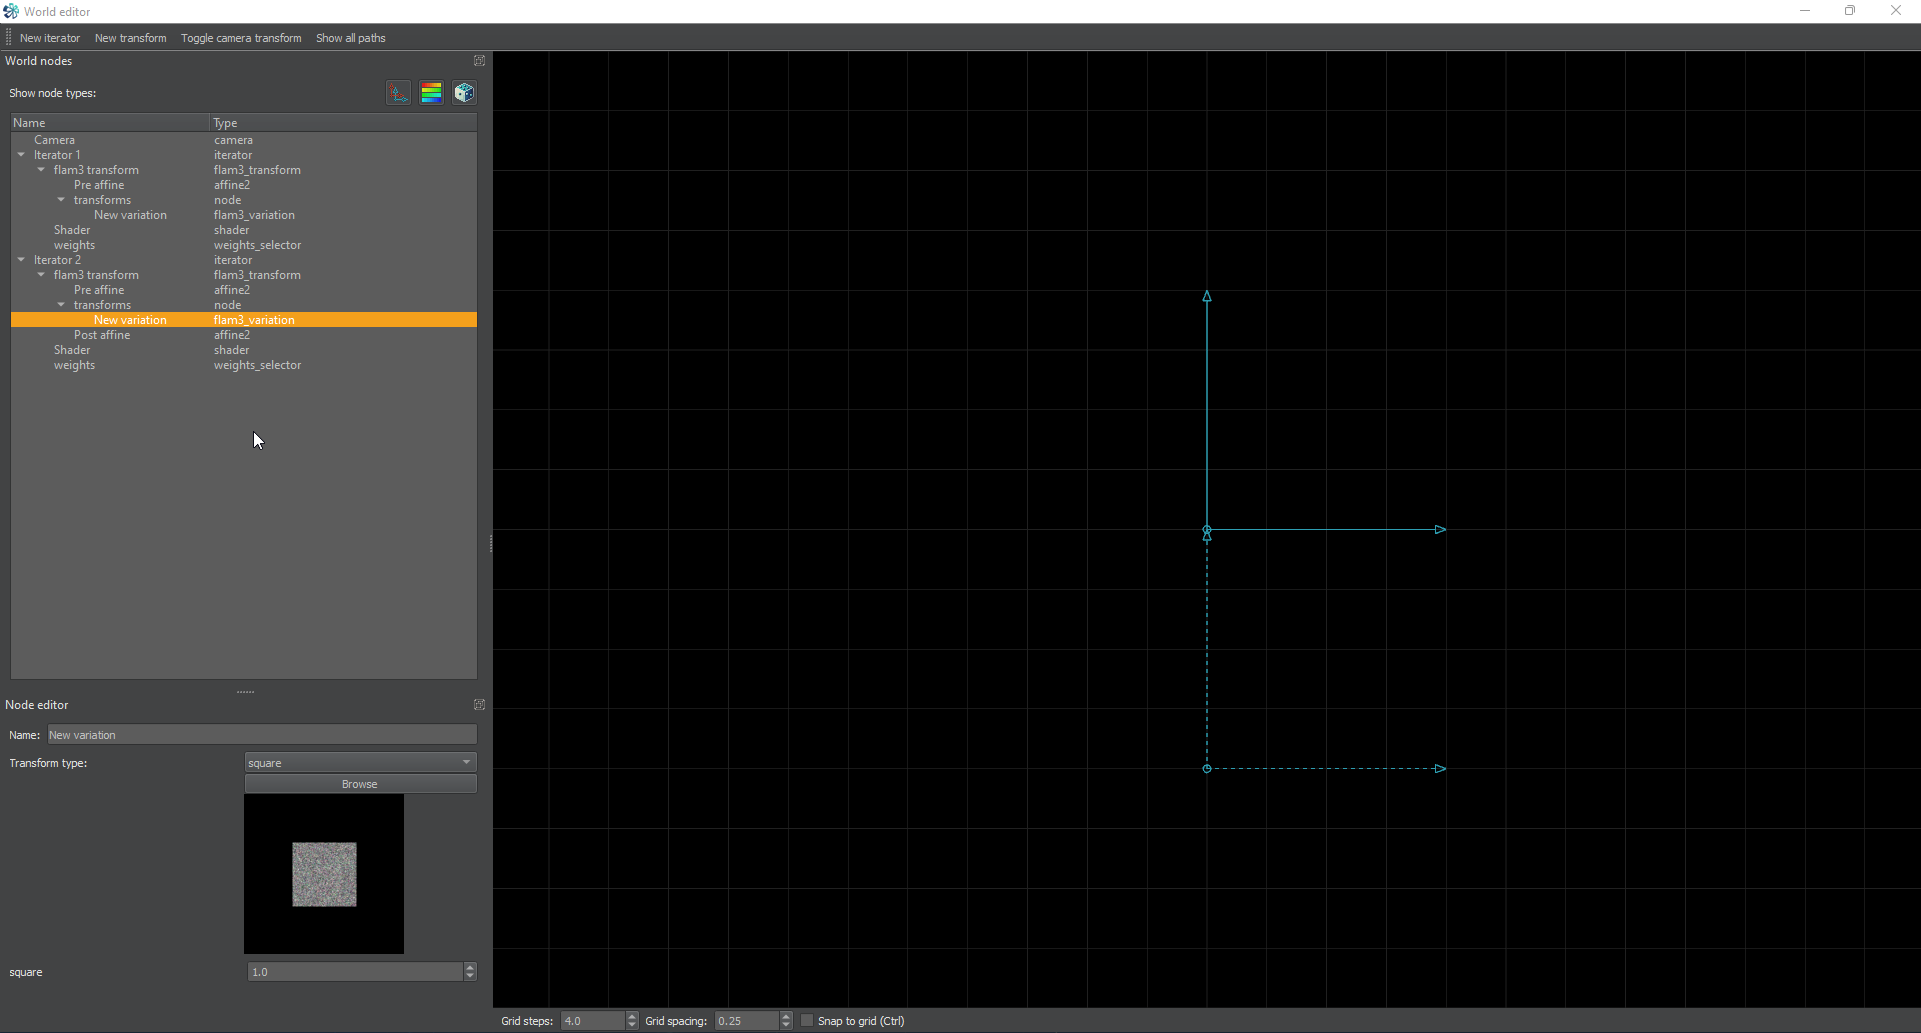
<p>First, I’m going to open Chaotica and create a new world.  Next I’m going to create two iterators.  I’ll set the first up with square as the transform and the second the same as the first, but with a post-affine of y=-1 in order to move the second one up by 1 unit.</p>

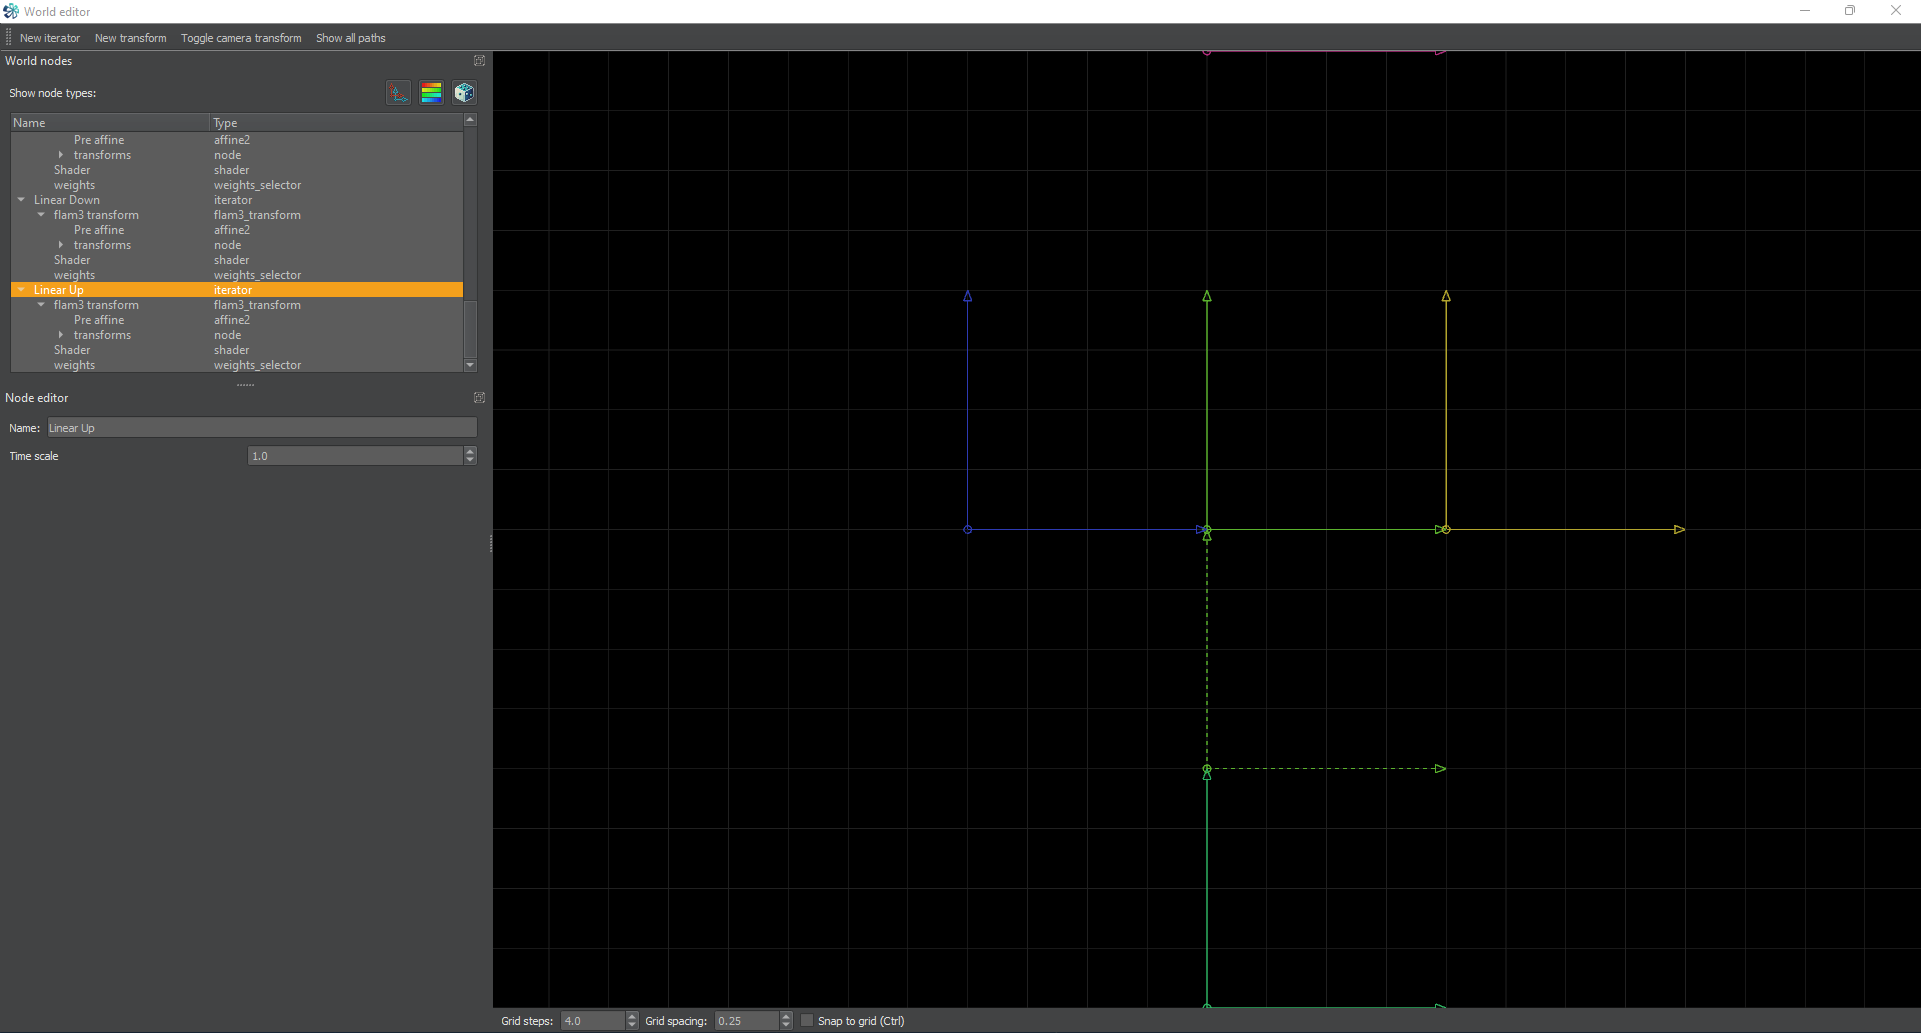
<p><a href="/assets/images/chaotica-intermediate-linear-tiles/chaotica_uczLCgtQDu.png"><img src="/assets/images/chaotica-intermediate-linear-tiles/chaotica_uczLCgtQDu.png" alt="Opening Blurs" /></a> <a href="/assets/images/chaotica-intermediate-linear-tiles/chaotica_ZwakeYbLlP.png"><img src="/assets/images/chaotica-intermediate-linear-tiles/chaotica_ZwakeYbLlP.png" alt="Opening Blurs Editor" /></a></p>

<h4 id="bottom-square">Bottom Square</h4>

<p>Now I’m going to take the bottom square and do some modification.  I think it would look awesome if I cropped out the middle and then put another iterator in there with maybe a loonie or possibly a hemisphere.  So let’s do that.</p>

<p>First, I’m going to take the first two iterators and rename them so I can keep track.  I’ll name the first one “Bottom Square” and the other one “Top Square”.  Super original, I know…</p>

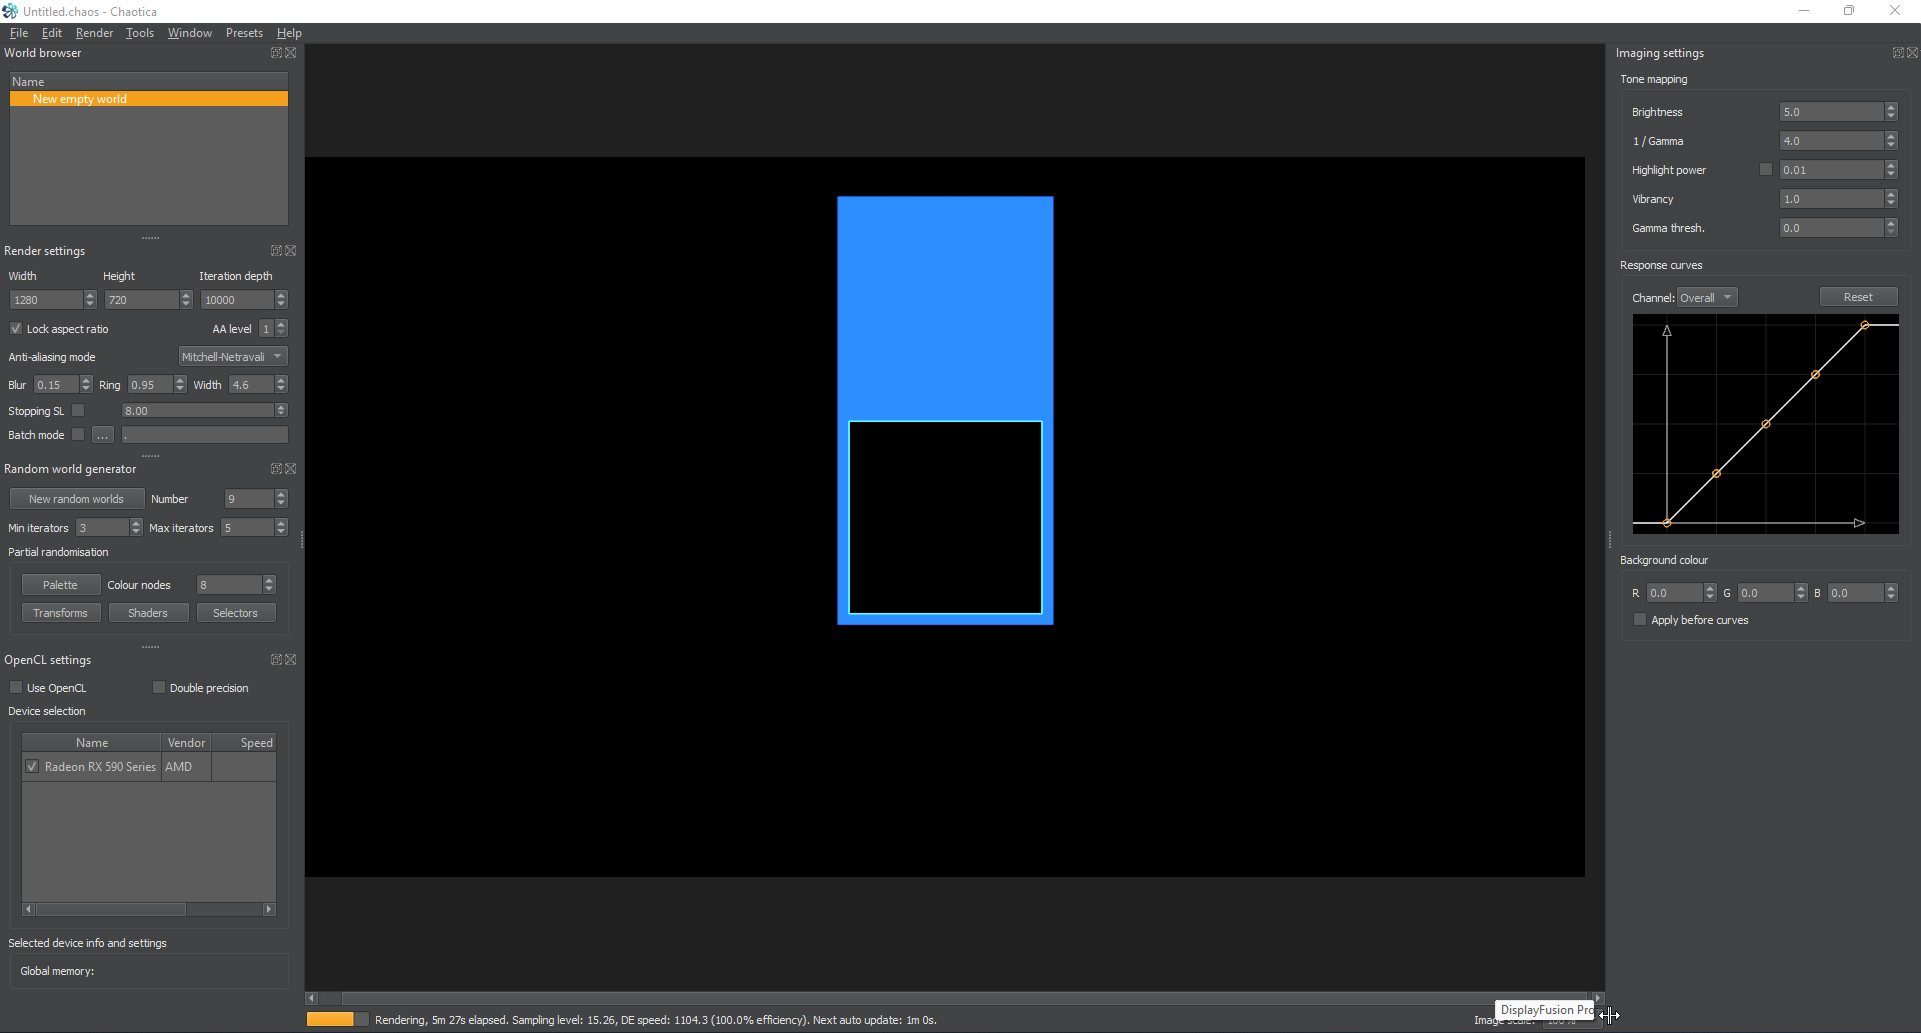
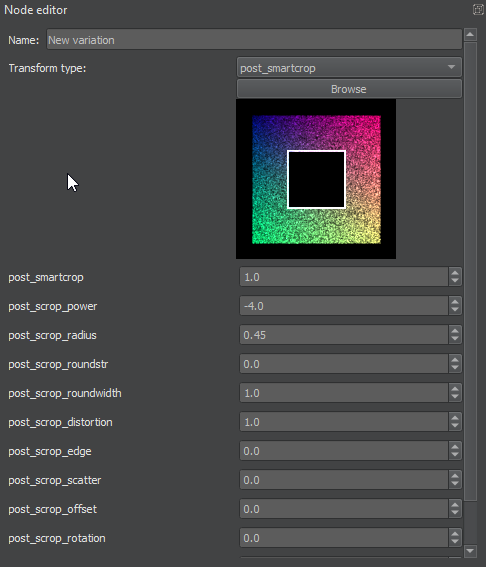
<p>Now, I’m going to add a post-transform to the bottom square and I’ll make it a post-smartcrop.  I’ll set the power on the post_smartcrop to -4.  This will match the square but instead of cropping the outside, it will crop the inside due to the negative.  Then I’ll drop the radius to 0.45 so it will leave a bit of a border.</p>

<p><a href="/assets/images/chaotica-intermediate-linear-tiles/chaotica_nd2SkrqUXy.png"><img src="/assets/images/chaotica-intermediate-linear-tiles/chaotica_nd2SkrqUXy.png" alt="Bottom Square" /></a> <a href="/assets/images/chaotica-intermediate-linear-tiles/chaotica_7by5ZkD0lg.png"><img src="/assets/images/chaotica-intermediate-linear-tiles/chaotica_7by5ZkD0lg.png" alt="Post Smartcrop" /></a></p>

<h4 id="bottom-square-fill">Bottom Square Fill</h4>

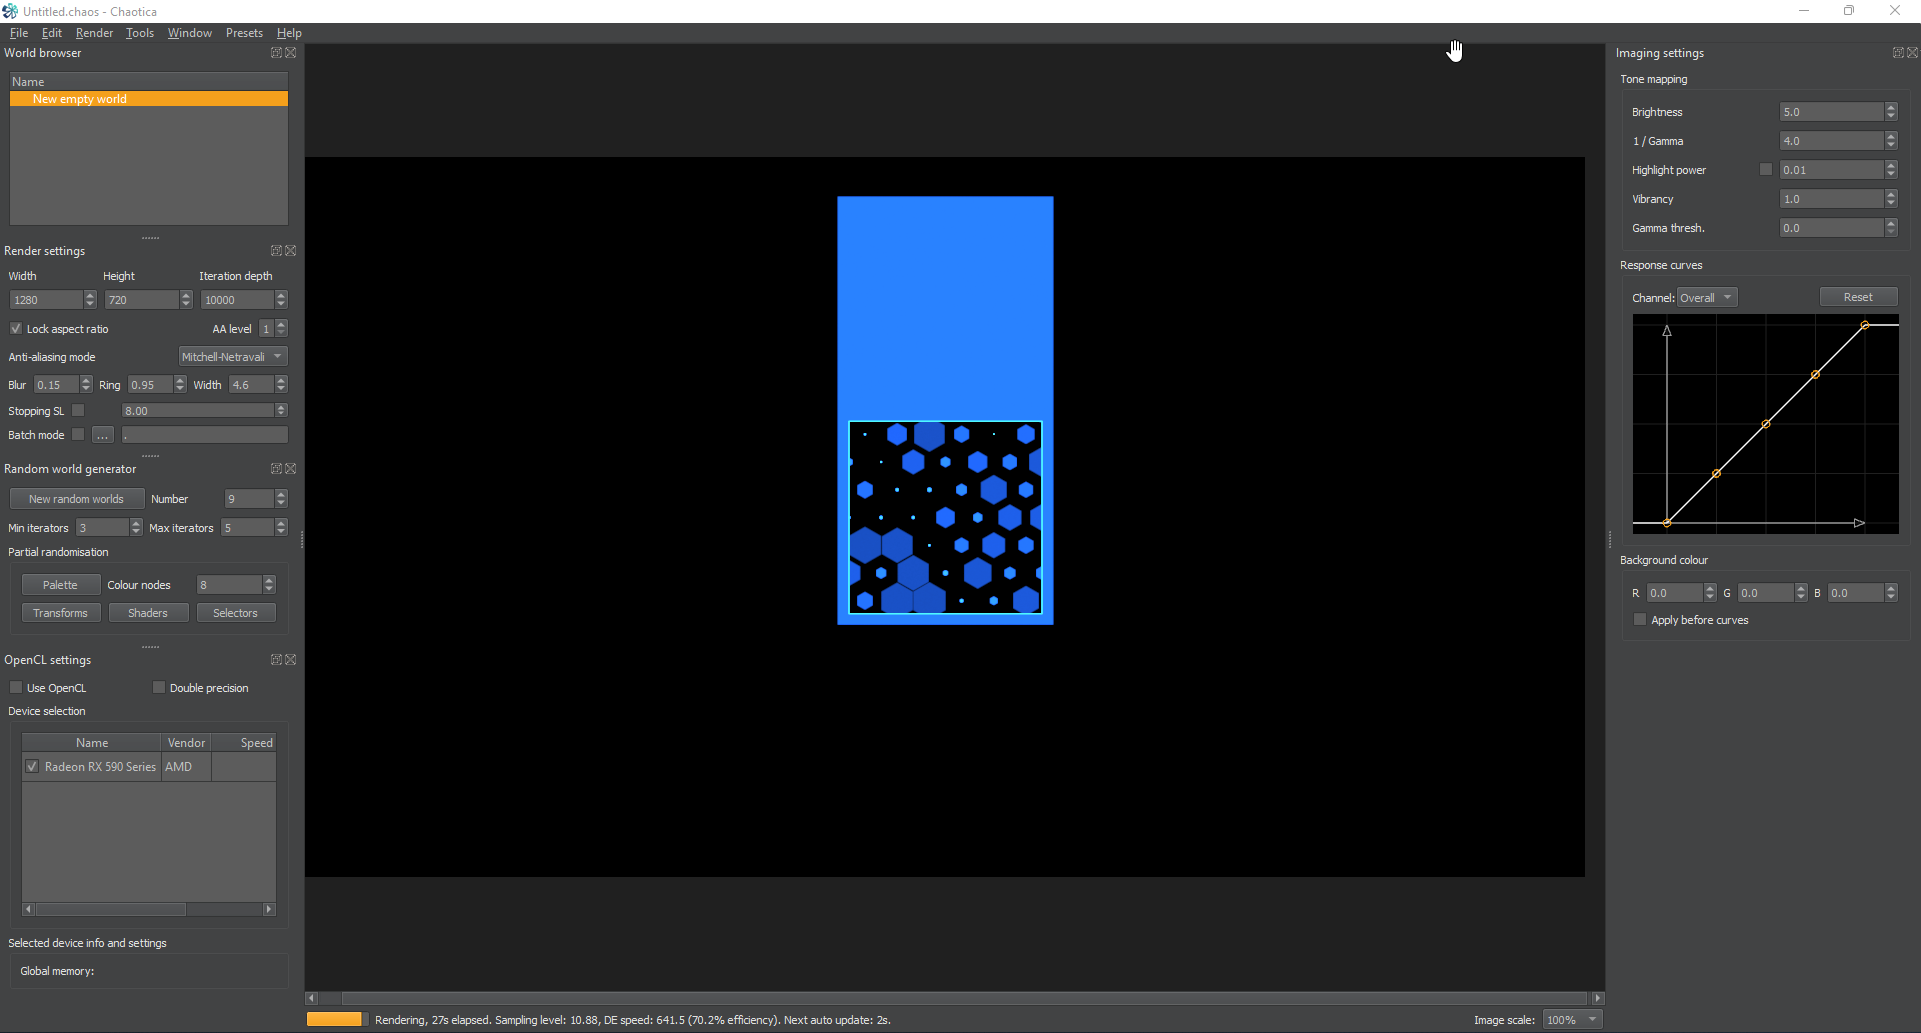
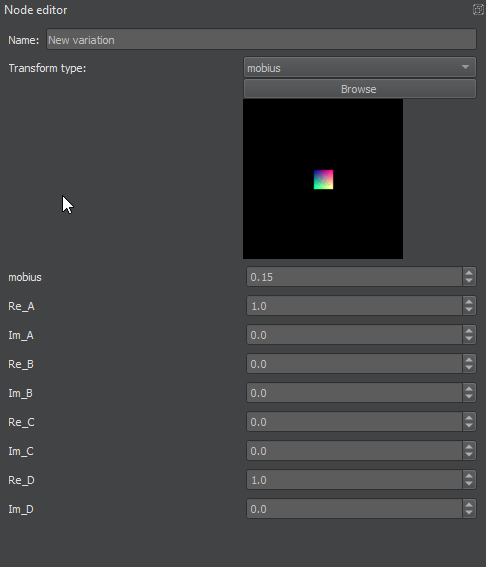
<p>Now let’s fill it with something.  First I’m going to create a new iterator.  Next, I’ll set the transform to something neat.  Hex_rand seems fun.  It’s super large and overlaps, but we’ll take care of that.  I’m going to then turn on the post-transform and toss in a mobius.  That way I can adjust sizing, rotation and warping later if needed.</p>

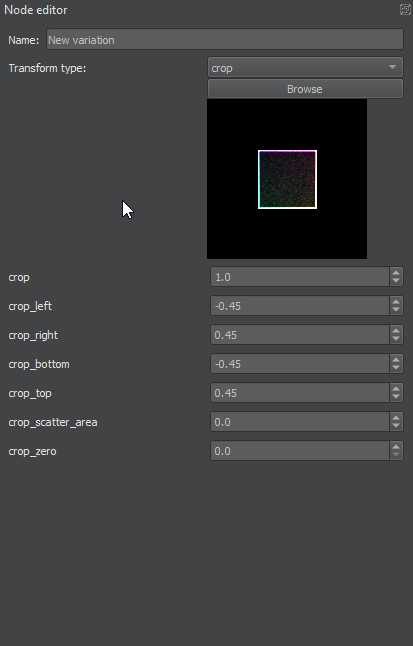
<p>Next another post-transform of crop to crop out anything that goes over our size.  This isn’t strictly needed if you perfectly control the size of the fill, but in this case I’m going to use it.  I’m going to set the values on the crop to positive and negative 0.45 to match the other crop.  Next I’m going to change the crop_scatter_area variable to 0 so it doesn’t put a ton of noise in there.</p>

<p><em>I’m going to list here the reasons I did it this way.</em></p>

<p><em>First off, the crop lets you swap out the hex rand for other things without having to worry about it overlapping later and having to go through the extra time of fiddling with it to make the overlap work.  It just handles it.</em></p>

<p><em>Second, This shows you yet another way to play with tiles.  You can get away with a lot by using post_smartcrop and other crops in both the pre and post transform.  It illustrates the need to think of Chaotica as a different editor than others.</em></p>

<p><em>This is yet another example of the incredibly important chain methods that Chaotica is capable of.  The ability to basically program an iterator using pre and post transform chains is incredibly mind blowing to me.</em></p>

<p>Lastly, I’m going to go back to the mobius and change its size down some so I can have more of the hexes inside the crop area.  I could do all kinds of things with the mobius and that might be a good area to play with later.</p>

<p>Sorry for the wall of text.  Here’s what I ended up with.</p>

<p><a href="/assets/images/chaotica-intermediate-linear-tiles/chaotica_XX2lIVa1Ap.png"><img src="/assets/images/chaotica-intermediate-linear-tiles/chaotica_XX2lIVa1Ap.png" alt="Square Fill 1" /></a> <a href="/assets/images/chaotica-intermediate-linear-tiles/chaotica_SymEybwEPI.png"><img src="/assets/images/chaotica-intermediate-linear-tiles/chaotica_SymEybwEPI.png" alt="First Fill Crop" /></a> <a href="/assets/images/chaotica-intermediate-linear-tiles/chaotica_hytLnwVIMf.png"><img src="/assets/images/chaotica-intermediate-linear-tiles/chaotica_hytLnwVIMf.png" alt="First Fill Mobius" /></a></p>

<h4 id="top-square-fill">Top Square Fill</h4>

<p>Now let’s do something entirely different for the second one.  I’m thinking something exotic like an octogon cut-out with a sphere inside it.</p>

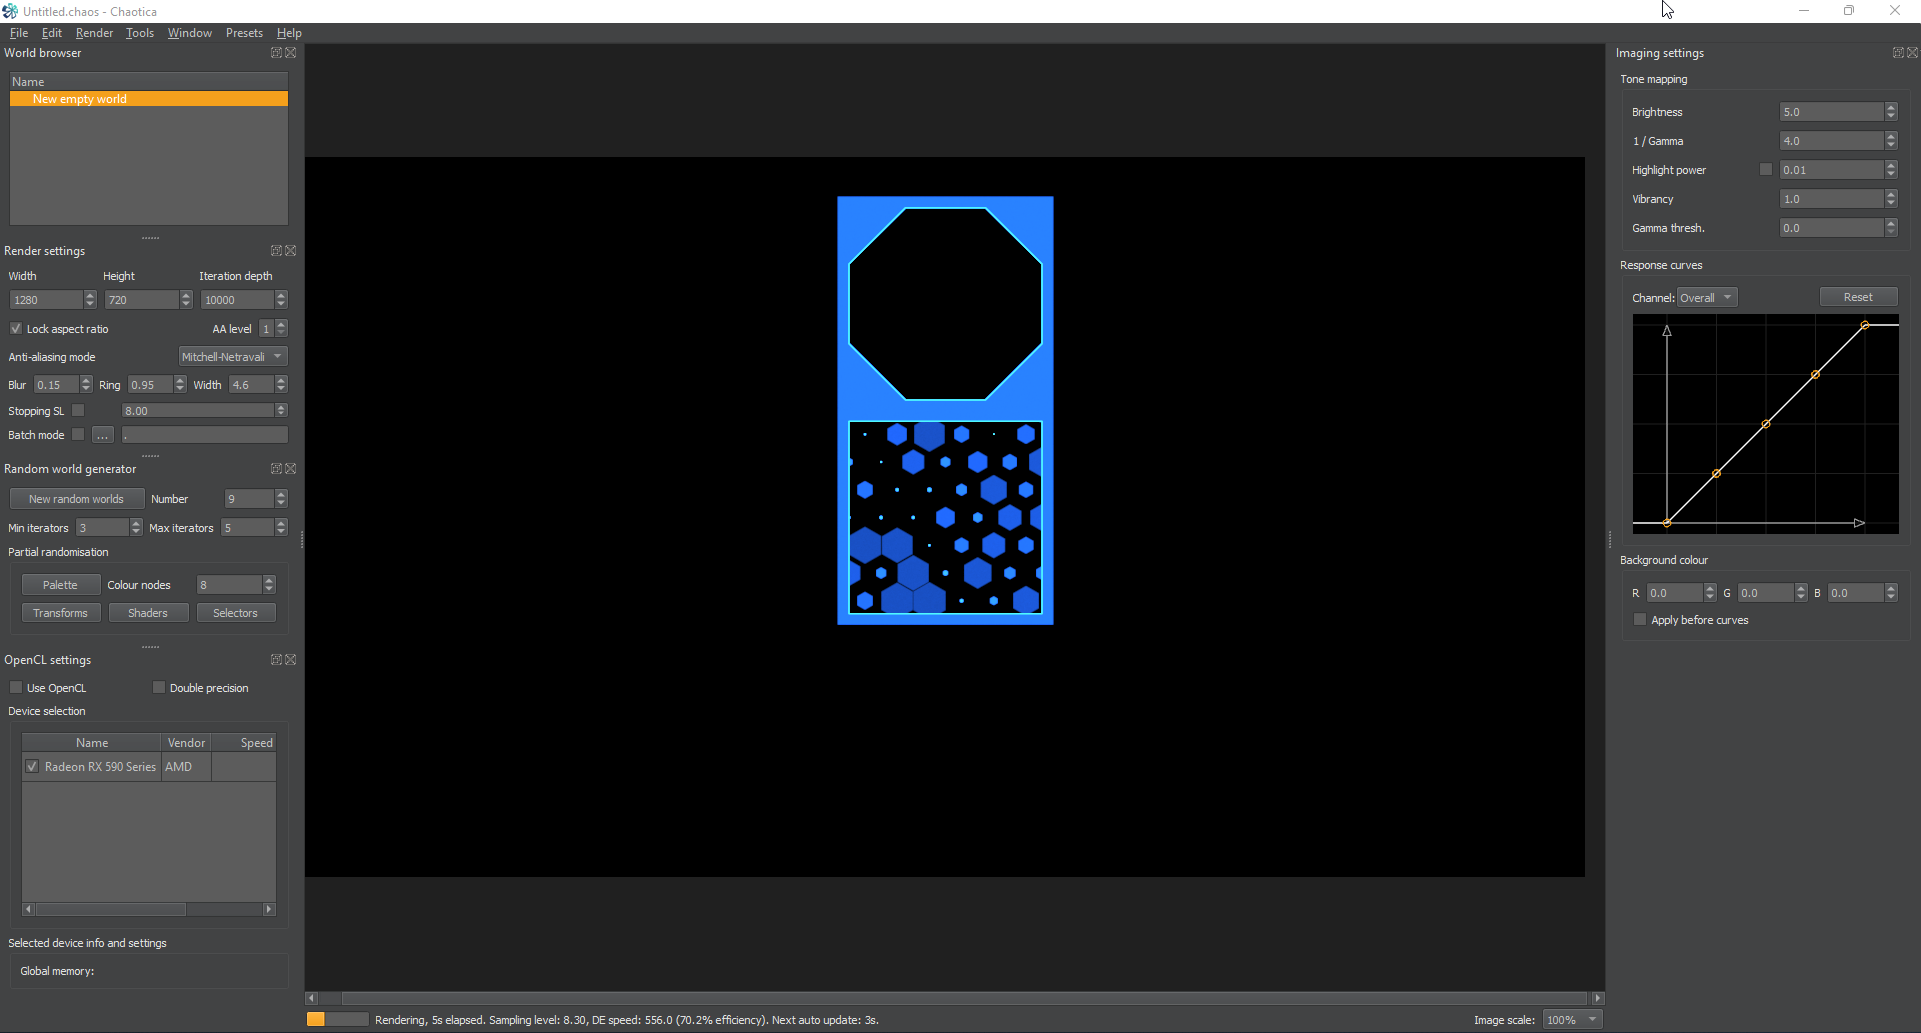
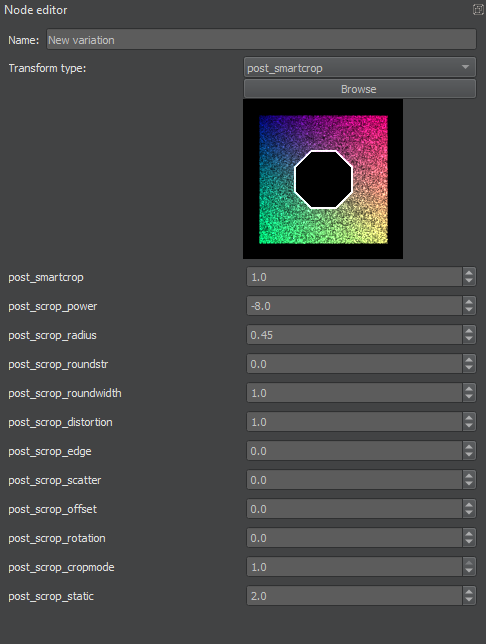
<p>First, I’m going to go back to that top square iterator (glad I named it) and add in a post smartcrop.  This time with a power of -8 for the octogon cutout and a radius of 0.45</p>

<p><a href="/assets/images/chaotica-intermediate-linear-tiles/chaotica_0Xy2PBGJ7k.png"><img src="/assets/images/chaotica-intermediate-linear-tiles/chaotica_0Xy2PBGJ7k.png" alt="Square Crop 2" /></a> <a href="/assets/images/chaotica-intermediate-linear-tiles/chaotica_lmok7IMPZj.png"><img src="/assets/images/chaotica-intermediate-linear-tiles/chaotica_lmok7IMPZj.png" alt="post_smartcrop 2" /></a></p>

<p>Next I’m going to create a new iterator, and shift the post-affine up to match the top square it’s supposed to fill.  That means the post-affine will be set to -1.0 on the y axis.  I’m going to set the transform to hemisphere so we can get a good coverage and have a pseudo-3d effect.</p>

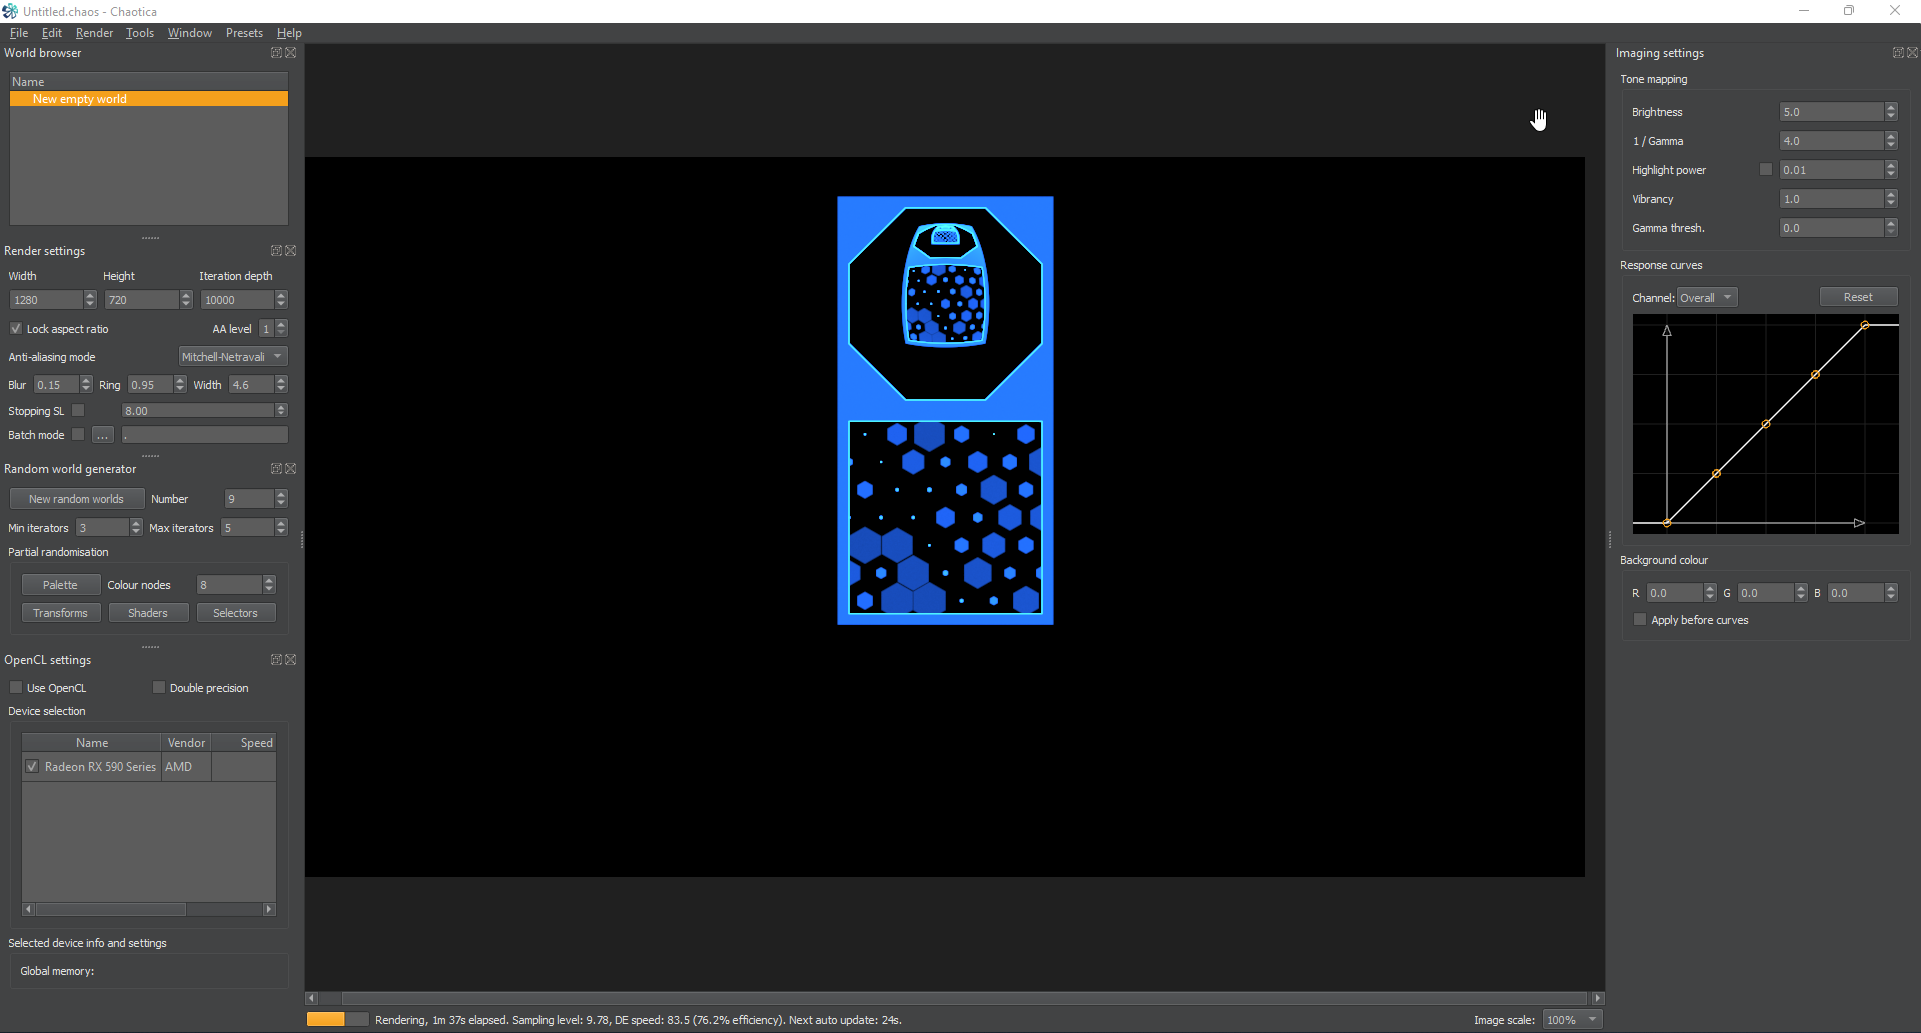
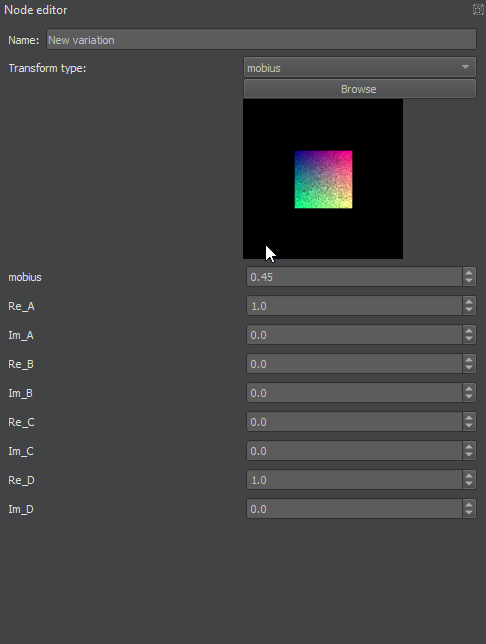
<p>Lastly, I’m going to create a post-transform of mobius and set its size to 0.45 to match the crop.</p>

<p><a href="/assets/images/chaotica-intermediate-linear-tiles/chaotica_YJIf2Pd7aR.png"><img src="/assets/images/chaotica-intermediate-linear-tiles/chaotica_YJIf2Pd7aR.png" alt="Top Fill" /></a> <a href="/assets/images/chaotica-intermediate-linear-tiles/chaotica_E1pbEgIhr2.png"><img src="/assets/images/chaotica-intermediate-linear-tiles/chaotica_E1pbEgIhr2.png" alt="Top Mobius" /></a></p>

<h3 id="setting-up-the-tiled-plane">Setting Up the Tiled Plane</h3>

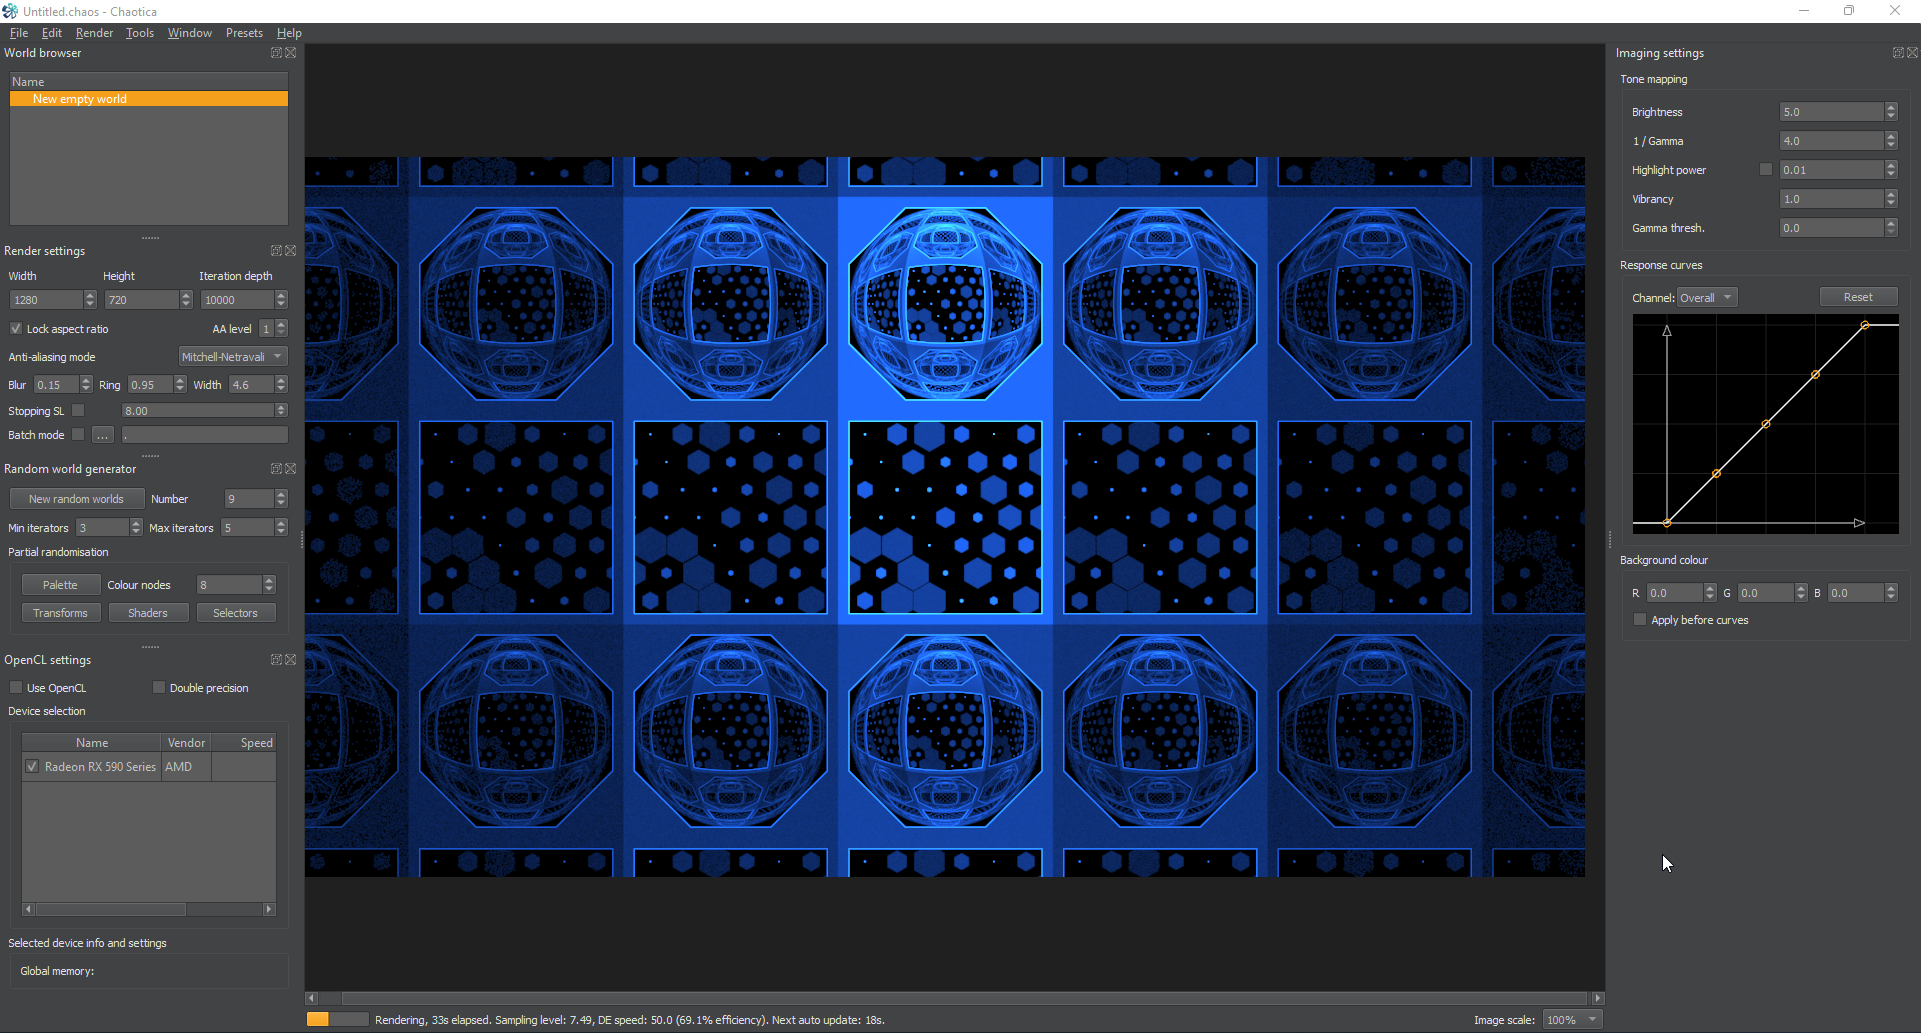
<p>Now is a great time to see how this is going to look when it’s tiled.  I’m going to create four more iterators, set them all to have a transform of linear, and then set the pre-affine to each linear direction.  (If you’ve been through my previous linear tutorial, this will be familiar to you.  If not, one of the iterators gets the coordinates (1,0) and the next gets (-1,0) and then the next two get (0,2) and the last (0,-2).  It’s just moving things around so it tiles.) For the y values instead of +/-1 they are going to be +/-2 because this is taller than standard.</p>

<p>Here’s what it looks like after creating them.</p>

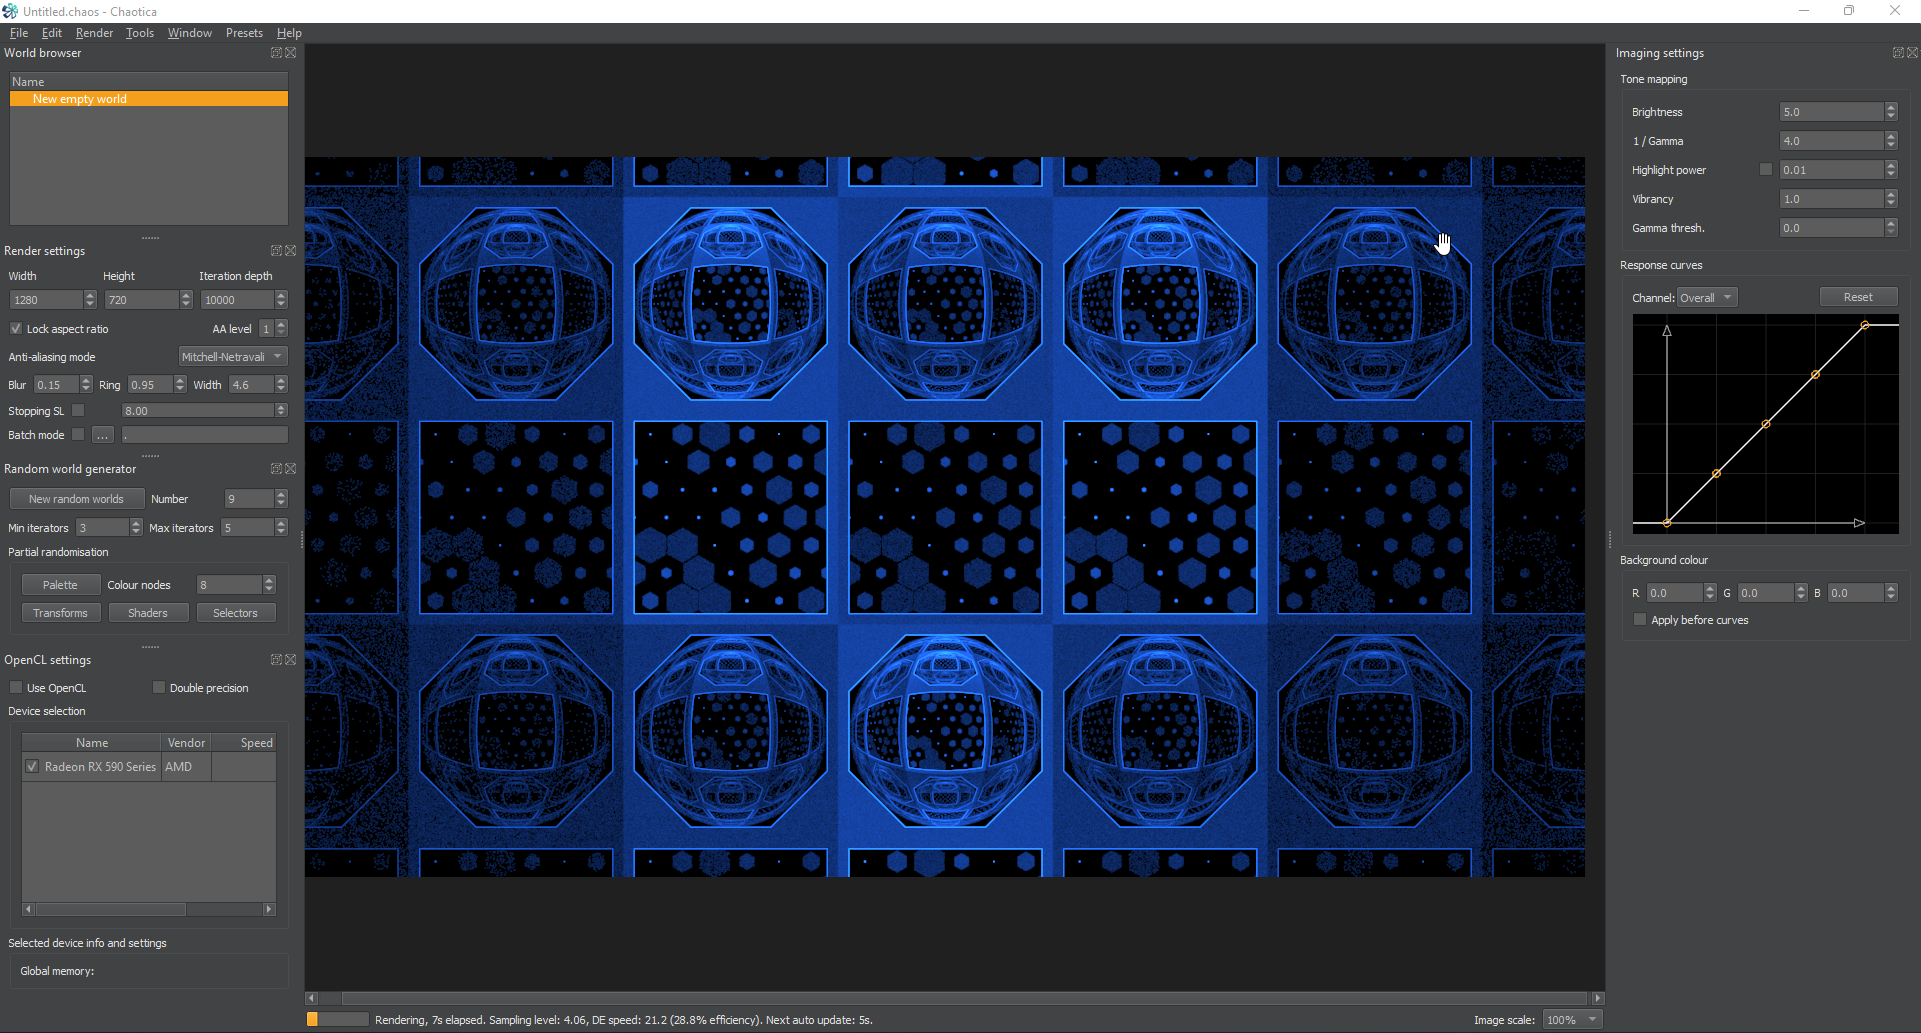
<p><a href="/assets/images/chaotica-intermediate-linear-tiles/chaotica_U0gfo5h68t.png"><img src="/assets/images/chaotica-intermediate-linear-tiles/chaotica_U0gfo5h68t.png" alt="Tiled Plane" /></a> <a href="/assets/images/chaotica-intermediate-linear-tiles/chaotica_NV48Th0wdX.png"><img src="/assets/images/chaotica-intermediate-linear-tiles/chaotica_NV48Th0wdX.png" alt="Tiled Plane Editor" /></a></p>

<h3 id="weights-and-coloring">Weights and Coloring</h3>

<p>Now that we have something to work with, let’s do a bit of housekeeping.  This is a great time to make sure everything is named so that when you go play with weights it’s all labelled right.  That’s right, naming an iterator changes the name in the weights node to match.  It’s super handy when you get into more advanced things.</p>

<p>To start with. all of the blurs can have their opacity turned to 0.  Let me interject with a little knowledge here so newbies will know what I’m talking about.</p>

<h4 id="types-of-transforms">Types of Transforms</h4>

<p>There are three main types of transform.  Keep in mind that this is my own interpretation and others may see it differently.</p>

<h5 id="blurs">Blurs</h5>

<p>Blurs are transforms that distribute points.  If you’ve been through my previous tutorials, you may have seen the link I posted, or even watched the video on the chaos game.  That’s basically what blurs are.  They distribute points, which get displayed as “solid” color by the software.  Examples of blurs are square, hex_rand, circleblur, gaussian_blur etc…</p>

<h5 id="modifiers">Modifiers</h5>

<p>Modifiers are transforms that act as rules.  They take the points distributed by blurs and then change or translate them in some way according to the rules they contain.  An example of this is bipolar or hemisphere.</p>

<h5 id="hybrids">Hybrids</h5>

<p>These both distribute points and tranform or translate.  There are some transforms that do both.  They can distribute points, or they can modify other points, or they can do both at the same time.  I’ll leave these to you to discover.  It gives you a reason to learn what they all do and how they interact.</p>

<h3 id="back-on-topic">Back on topic.</h3>

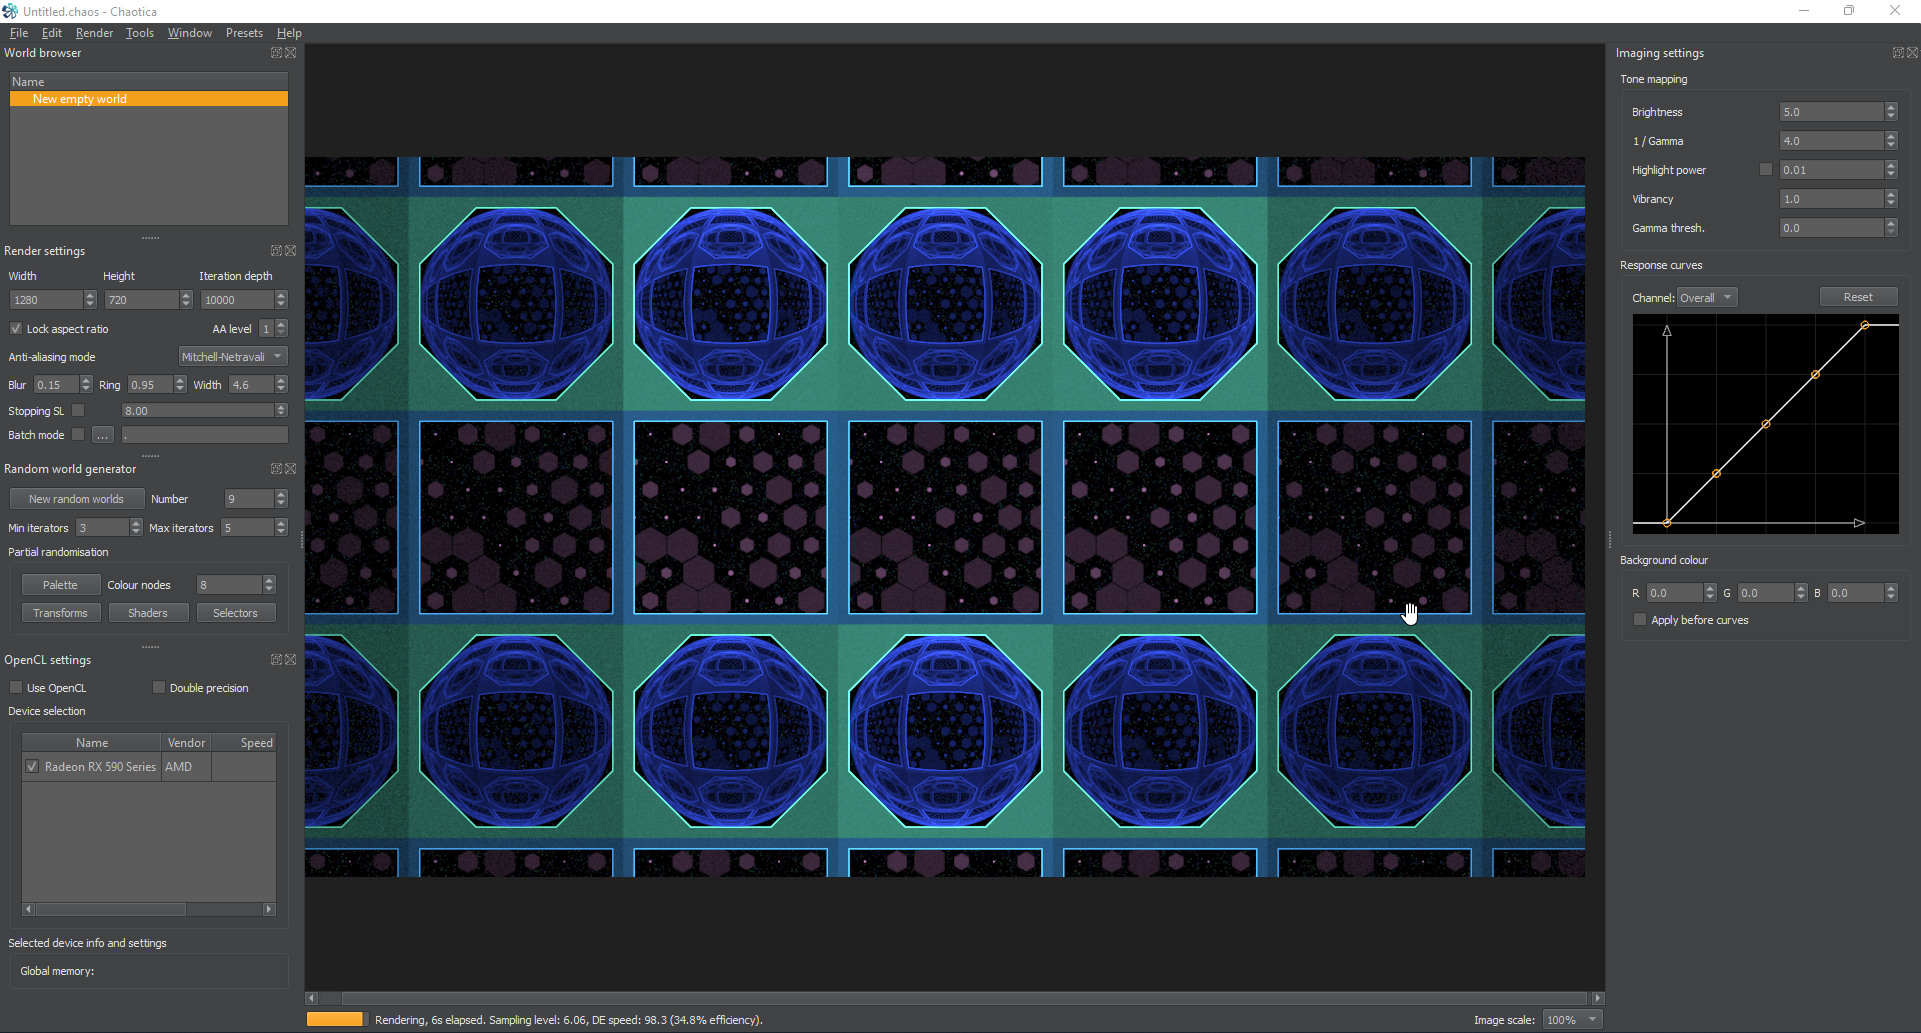
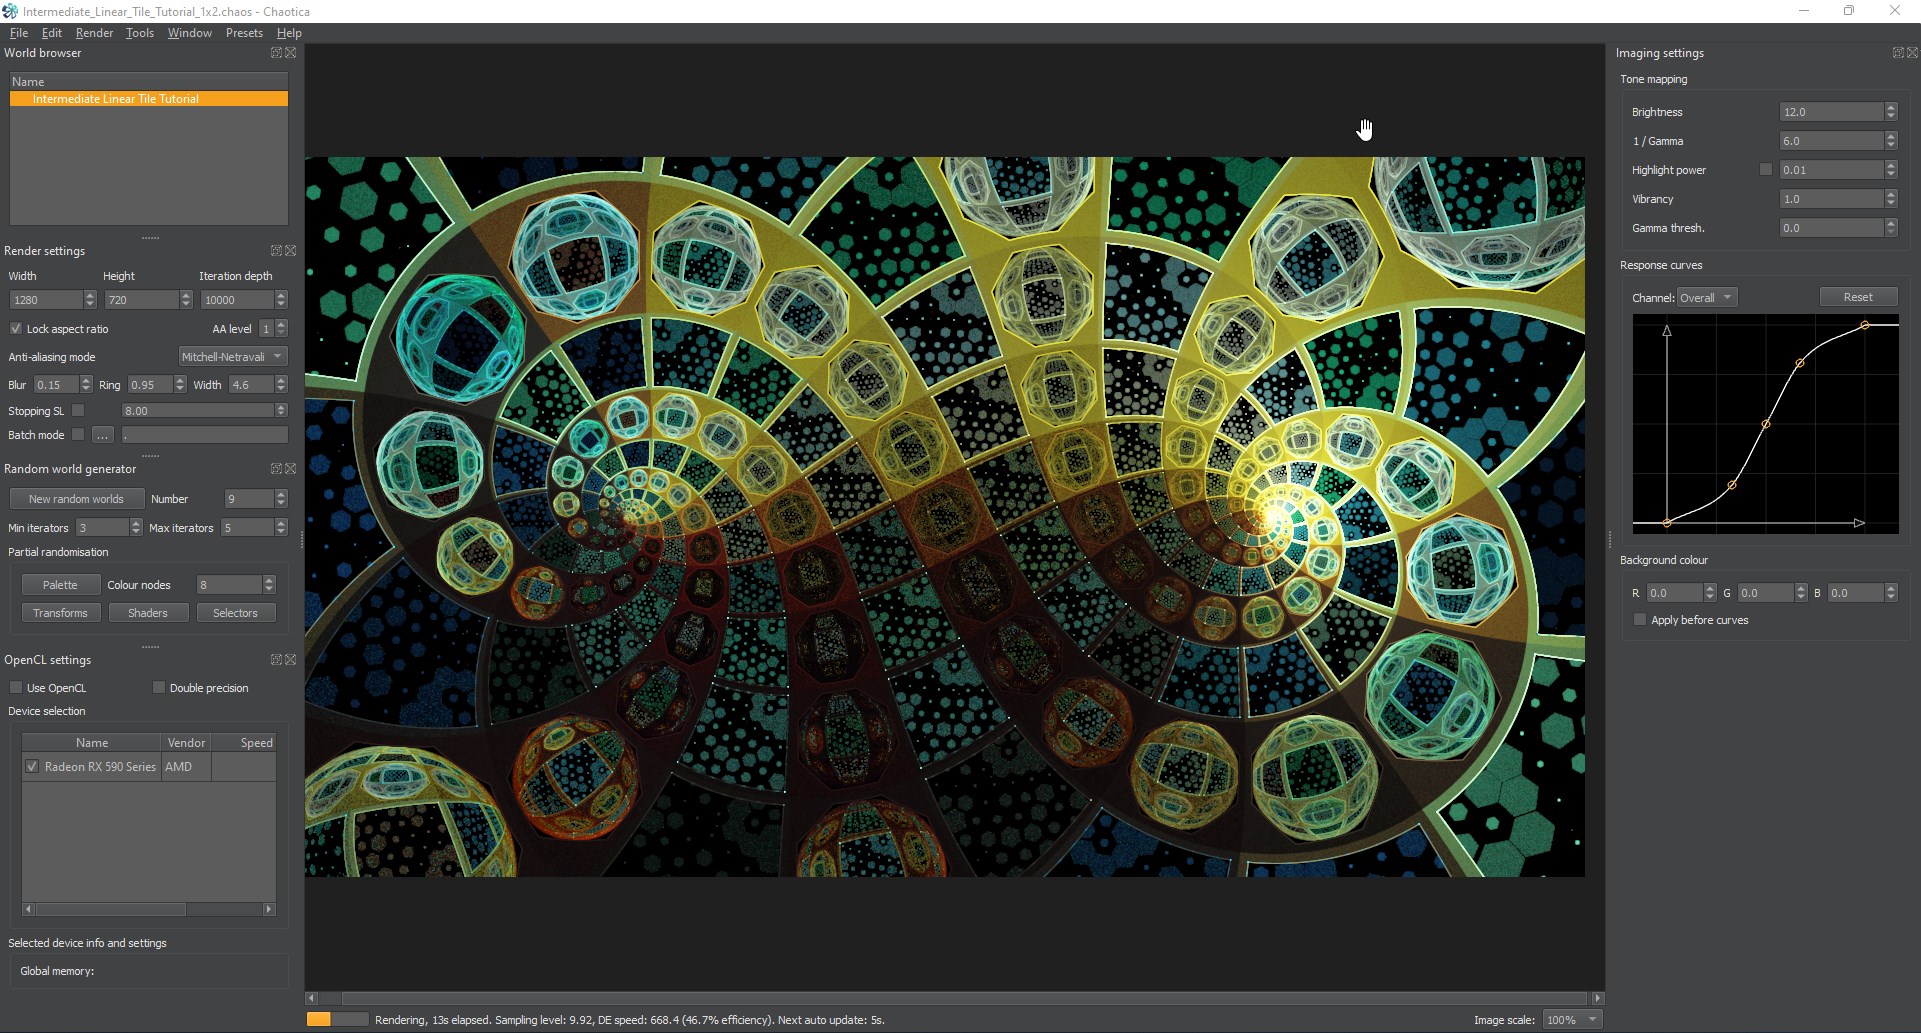
<p>Now after going into all the shader nodes and setting the opacity on everything except the linears to 0, you’ll notice that the bright spots in the middle are a lot less pronounced.  We don’t need those to be visible as the linears are picking up the points and providing full coverage.  Here’s what it looks like.</p>

<p><a href="/assets/images/chaotica-intermediate-linear-tiles/chaotica_TpinmYFLT4.png"><img src="/assets/images/chaotica-intermediate-linear-tiles/chaotica_TpinmYFLT4.png" alt="Modified Plane" /></a></p>

<p>We still have a bit of a bright spot in the middle because of the weights on the linears.  Let’s adjust that now so it looks more uniform.</p>

<p>I’m going to look at the weights on the linears and set their base weight to somewhere in the realm of 4.  This is a little brighter and more filled out.  You can edit this however you like(I suggest doing so until you’re happy), and you’ll notice that when you change the base weight on one of the linears, it lights up the section that the particular iterator controls more than the others.  You can use this to control the coloring or “lighting” later on.</p>

<p>Next, I’m going to go back to the shader nodes and set this up for direct coloring.  I want to control the color of each section and take the blending off.  That way It all looks uniform.  You might like to leave the blending, or you might like to mash the random shader button.  That’s fine and do whatever makes you happy.  However, in this example, I’m showing how to directly color an entire linear tile so please bear with me.</p>

<p>I’m going to set it up like this.  I’m going to change the blending in all the linears to 0 and all the blurs to 1.  When coloring, a blend value of 0 means full blending, and 1 means no blending.  At least that’s a simple explanation for it.  I want the linears to carry the form but not control the color, so I’m going to set it up like that.</p>

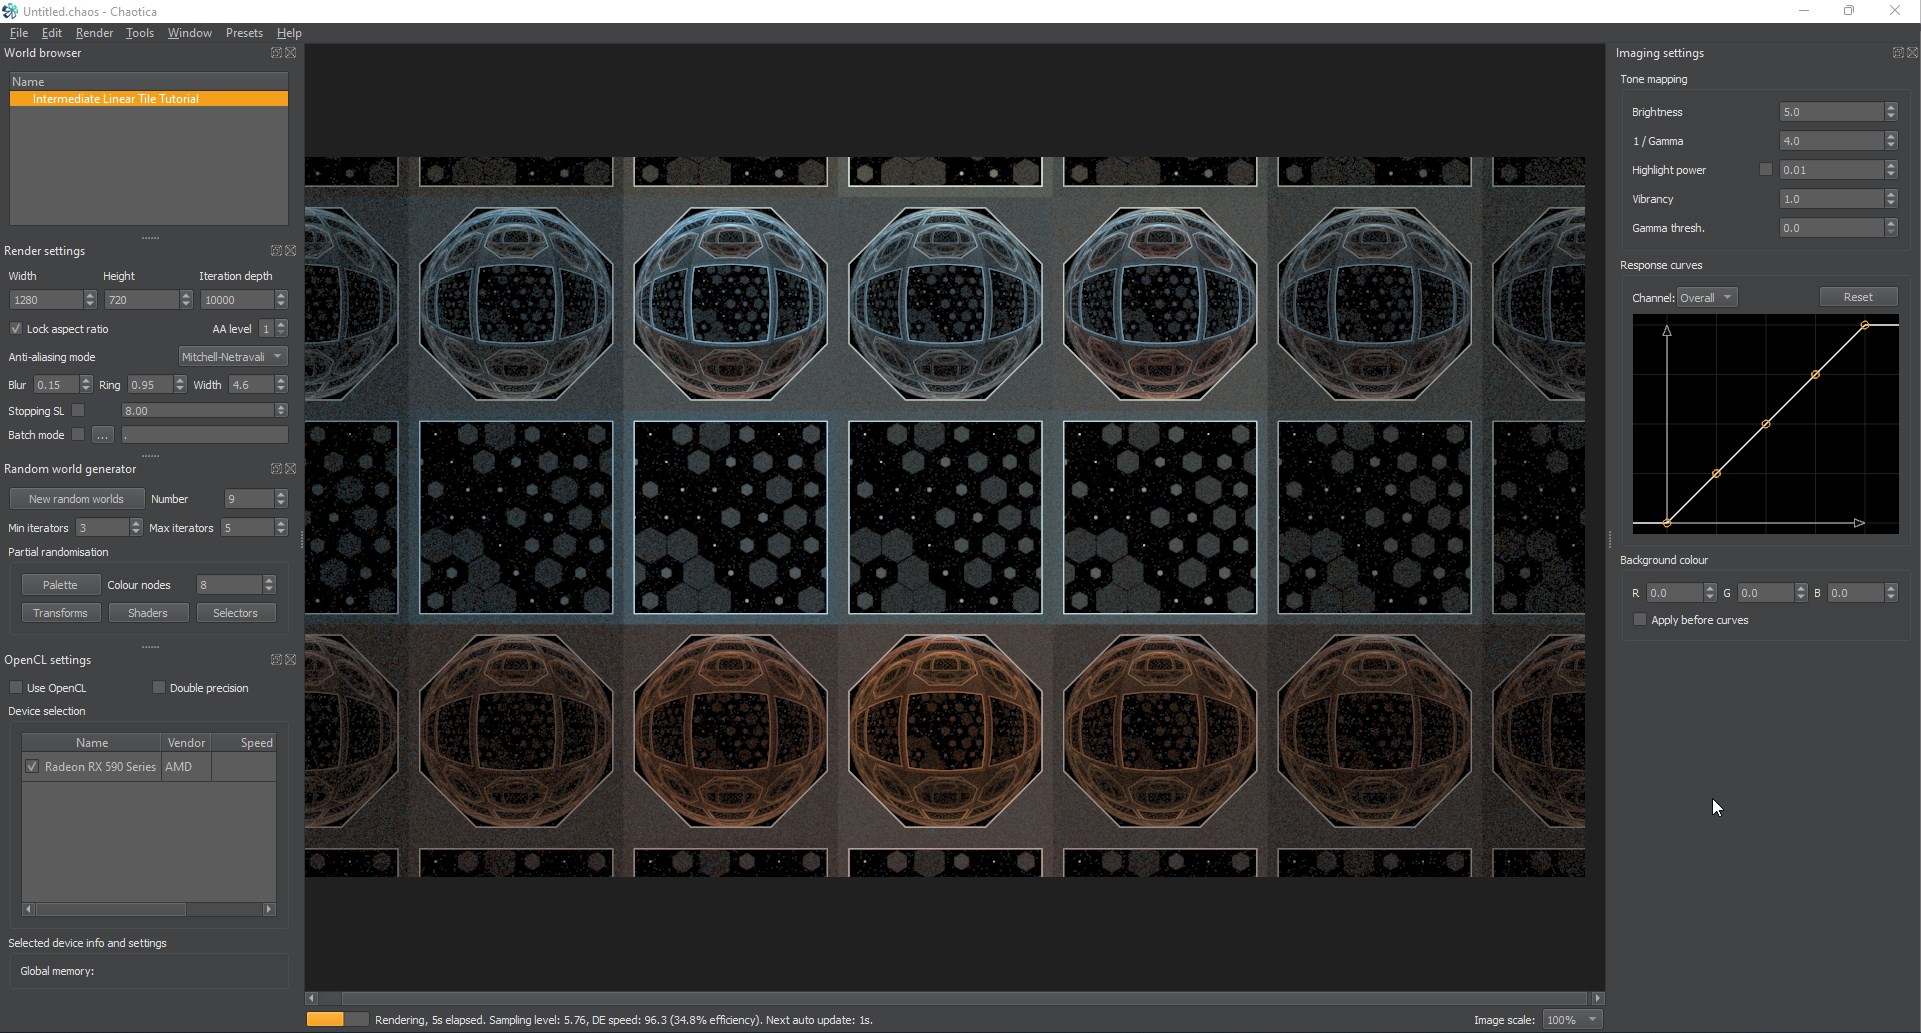
<p>Next I’m going to go into the shader nodes on the blurs and play around with their palette location value.  This will change all the blurs and fills together as you adjust.  Here’s what mine looks like.</p>

<p><a href="/assets/images/chaotica-intermediate-linear-tiles/chaotica_pm6YRxGbLJ.png"><img src="/assets/images/chaotica-intermediate-linear-tiles/chaotica_pm6YRxGbLJ.png" alt="Modified Plane" /></a></p>

<p>Now, this isn’t anywhere near what I would do in a full render.  This is to show you how coloring works.  Now that you’ve seen it, feel free to mash the shader button and see if you can make something cool.  I’m going to inject some color in mine and then move on to the next section where I’ll show you how foci and unpolar work.  They are the most popular camera modifiers for a linear tile.</p>

<p><a href="/assets/images/chaotica-intermediate-linear-tiles/chaotica_OeD4ZFHpLq.jpg"><img src="/assets/images/chaotica-intermediate-linear-tiles/chaotica_OeD4ZFHpLq.jpg" alt="Modified Plane" /></a></p>

<h3 id="deep-dive-into-foci-and-unpolar">Deep Dive into Foci and Unpolar</h3>

<p>Next, let’s get you an idea of how unpolar and foci work.  These are interesting.  The best example I’ve seen comes from Pillemaster.</p>

<p>Imagine taking the 2d plane you have and wrapping it into a cylinder like wrapping paper and stare down the inside at the pattern.  That’s unpolar.  Now imagine taking that cylinder with the pattern on the inside and wrap it into a U shape where your view is inside the U bend and you’re looking down both lengths of it at the same time.  That’s foci.</p>

<p>Now back to the practical.  Using them.  For the last part, I’m going to adjust the camera sensor width to around 3 to get the best views.  Like always, adjust as you like.</p>

<h4 id="unpolar">Unpolar</h4>

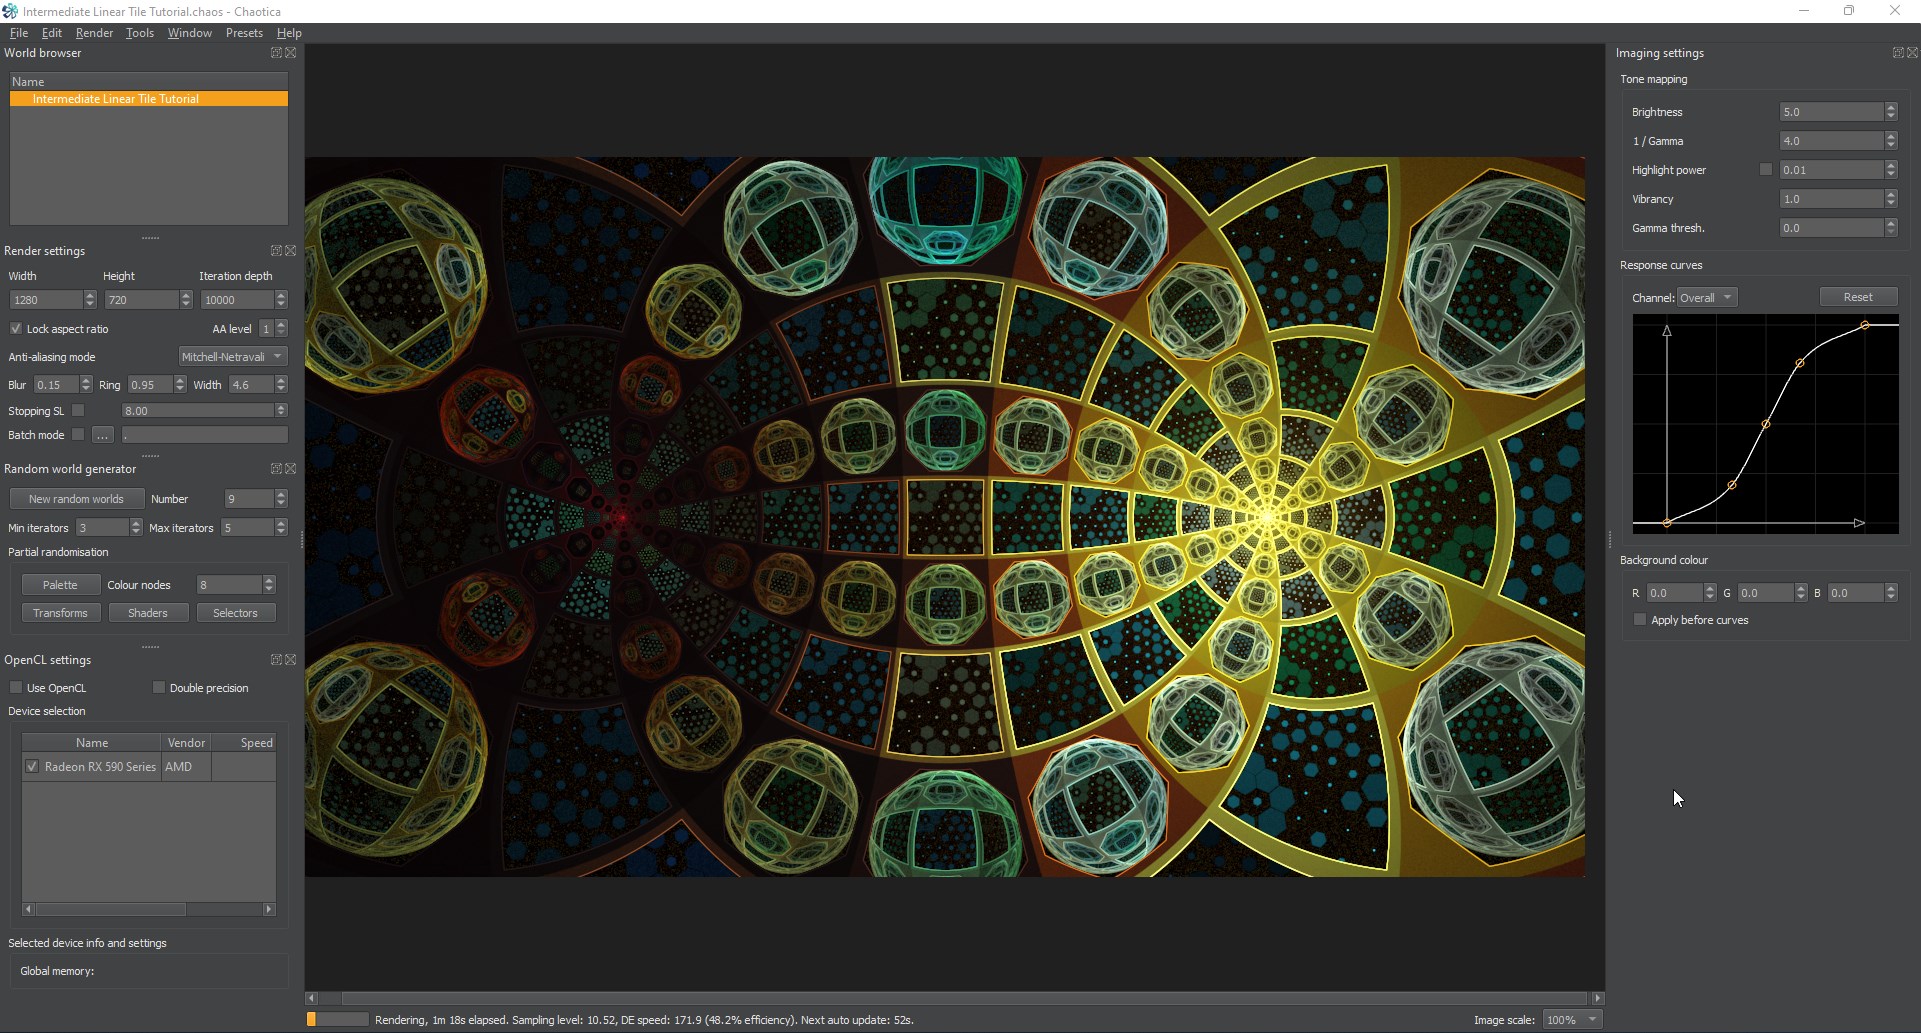
<p>Unpolar is simple.  You set it on the camera or an iterator like any other transform, but the key is that the size of whatever goes into it has to be a variant of pi/3.  Using it is simple.  Toggle your camera transform, and leave the linear there.  Then create a post-transform and set it to unpolar.  Looks blurry or overlapping right?  Now…whip out your calculator and punch in pi/3.  I’ll save you some time.  The answer comes out to 1.047197551196.  Set the value of the linear to that and watch the magic happen.</p>

<p><a href="/assets/images/chaotica-intermediate-linear-tiles/chaotica_7Vk0tYuE16.png"><img src="/assets/images/chaotica-intermediate-linear-tiles/chaotica_7Vk0tYuE16.png" alt="Basic Unpolar" /></a></p>

<p>Now you may notice that even though it’s lined up right, it’s still…a little boring.  Let’s divide the linear value by 2.  To do this, i’m going to create a pre-transform on the camera and set it to linear.  Set it to 0.5, which is half.  After you set that, and it’s definitely looking a bit more interesting.  Next, I’m going to adjust the coloring some more to compensate for the added complexity.</p>

<p><a href="/assets/images/chaotica-intermediate-linear-tiles/chaotica_roqwl5YH3P.jpg"><img src="/assets/images/chaotica-intermediate-linear-tiles/chaotica_roqwl5YH3P.jpg" alt="Basic Unpolar" /></a></p>

<h4 id="foci">Foci</h4>

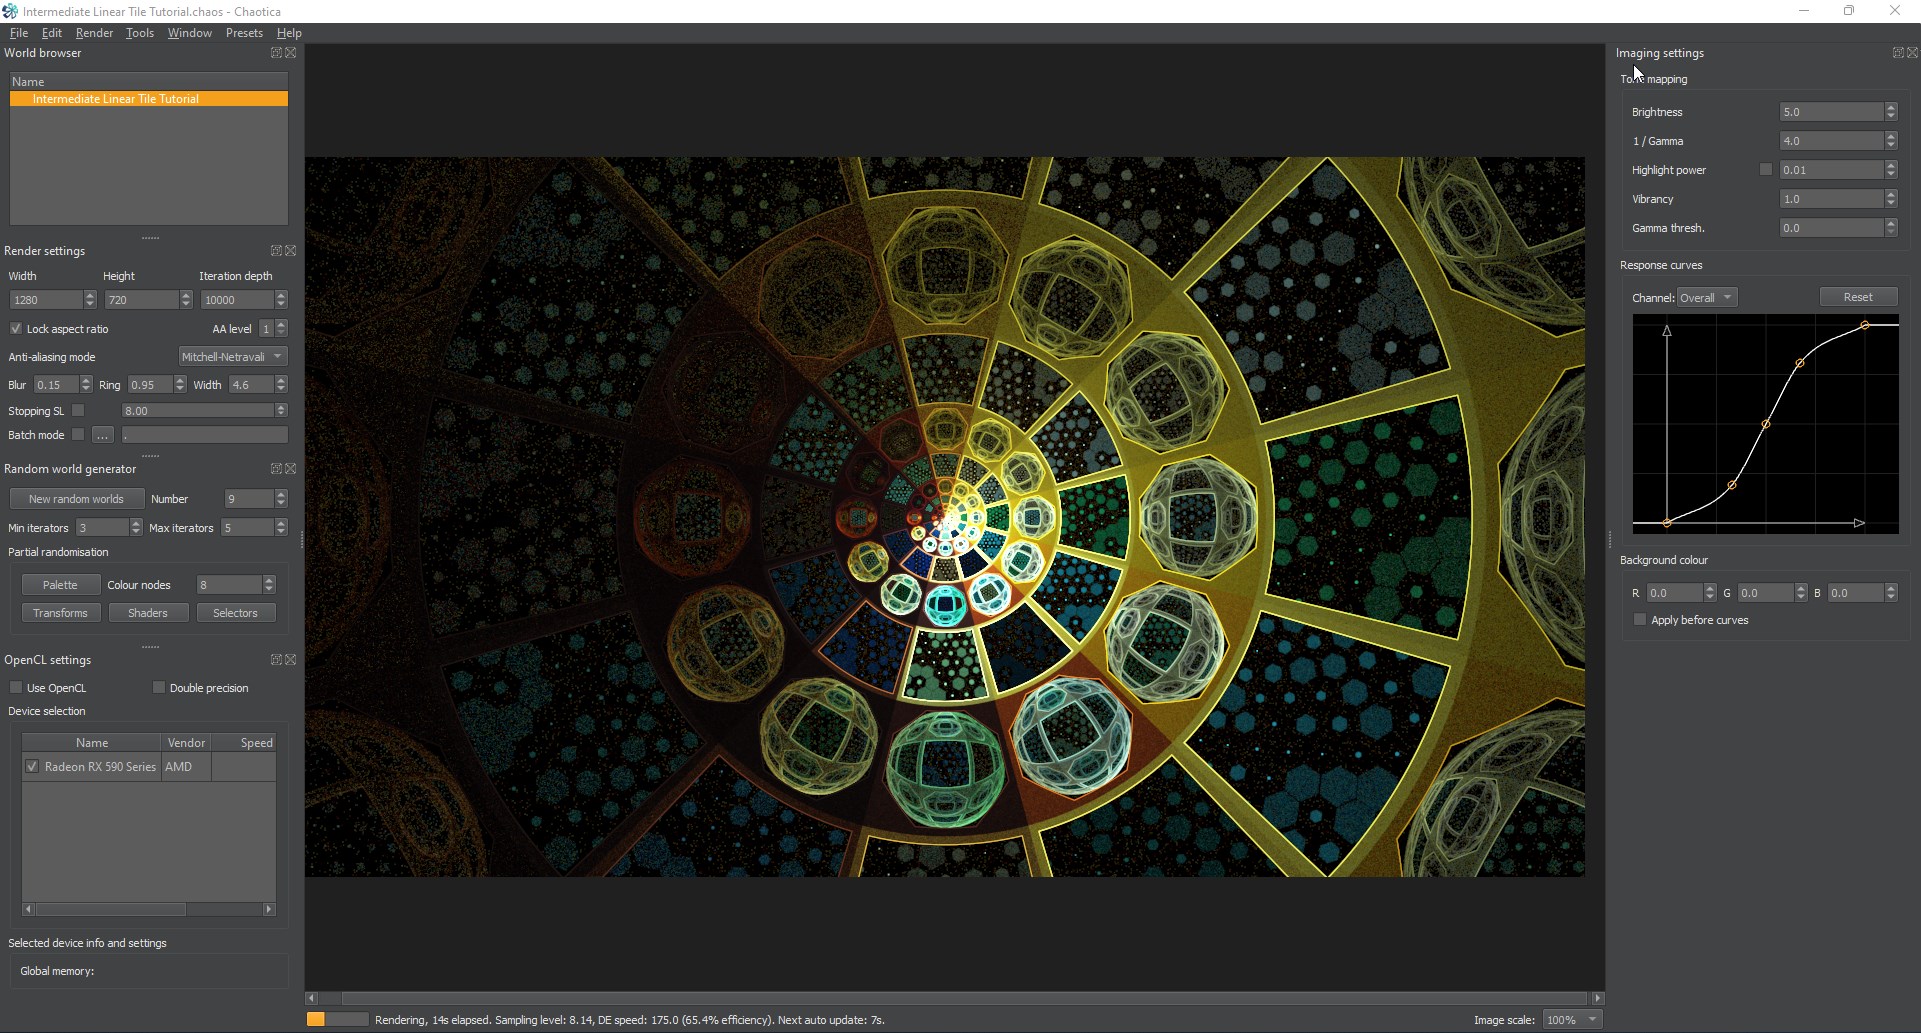
<p>Next, foci is a bit more complex.  When you’re using a basic foci, you can use the same sizing as the unpolar.  You have to send whatever into it using a variation of pi/3.  If i change the unpolar on the camera to foci, it looks like this.</p>

<p><a href="/assets/images/chaotica-intermediate-linear-tiles/chaotica_YfFKPRs2eJ.jpg"><img src="/assets/images/chaotica-intermediate-linear-tiles/chaotica_YfFKPRs2eJ.jpg" alt="Unpolar Recolor" /></a></p>

<p>Looks pretty awesome right?  Well, it can look even better.</p>

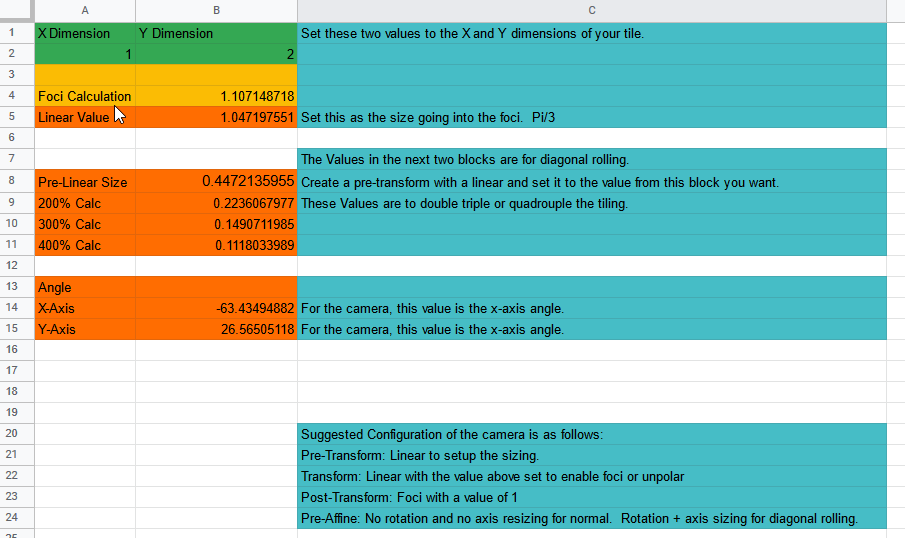
<p>Now…let’s apply a diagonal roll to this.  It’s basically turning it 45 degrees(Based on the sizing) and then adjusting it so it overlaps perfectly.  If you’re interested, feel free to dig into the math.  I suggest Pillemaster’s <a href="https://www.deviantart.com/pillemaster/art/Foci-and-Unpolar-Tutorial-301184325">Tutorial</a> as it’s incredibly detailed.  I’m going to provide a calculator I wrote here for your use.  This is specifically tailored to figuring out foci diagonal rolling in chaotica.</p>

<p><a href="https://docs.google.com/spreadsheets/d/1akfY6-lx3esmaQHTGy4xn43-QEKsRGOyfqzFAjrPlSU/edit?usp=sharing">Calculator</a></p>

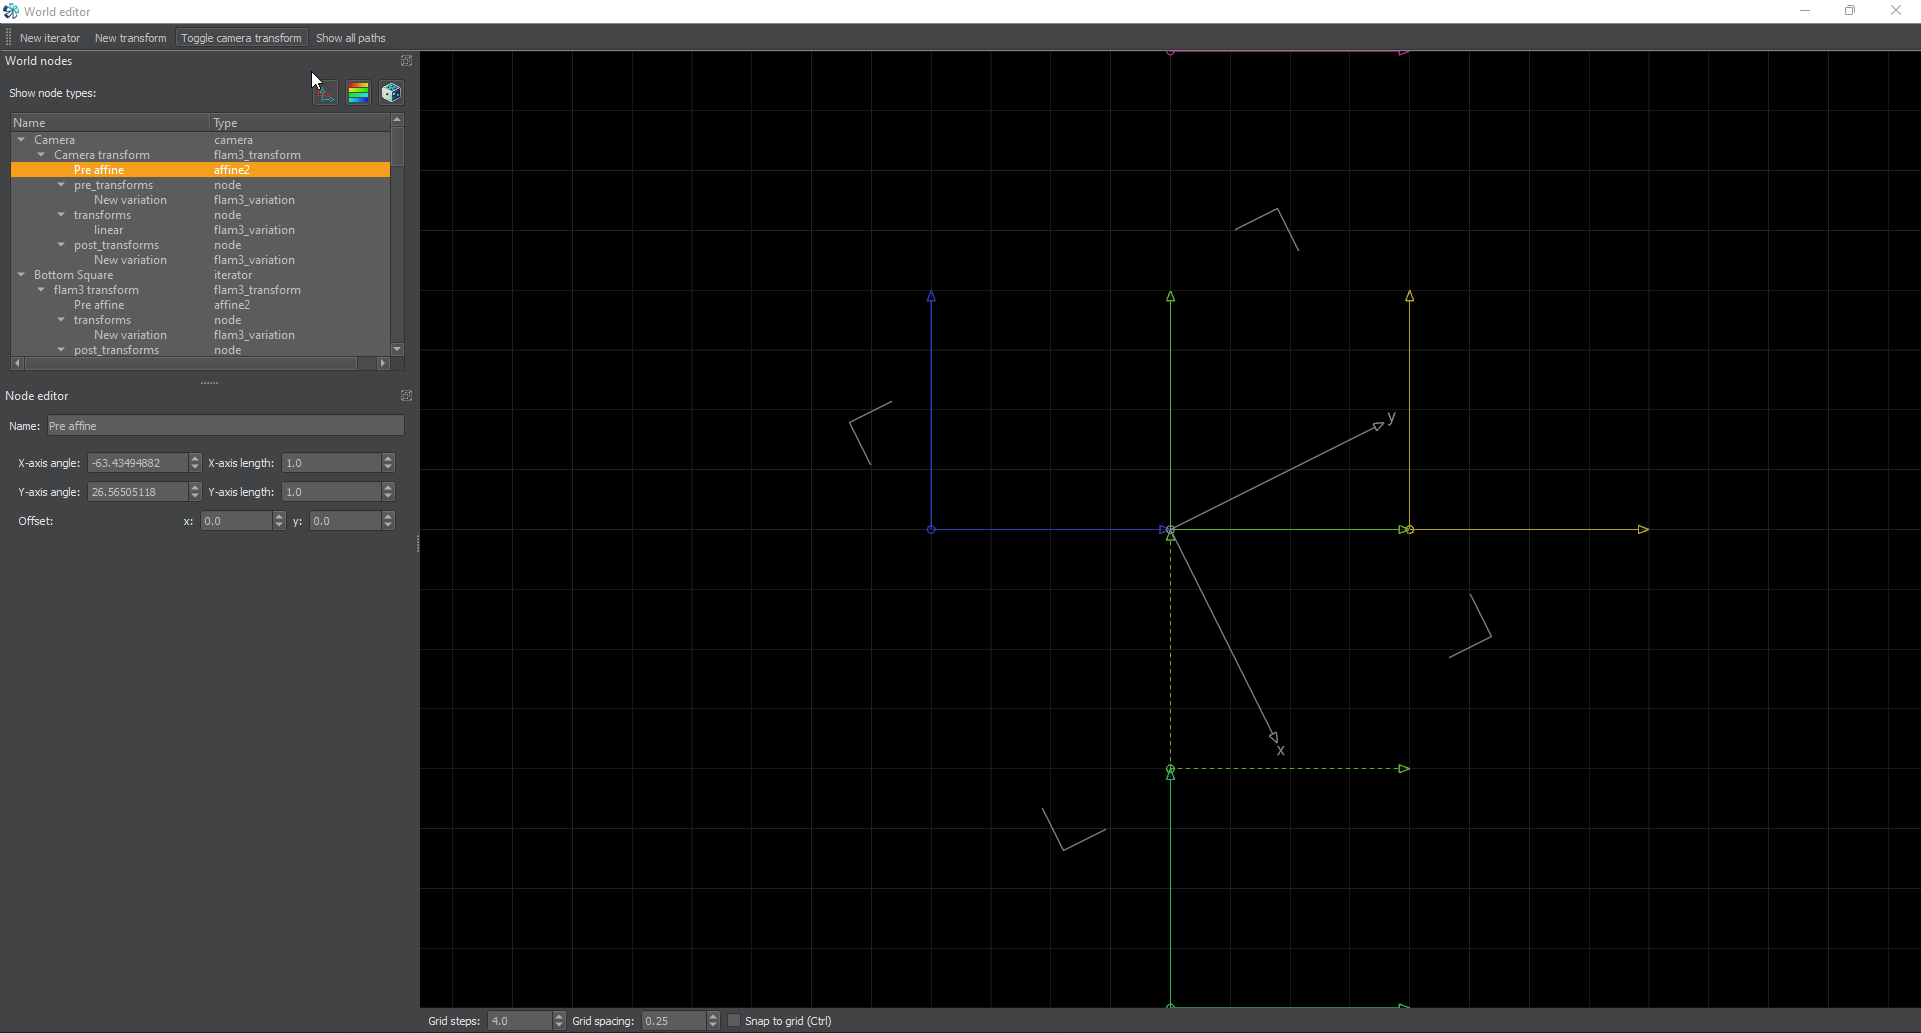
<p>If I plug the values of the x and y tile into this, it gives me the values to set the linear, the pre-affine and the angles to make it overlap perfectly.</p>

<p>This is a 1x2 tile, so when I plug in those values, this is what I get.</p>

<p><a href="/assets/images/chaotica-intermediate-linear-tiles/firefox_oAdJls2w3o.png"><img src="/assets/images/chaotica-intermediate-linear-tiles/firefox_oAdJls2w3o.png" alt="Diagonal Rolling" /></a></p>

<p>And this is what it looks like with the following values on the pre-affine.</p>

<p><a href="/assets/images/chaotica-intermediate-linear-tiles/chaotica_sb9diglmkY.jpg"><img src="/assets/images/chaotica-intermediate-linear-tiles/chaotica_sb9diglmkY.jpg" alt="Final Result" /></a> <a href="/assets/images/chaotica-intermediate-linear-tiles/chaotica_Fu1MigwjRT.png"><img src="/assets/images/chaotica-intermediate-linear-tiles/chaotica_Fu1MigwjRT.png" alt="Final Editor" /></a></p>

<h3 id="finishing-up">Finishing up</h3>

<p>Now, keep in mind that I may be totally wrong on the math on this one.  If I’m wrong, correct me.  I’d love to make my calculator better and share it with everyone.</p>

<p>That being said, there are many ways to do this.  You can tile it as far as your imagination can take you and beyond.  Keep playing with the variables and before you know it, I’ll be learning from you.  That’s the hope anyway.</p>

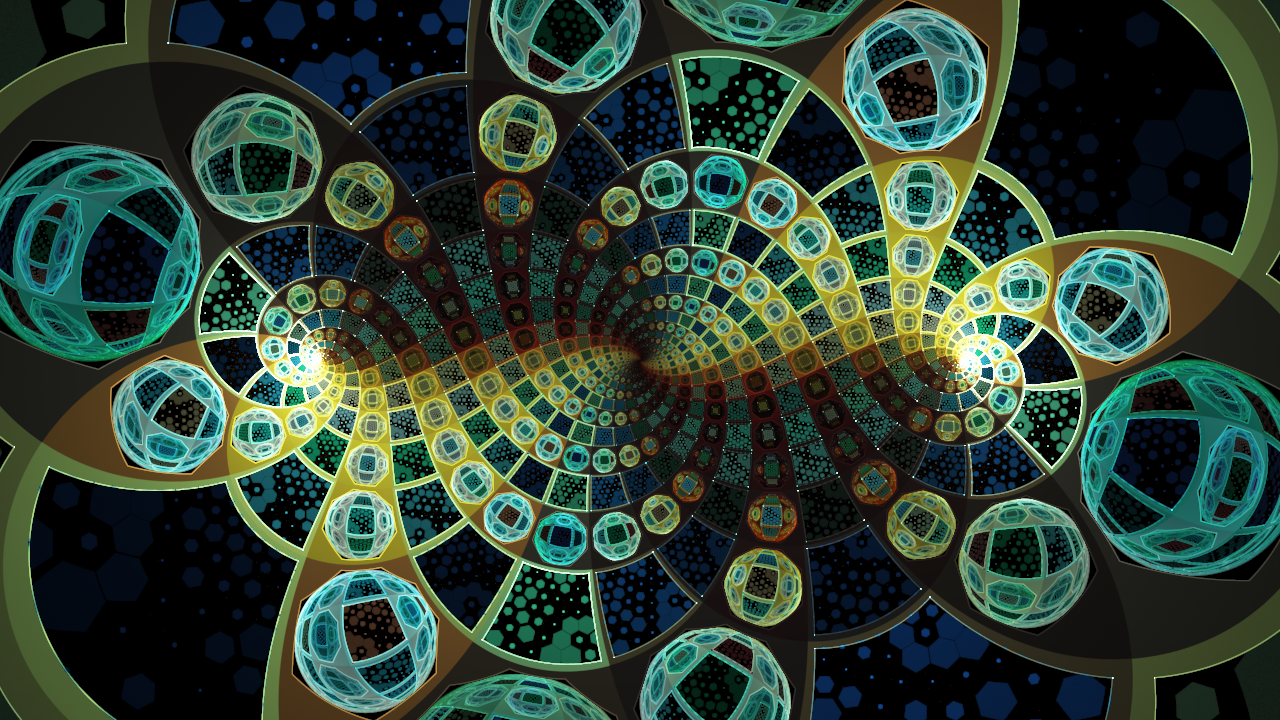
<p>One variable you can use is send the foci on the camera to e-julia.  It turns it from what you just saw, to this.</p>

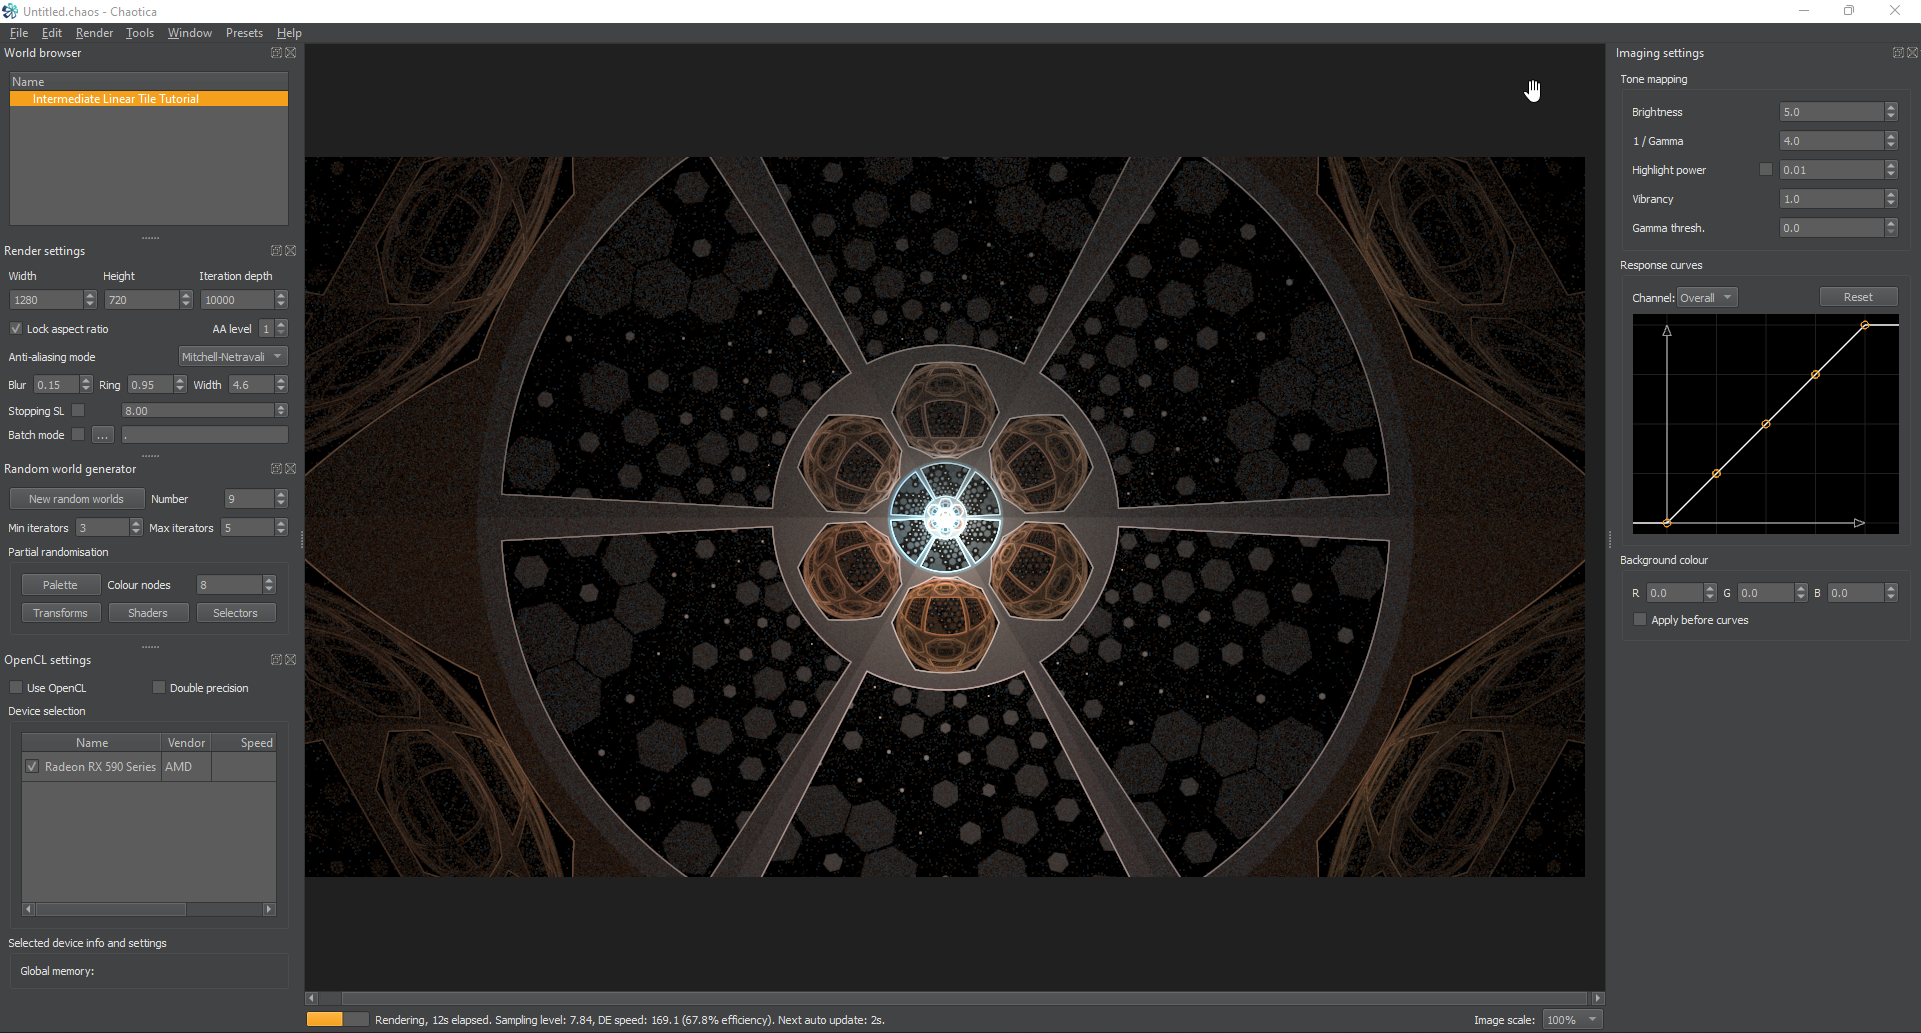
<p><a href="/assets/images/chaotica-intermediate-linear-tiles/intermediate_linear_tile_tutorial_ejulia.png"><img src="/assets/images/chaotica-intermediate-linear-tiles/intermediate_linear_tile_tutorial_ejulia.png" alt="Final Result ejulia" /></a></p>

<h3 id="examples">Examples</h3>

<p>At this point though, where you take the fractal is up to you. I’ll leave you with a few examples of what I have created with this method.</p>

<p><a href="https://www.deviantart.com/pugnaciousone/art/Illumination-Conduit-922819540"><img src="https://images-wixmp-ed30a86b8c4ca887773594c2.wixmp.com/f/c44d1498-1c89-4141-bf98-d14781623673/df9f844-27892ced-4cbd-41a1-8828-c9d3e86c6404.png?token=eyJ0eXAiOiJKV1QiLCJhbGciOiJIUzI1NiJ9.eyJzdWIiOiJ1cm46YXBwOjdlMGQxODg5ODIyNjQzNzNhNWYwZDQxNWVhMGQyNmUwIiwiaXNzIjoidXJuOmFwcDo3ZTBkMTg4OTgyMjY0MzczYTVmMGQ0MTVlYTBkMjZlMCIsIm9iaiI6W1t7InBhdGgiOiJcL2ZcL2M0NGQxNDk4LTFjODktNDE0MS1iZjk4LWQxNDc4MTYyMzY3M1wvZGY5Zjg0NC0yNzg5MmNlZC00Y2JkLTQxYTEtODgyOC1jOWQzZTg2YzY0MDQucG5nIn1dXSwiYXVkIjpbInVybjpzZXJ2aWNlOmZpbGUuZG93bmxvYWQiXX0.VKaV4CcgbP-9RfqMzZymNvFYGddvxTSGQ9mlBn8RKRU" alt="Illumination Conduit - By PugnaciousOne (me)" /></a> <a href="https://www.deviantart.com/pugnaciousone/art/Hexes-Revisited-920215284"><img src="https://images-wixmp-ed30a86b8c4ca887773594c2.wixmp.com/f/c44d1498-1c89-4141-bf98-d14781623673/df7veno-273ce7da-f556-4fbc-b50c-8680536a5aeb.png?token=eyJ0eXAiOiJKV1QiLCJhbGciOiJIUzI1NiJ9.eyJzdWIiOiJ1cm46YXBwOjdlMGQxODg5ODIyNjQzNzNhNWYwZDQxNWVhMGQyNmUwIiwiaXNzIjoidXJuOmFwcDo3ZTBkMTg4OTgyMjY0MzczYTVmMGQ0MTVlYTBkMjZlMCIsIm9iaiI6W1t7InBhdGgiOiJcL2ZcL2M0NGQxNDk4LTFjODktNDE0MS1iZjk4LWQxNDc4MTYyMzY3M1wvZGY3dmVuby0yNzNjZTdkYS1mNTU2LTRmYmMtYjUwYy04NjgwNTM2YTVhZWIucG5nIn1dXSwiYXVkIjpbInVybjpzZXJ2aWNlOmZpbGUuZG93bmxvYWQiXX0.EUJas7jrz2S2AEVEft14ftuOWVWLHo3bP-33Qg5b8ew" alt="Hexes Revisited - By PugnaciousOne (me)" /></a> <a href="https://www.deviantart.com/pugnaciousone/art/Rise-of-the-Machine-895110846"><img src="https://images-wixmp-ed30a86b8c4ca887773594c2.wixmp.com/f/c44d1498-1c89-4141-bf98-d14781623673/desxby6-02ad99b7-4526-4fe8-b380-508cb9a16bcb.png?token=eyJ0eXAiOiJKV1QiLCJhbGciOiJIUzI1NiJ9.eyJzdWIiOiJ1cm46YXBwOjdlMGQxODg5ODIyNjQzNzNhNWYwZDQxNWVhMGQyNmUwIiwiaXNzIjoidXJuOmFwcDo3ZTBkMTg4OTgyMjY0MzczYTVmMGQ0MTVlYTBkMjZlMCIsIm9iaiI6W1t7InBhdGgiOiJcL2ZcL2M0NGQxNDk4LTFjODktNDE0MS1iZjk4LWQxNDc4MTYyMzY3M1wvZGVzeGJ5Ni0wMmFkOTliNy00NTI2LTRmZTgtYjM4MC01MDhjYjlhMTZiY2IucG5nIn1dXSwiYXVkIjpbInVybjpzZXJ2aWNlOmZpbGUuZG93bmxvYWQiXX0.jxYiSNwndnAysI4gaw2m8lQjfhRziTpWbJzga9CeGss" alt="Rise of the Machine - By PugnaciousOne (me)" /></a></p>]]></content><author><name>Pugnacious</name></author><category term="fractal" /><category term="chaotica" /><summary type="html"><![CDATA[This is a tutorial on creating a more difficult linear tile with Chatoica.]]></summary></entry><entry><title type="html">Chaotica: Generating Transform Previews</title><link href="https://www.pug.fyi/chaotica/transform/previews" rel="alternate" type="text/html" title="Chaotica: Generating Transform Previews" /><published>2021-06-21T00:00:00+00:00</published><updated>2021-06-21T00:00:00+00:00</updated><id>https://www.pug.fyi/chaotica/transform/Chaotica-Generating-Transform-Previews</id><content type="html" xml:base="https://www.pug.fyi/chaotica/transform/previews"><![CDATA[<h2 id="credits">Credits</h2>

<p>All credit for the method to generate the previews goes out to <a href="https://www.artstation.com/toanlish">Toan Lish</a> who did all the research and put together this awesome chaos file.</p>

<blockquote>
  <p><em>If I have seen further than others, it is by standing upon the shoulders of giants. - Isaac Newton</em></p>
</blockquote>

<h2 id="the-setup">The Setup</h2>

<p>First, we need a special Chaos file. This was created by Toan Lish and released on the fractal discord around a year ago. It’s purpose is to generate preview images for transforms.</p>

<p><a href="/assets/files/chaotica-generating-transform-previews/Generating-Chaotica-Thumbnails.chaos">Chaos File</a></p>

<p>As you absolutely shouldn’t trust a random download on the internet, I’m also including the file in text format here. You can skip this section if you choose to just download the file.</p>

<h3 id="chaos-file">Chaos File</h3>

<div class="language-plaintext highlighter-rouge"><div class="highlight"><pre class="highlight"><code>&lt;?xml version="1.0" encoding="utf-8"?&gt;
&lt;world name="World"&gt;
&lt;int name="format_version"&gt;2&lt;/int&gt;
&lt;IFS name="Generating Chaotica Thumbnails"&gt;
&lt;imaging name="img"&gt;
  &lt;int name="image_width"&gt;160&lt;/int&gt;
  &lt;int name="image_height"&gt;160&lt;/int&gt;
  &lt;int name="image_aa_level"&gt;4&lt;/int&gt;
  &lt;int name="image_layers"&gt;1&lt;/int&gt;
  &lt;int name="image_quality"&gt;0&lt;/int&gt;
  &lt;string name="antialiasing_mode"&gt;smooth&lt;/string&gt;
  &lt;real name="brightness"&gt;60&lt;/real&gt;
  &lt;vec4 name="background_colour"&gt;0 0 0 1&lt;/vec4&gt;
  &lt;bool name="apply_bg_before_curves"&gt;false&lt;/bool&gt;
  &lt;real name="flam3_gamma"&gt;3&lt;/real&gt;
  &lt;real name="flam3_vibrancy"&gt;1&lt;/real&gt;
  &lt;bool name="flam3_use_highlight_power"&gt;false&lt;/bool&gt;
  &lt;real name="flam3_highlight_power"&gt;100&lt;/real&gt;
  &lt;real name="flam3_gamma_linear_threshold"&gt;0&lt;/real&gt;
  &lt;table name="layer_weights"&gt;
    &lt;values&gt;1 1 1 1&lt;/values&gt;
  &lt;/table&gt;
&lt;/imaging&gt;
&lt;camera name="flam3 camera"&gt;
  &lt;vec2 name="pos"&gt;0 0&lt;/vec2&gt;
  &lt;real name="rotate"&gt;0&lt;/real&gt;
  &lt;real name="sensor_width"&gt;2.65&lt;/real&gt;
  &lt;flam3_transform name="Camera transform"&gt;
    &lt;affine2 name="Pre affine"&gt;
      &lt;real name="x_axis_angle"&gt;0&lt;/real&gt;
      &lt;real name="x_axis_length"&gt;1&lt;/real&gt;
      &lt;real name="y_axis_angle"&gt;90&lt;/real&gt;
      &lt;real name="y_axis_length"&gt;1&lt;/real&gt;
      &lt;vec2 name="offset"&gt;0 0&lt;/vec2&gt;
    &lt;/affine2&gt;
    &lt;node name="transforms"&gt;
      &lt;flam3_variation name="linear"&gt;
        &lt;string name="variation_name"&gt;linear&lt;/string&gt;
        &lt;params&gt;
          &lt;real name="linear"&gt;1&lt;/real&gt;
        &lt;/params&gt;
      &lt;/flam3_variation&gt;
    &lt;/node&gt;
    &lt;node name="post_transforms"&gt;
      &lt;flam3_variation name="New variation"&gt;
        &lt;string name="variation_name"&gt;post_smartcrop&lt;/string&gt;
        &lt;params&gt;
          &lt;real name="post_smartcrop"&gt;1&lt;/real&gt;
          &lt;real name="post_scrop_power"&gt;4&lt;/real&gt;
          &lt;real name="post_scrop_radius"&gt;1&lt;/real&gt;
          &lt;real name="post_scrop_roundstr"&gt;0&lt;/real&gt;
          &lt;real name="post_scrop_roundwidth"&gt;0&lt;/real&gt;
          &lt;real name="post_scrop_distortion"&gt;1&lt;/real&gt;
          &lt;real name="post_scrop_edge"&gt;0&lt;/real&gt;
          &lt;real name="post_scrop_scatter"&gt;0&lt;/real&gt;
          &lt;real name="post_scrop_offset"&gt;0&lt;/real&gt;
          &lt;real name="post_scrop_rotation"&gt;0&lt;/real&gt;
          &lt;real name="post_scrop_cropmode"&gt;0&lt;/real&gt;
          &lt;real name="post_scrop_static"&gt;2&lt;/real&gt;
        &lt;/params&gt;
      &lt;/flam3_variation&gt;
      &lt;flam3_variation name="New variation"&gt;
        &lt;string name="variation_name"&gt;linear&lt;/string&gt;
        &lt;params&gt;
          &lt;real name="linear"&gt;1&lt;/real&gt;
        &lt;/params&gt;
      &lt;/flam3_variation&gt;
    &lt;/node&gt;
  &lt;/flam3_transform&gt;
&lt;/camera&gt;
&lt;node name="iterators"&gt;
  &lt;iterator name="Iterator 1"&gt;
    &lt;flam3_transform name="flam3_xform 1"&gt;
      &lt;affine2 name="Pre affine"&gt;
        &lt;real name="x_axis_angle"&gt;0&lt;/real&gt;
        &lt;real name="x_axis_length"&gt;1&lt;/real&gt;
        &lt;real name="y_axis_angle"&gt;90&lt;/real&gt;
        &lt;real name="y_axis_length"&gt;1&lt;/real&gt;
        &lt;vec2 name="offset"&gt;0 0&lt;/vec2&gt;
      &lt;/affine2&gt;
      &lt;affine2 name="Post affine"&gt;
        &lt;real name="x_axis_angle"&gt;0&lt;/real&gt;
        &lt;real name="x_axis_length"&gt;1&lt;/real&gt;
        &lt;real name="y_axis_angle"&gt;90&lt;/real&gt;
        &lt;real name="y_axis_length"&gt;1&lt;/real&gt;
        &lt;vec2 name="offset"&gt;0.5 -0.5&lt;/vec2&gt;
      &lt;/affine2&gt;
      &lt;node name="transforms"&gt;
        &lt;flam3_variation name="Transform 3"&gt;
          &lt;string name="variation_name"&gt;sineblur&lt;/string&gt;
          &lt;params&gt;
            &lt;real name="sineblur"&gt;2&lt;/real&gt;
            &lt;real name="sineblur_power"&gt;0.5&lt;/real&gt;
          &lt;/params&gt;
        &lt;/flam3_variation&gt;
      &lt;/node&gt;
    &lt;/flam3_transform&gt;
    &lt;flam3_shader name="flam3 shader"&gt;
      &lt;real name="palette_index"&gt;0.108&lt;/real&gt;
      &lt;real name="blend_speed"&gt;1&lt;/real&gt;
      &lt;real name="opacity"&gt;1&lt;/real&gt;
      &lt;table name="layer_weights"&gt;
        &lt;values&gt;1 1 1 1&lt;/values&gt;
      &lt;/table&gt;
    &lt;/flam3_shader&gt;
    &lt;weights_selector name="Iterator selection weights"&gt;
      &lt;real name="Base weight"&gt;0.5&lt;/real&gt;
      &lt;node name="per_iterator_weights"&gt;
        &lt;real name="Iterator 1 weight"&gt;1&lt;/real&gt;
        &lt;real name="Iterator 2 weight"&gt;1&lt;/real&gt;
        &lt;real name="Iterator 3 weight"&gt;1&lt;/real&gt;
        &lt;real name="Iterator 4 weight"&gt;1&lt;/real&gt;
      &lt;/node&gt;
    &lt;/weights_selector&gt;
    &lt;real name="time_scale"&gt;1&lt;/real&gt;
  &lt;/iterator&gt;
  &lt;iterator name="Iterator 2"&gt;
    &lt;flam3_transform name="flam3_xform 2"&gt;
      &lt;affine2 name="Pre affine"&gt;
        &lt;real name="x_axis_angle"&gt;0&lt;/real&gt;
        &lt;real name="x_axis_length"&gt;1&lt;/real&gt;
        &lt;real name="y_axis_angle"&gt;90&lt;/real&gt;
        &lt;real name="y_axis_length"&gt;1&lt;/real&gt;
        &lt;vec2 name="offset"&gt;0 0&lt;/vec2&gt;
      &lt;/affine2&gt;
      &lt;affine2 name="Post affine"&gt;
        &lt;real name="x_axis_angle"&gt;0&lt;/real&gt;
        &lt;real name="x_axis_length"&gt;1&lt;/real&gt;
        &lt;real name="y_axis_angle"&gt;90&lt;/real&gt;
        &lt;real name="y_axis_length"&gt;1&lt;/real&gt;
        &lt;vec2 name="offset"&gt;-0.5 -0.5&lt;/vec2&gt;
      &lt;/affine2&gt;
      &lt;node name="transforms"&gt;
        &lt;flam3_variation name="Transform 3"&gt;
          &lt;string name="variation_name"&gt;sineblur&lt;/string&gt;
          &lt;params&gt;
            &lt;real name="sineblur"&gt;2&lt;/real&gt;
            &lt;real name="sineblur_power"&gt;0.5&lt;/real&gt;
          &lt;/params&gt;
        &lt;/flam3_variation&gt;
      &lt;/node&gt;
    &lt;/flam3_transform&gt;
    &lt;flam3_shader name="flam3 shader"&gt;
      &lt;real name="palette_index"&gt;0.382&lt;/real&gt;
      &lt;real name="blend_speed"&gt;1&lt;/real&gt;
      &lt;real name="opacity"&gt;1&lt;/real&gt;
      &lt;table name="layer_weights"&gt;
        &lt;values&gt;1 1 1 1&lt;/values&gt;
      &lt;/table&gt;
    &lt;/flam3_shader&gt;
    &lt;weights_selector name="Iterator selection weights"&gt;
      &lt;real name="Base weight"&gt;0.5&lt;/real&gt;
      &lt;node name="per_iterator_weights"&gt;
        &lt;real name="Iterator 1 weight"&gt;1&lt;/real&gt;
        &lt;real name="Iterator 2 weight"&gt;1&lt;/real&gt;
        &lt;real name="Iterator 3 weight"&gt;1&lt;/real&gt;
        &lt;real name="Iterator 4 weight"&gt;1&lt;/real&gt;
      &lt;/node&gt;
    &lt;/weights_selector&gt;
    &lt;real name="time_scale"&gt;1&lt;/real&gt;
  &lt;/iterator&gt;
  &lt;iterator name="Iterator 3"&gt;
    &lt;flam3_transform name="flam3_xform 3"&gt;
      &lt;affine2 name="Pre affine"&gt;
        &lt;real name="x_axis_angle"&gt;0&lt;/real&gt;
        &lt;real name="x_axis_length"&gt;1&lt;/real&gt;
        &lt;real name="y_axis_angle"&gt;90&lt;/real&gt;
        &lt;real name="y_axis_length"&gt;1&lt;/real&gt;
        &lt;vec2 name="offset"&gt;0 0&lt;/vec2&gt;
      &lt;/affine2&gt;
      &lt;affine2 name="Post affine"&gt;
        &lt;real name="x_axis_angle"&gt;0&lt;/real&gt;
        &lt;real name="x_axis_length"&gt;1&lt;/real&gt;
        &lt;real name="y_axis_angle"&gt;90&lt;/real&gt;
        &lt;real name="y_axis_length"&gt;1&lt;/real&gt;
        &lt;vec2 name="offset"&gt;-0.5 0.5&lt;/vec2&gt;
      &lt;/affine2&gt;
      &lt;node name="transforms"&gt;
        &lt;flam3_variation name="Transform 3"&gt;
          &lt;string name="variation_name"&gt;sineblur&lt;/string&gt;
          &lt;params&gt;
            &lt;real name="sineblur"&gt;2&lt;/real&gt;
            &lt;real name="sineblur_power"&gt;0.5&lt;/real&gt;
          &lt;/params&gt;
        &lt;/flam3_variation&gt;
      &lt;/node&gt;
    &lt;/flam3_transform&gt;
    &lt;flam3_shader name="flam3 shader"&gt;
      &lt;real name="palette_index"&gt;0.656&lt;/real&gt;
      &lt;real name="blend_speed"&gt;1&lt;/real&gt;
      &lt;real name="opacity"&gt;1&lt;/real&gt;
      &lt;table name="layer_weights"&gt;
        &lt;values&gt;1 1 1 1&lt;/values&gt;
      &lt;/table&gt;
    &lt;/flam3_shader&gt;
    &lt;weights_selector name="Iterator selection weights"&gt;
      &lt;real name="Base weight"&gt;0.5&lt;/real&gt;
      &lt;node name="per_iterator_weights"&gt;
        &lt;real name="Iterator 1 weight"&gt;1&lt;/real&gt;
        &lt;real name="Iterator 2 weight"&gt;1&lt;/real&gt;
        &lt;real name="Iterator 3 weight"&gt;1&lt;/real&gt;
        &lt;real name="Iterator 4 weight"&gt;1&lt;/real&gt;
      &lt;/node&gt;
    &lt;/weights_selector&gt;
    &lt;real name="time_scale"&gt;1&lt;/real&gt;
  &lt;/iterator&gt;
  &lt;iterator name="Iterator 4"&gt;
    &lt;flam3_transform name="flam3_xform 4"&gt;
      &lt;affine2 name="Pre affine"&gt;
        &lt;real name="x_axis_angle"&gt;0&lt;/real&gt;
        &lt;real name="x_axis_length"&gt;1&lt;/real&gt;
        &lt;real name="y_axis_angle"&gt;90&lt;/real&gt;
        &lt;real name="y_axis_length"&gt;1&lt;/real&gt;
        &lt;vec2 name="offset"&gt;0 0&lt;/vec2&gt;
      &lt;/affine2&gt;
      &lt;affine2 name="Post affine"&gt;
        &lt;real name="x_axis_angle"&gt;0&lt;/real&gt;
        &lt;real name="x_axis_length"&gt;1&lt;/real&gt;
        &lt;real name="y_axis_angle"&gt;90&lt;/real&gt;
        &lt;real name="y_axis_length"&gt;1&lt;/real&gt;
        &lt;vec2 name="offset"&gt;0.5 0.5&lt;/vec2&gt;
      &lt;/affine2&gt;
      &lt;node name="transforms"&gt;
        &lt;flam3_variation name="Transform 3"&gt;
          &lt;string name="variation_name"&gt;sineblur&lt;/string&gt;
          &lt;params&gt;
            &lt;real name="sineblur"&gt;2&lt;/real&gt;
            &lt;real name="sineblur_power"&gt;0.5&lt;/real&gt;
          &lt;/params&gt;
        &lt;/flam3_variation&gt;
      &lt;/node&gt;
    &lt;/flam3_transform&gt;
    &lt;flam3_shader name="flam3 shader"&gt;
      &lt;real name="palette_index"&gt;0.906&lt;/real&gt;
      &lt;real name="blend_speed"&gt;1&lt;/real&gt;
      &lt;real name="opacity"&gt;1&lt;/real&gt;
      &lt;table name="layer_weights"&gt;
        &lt;values&gt;1 1 1 1&lt;/values&gt;
      &lt;/table&gt;
    &lt;/flam3_shader&gt;
    &lt;weights_selector name="Iterator selection weights"&gt;
      &lt;real name="Base weight"&gt;0.5&lt;/real&gt;
      &lt;node name="per_iterator_weights"&gt;
        &lt;real name="Iterator 1 weight"&gt;1&lt;/real&gt;
        &lt;real name="Iterator 2 weight"&gt;1&lt;/real&gt;
        &lt;real name="Iterator 3 weight"&gt;1&lt;/real&gt;
        &lt;real name="Iterator 4 weight"&gt;1&lt;/real&gt;
      &lt;/node&gt;
    &lt;/weights_selector&gt;
    &lt;real name="time_scale"&gt;1&lt;/real&gt;
  &lt;/iterator&gt;
&lt;/node&gt;
&lt;colouring&gt;
  &lt;table name="flam3_palette"&gt;
    &lt;values&gt;0.50980395 0.019607844 0.26666668 0.50980395 0.019607844 0.26666668 0.50980395 0.019607844 0.26666668 0.50980395 0.019607844 0.26666668 0.50980395 0.019607844 0.26666668 0.50980395 0.019607844 0.26666668 0.50980395 0.019607844 0.26666668 0.50980395 0.019607844 0.26666668 0.50980395 0.019607844 0.26666668 0.50980395 0.019607844 0.26666668 0.50980395 0.019607844 0.26666668 0.50980395 0.019607844 0.26666668 0.50980395 0.019607844 0.26666668 0.50980395 0.019607844 0.26666668 0.50980395 0.019607844 0.26666668 0.50980395 0.019607844 0.26666668 0.50980395 0.019607844 0.26666668 0.50980395 0.019607844 0.26666668 0.50980395 0.019607844 0.26666668 0.50980395 0.019607844 0.26666668 0.50980395 0.019607844 0.26666668 0.50980395 0.019607844 0.26666668 0.50980395 0.019607844 0.26666668 0.50980395 0.019607844 0.26666668 0.50980395 0.019607844 0.26666668 0.50980395 0.019607844 0.26666668 0.50980395 0.019607844 0.26666668 0.50980395 0.019607844 0.26666668 0.50980395 0.019607844 0.26666668 0.50980395 0.019607844 0.26666668 0.50980395 0.019607844 0.26666668 0.50980395 0.019607844 0.26666668 0.50980395 0.019607844 0.26666668 0.50980395 0.019607844 0.26666668 0.50980395 0.019607844 0.26666668 0.50980395 0.019607844 0.26666668 0.50980395 0.019607844 0.26666668 0.50980395 0.019607844 0.26666668 0.50980395 0.019607844 0.26666668 0.50980395 0.019607844 0.26666668 0.50980395 0.019607844 0.26666668 0.50980395 0.019607844 0.26666668 0.50980395 0.019607844 0.26666668 0.50980395 0.019607844 0.26666668 0.50980395 0.019607844 0.26666668 0.50980395 0.019607844 0.26666668 0.50980395 0.019607844 0.26666668 0.50980395 0.019607844 0.26666668 0.50980395 0.019607844 0.26666668 0.50980395 0.019607844 0.26666668 0.50980395 0.019607844 0.26666668 0.50980395 0.019607844 0.26666668 0.50980395 0.019607844 0.26666668 0.50980395 0.019607844 0.26666668 0.50980395 0.019607844 0.26666668 0.50980395 0.019607844 0.26666668 0.50980395 0.019607844 0.26666668 0.41176474 0.019607844 0.2627451 0.3137255 0.019607844 0.25882354 0.21568629 0.019607844 0.2509804 0.11764707 0.019607844 0.24705884 0.019607844 0.019607844 0.24313727 0.019607844 0.019607844 0.24313727 0.019607844 0.019607844 0.24313727 0.019607844 0.019607844 0.24313727 0.019607844 0.019607844 0.24313727 0.019607844 0.019607844 0.24313727 0.019607844 0.019607844 0.24313727 0.019607844 0.019607844 0.24313727 0.019607844 0.019607844 0.24313727 0.019607844 0.019607844 0.24313727 0.019607844 0.019607844 0.24313727 0.019607844 0.019607844 0.24313727 0.019607844 0.019607844 0.24313727 0.019607844 0.019607844 0.24313727 0.019607844 0.019607844 0.24313727 0.019607844 0.019607844 0.24313727 0.019607844 0.019607844 0.24313727 0.019607844 0.019607844 0.24313727 0.019607844 0.019607844 0.24313727 0.019607844 0.019607844 0.24313727 0.019607844 0.019607844 0.24313727 0.019607844 0.019607844 0.24313727 0.019607844 0.019607844 0.24313727 0.019607844 0.019607844 0.24313727 0.019607844 0.019607844 0.24313727 0.019607844 0.019607844 0.24313727 0.019607844 0.019607844 0.24313727 0.019607844 0.019607844 0.24313727 0.019607844 0.019607844 0.24313727 0.019607844 0.019607844 0.24313727 0.019607844 0.019607844 0.24313727 0.019607844 0.019607844 0.24313727 0.019607844 0.019607844 0.24313727 0.019607844 0.019607844 0.24313727 0.019607844 0.019607844 0.24313727 0.019607844 0.019607844 0.24313727 0.019607844 0.019607844 0.24313727 0.019607844 0.019607844 0.24313727 0.019607844 0.019607844 0.24313727 0.019607844 0.019607844 0.24313727 0.019607844 0.019607844 0.24313727 0.019607844 0.019607844 0.24313727 0.019607844 0.019607844 0.24313727 0.019607844 0.019607844 0.24313727 0.019607844 0.019607844 0.24313727 0.019607844 0.019607844 0.24313727 0.019607844 0.019607844 0.24313727 0.019607844 0.019607844 0.24313727 0.019607844 0.019607844 0.24313727 0.019607844 0.019607844 0.24313727 0.019607844 0.019607844 0.24313727 0.019607844 0.019607844 0.24313727 0.019607844 0.019607844 0.24313727 0.019607844 0.019607844 0.24313727 0.019607844 0.019607844 0.24313727 0.019607844 0.019607844 0.24313727 0.019607844 0.019607844 0.24313727 0.019607844 0.019607844 0.24313727 0.019607844 0.019607844 0.24313727 0.019607844 0.019607844 0.24313727 0.019607844 0.019607844 0.24313727 0.019607844 0.14117648 0.2509804 0.019607844 0.26666668 0.25490198 0.019607844 0.38823533 0.25882354 0.019607844 0.50980395 0.26666668 0.019607844 0.50980395 0.26666668 0.019607844 0.50980395 0.26666668 0.019607844 0.50980395 0.26666668 0.019607844 0.50980395 0.26666668 0.019607844 0.50980395 0.26666668 0.019607844 0.50980395 0.26666668 0.019607844 0.50980395 0.26666668 0.019607844 0.50980395 0.26666668 0.019607844 0.50980395 0.26666668 0.019607844 0.50980395 0.26666668 0.019607844 0.50980395 0.26666668 0.019607844 0.50980395 0.26666668 0.019607844 0.50980395 0.26666668 0.019607844 0.50980395 0.26666668 0.019607844 0.50980395 0.26666668 0.019607844 0.50980395 0.26666668 0.019607844 0.50980395 0.26666668 0.019607844 0.50980395 0.26666668 0.019607844 0.50980395 0.26666668 0.019607844 0.50980395 0.26666668 0.019607844 0.50980395 0.26666668 0.019607844 0.50980395 0.26666668 0.019607844 0.50980395 0.26666668 0.019607844 0.50980395 0.26666668 0.019607844 0.50980395 0.26666668 0.019607844 0.50980395 0.26666668 0.019607844 0.50980395 0.26666668 0.019607844 0.50980395 0.26666668 0.019607844 0.50980395 0.26666668 0.019607844 0.50980395 0.26666668 0.019607844 0.50980395 0.26666668 0.019607844 0.50980395 0.26666668 0.019607844 0.50980395 0.26666668 0.019607844 0.50980395 0.26666668 0.019607844 0.50980395 0.26666668 0.019607844 0.50980395 0.26666668 0.019607844 0.50980395 0.26666668 0.019607844 0.50980395 0.26666668 0.019607844 0.50980395 0.26666668 0.019607844 0.50980395 0.26666668 0.019607844 0.50980395 0.26666668 0.019607844 0.50980395 0.26666668 0.019607844 0.50980395 0.26666668 0.019607844 0.50980395 0.26666668 0.019607844 0.50980395 0.26666668 0.019607844 0.50980395 0.26666668 0.019607844 0.50980395 0.26666668 0.019607844 0.50980395 0.26666668 0.019607844 0.50980395 0.26666668 0.019607844 0.50980395 0.26666668 0.019607844 0.50980395 0.26666668 0.019607844 0.50980395 0.26666668 0.019607844 0.50980395 0.26666668 0.019607844 0.50980395 0.26666668 0.019607844 0.50980395 0.26666668 0.019607844 0.50980395 0.26666668 0.019607844 0.50980395 0.26666668 0.019607844 0.50980395 0.26666668 0.019607844 0.50980395 0.26666668 0.019607844 0.50980395 0.26666668 0.15686275 0.5254902 0.27450982 0.2901961 0.5372549 0.28235295 0.427451 0.54901963 0.28627452 0.5647059 0.5647059 0.29411766 0.5647059 0.5647059 0.29411766 0.5647059 0.5647059 0.29411766 0.5647059 0.5647059 0.29411766 0.5647059 0.5647059 0.29411766 0.5647059 0.5647059 0.29411766 0.5647059 0.5647059 0.29411766 0.5647059 0.5647059 0.29411766 0.5647059 0.5647059 0.29411766 0.5647059 0.5647059 0.29411766 0.5647059 0.5647059 0.29411766 0.5647059 0.5647059 0.29411766 0.5647059 0.5647059 0.29411766 0.5647059 0.5647059 0.29411766 0.5647059 0.5647059 0.29411766 0.5647059 0.5647059 0.29411766 0.5647059 0.5647059 0.29411766 0.5647059 0.5647059 0.29411766 0.5647059 0.5647059 0.29411766 0.5647059 0.5647059 0.29411766 0.5647059 0.5647059 0.29411766 0.5647059 0.5647059 0.29411766 0.5647059 0.5647059 0.29411766 0.5647059 0.5647059 0.29411766 0.5647059 0.5647059 0.29411766 0.5647059 0.5647059 0.29411766 0.5647059 0.5647059 0.29411766 0.5647059 0.5647059 0.29411766 0.5647059 0.5647059 0.29411766 0.5647059 0.5647059 0.29411766 0.5647059 0.5647059 0.29411766 0.5647059 0.5647059 0.29411766 0.5647059 0.5647059 0.29411766 0.5647059 0.5647059 0.29411766 0.5647059 0.5647059 0.29411766 0.5647059 0.5647059 0.29411766 0.5647059 0.5647059 0.29411766 0.5647059 0.5647059 0.29411766 0.5647059 0.5647059 0.29411766 0.5647059 0.5647059 0.29411766 0.5647059 0.5647059 0.29411766 0.5647059 0.5647059 0.29411766 0.5647059 0.5647059 0.29411766 0.5647059 0.5647059 0.29411766 0.5647059 0.5647059 0.29411766 0.5647059 0.5647059 0.29411766 0.5647059 0.5647059 0.29411766 0.5647059 0.5647059 0.29411766 0.5647059 0.5647059 0.29411766 0.5647059 0.5647059 0.29411766 0.5647059 0.5647059 0.29411766 0.5647059 0.5647059 0.29411766 0.5647059 0.5647059 0.29411766 0.5647059 0.5647059 0.29411766 0.5647059 0.5647059 0.29411766 0.5647059 0.5647059 0.29411766 0.5647059 0.5647059 0.29411766 0.5647059 0.5647059 0.29411766 0.5647059 0.5647059 0.29411766 0.5647059 0.5647059 0.29411766 0.5647059 0.5647059 0.29411766 0.5647059 0.5647059 0.29411766 0.5647059 0.5647059 0.29411766 0.5647059 0.5647059 0.29411766 0.5647059 0.5647059 0.29411766 0.5647059 0.5647059 0.29411766 0.5647059 0.5647059 0.29411766&lt;/values&gt;
  &lt;/table&gt;
&lt;/colouring&gt;
&lt;/IFS&gt;
&lt;/world&gt;
</code></pre></div></div>

<h2 id="how-to-use-it">How to use it</h2>

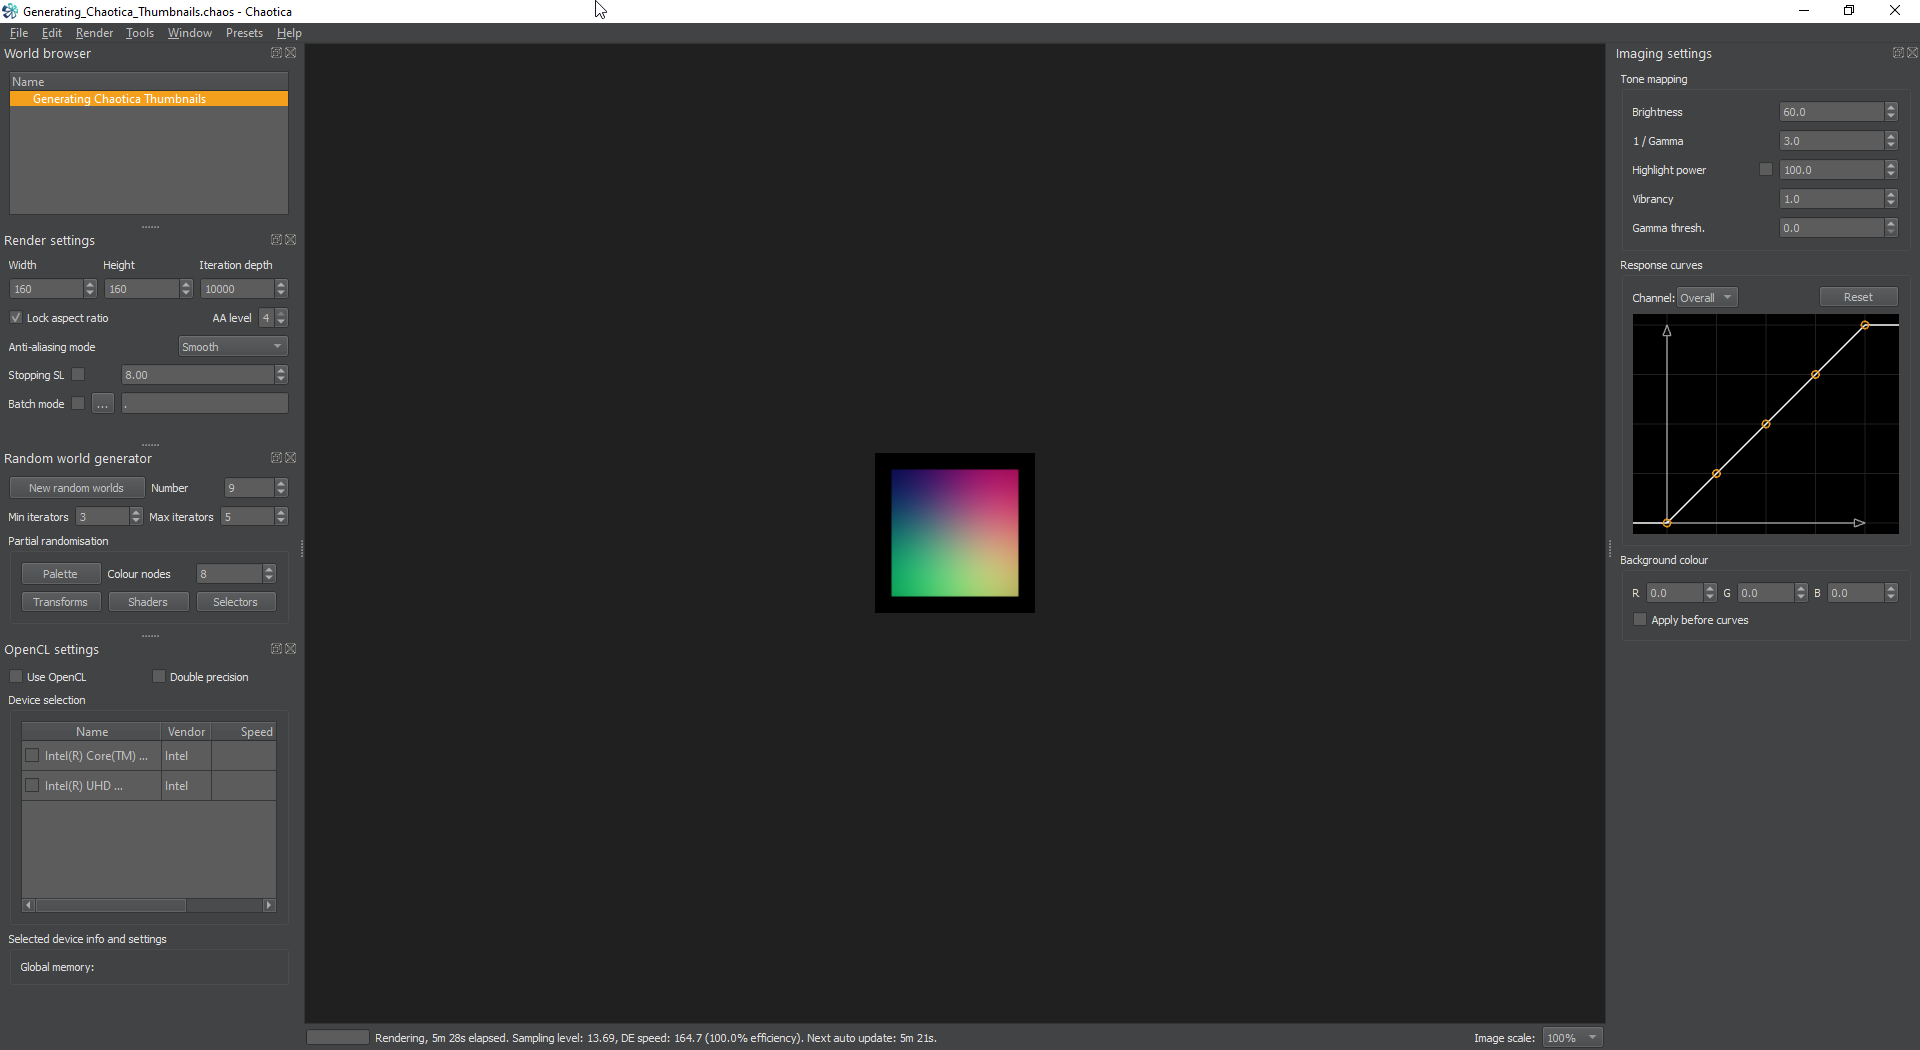
<p>Now, when you open the file, you’ll see a rainbow square. This is normal.</p>

<p><a href="/assets/images/chaotica-generating-transform-previews/chaotica_2021-06-26_09-13-29.png"><img src="/assets/images/chaotica-generating-transform-previews/chaotica_2021-06-26_09-13-29.png" alt="First Open" /></a></p>

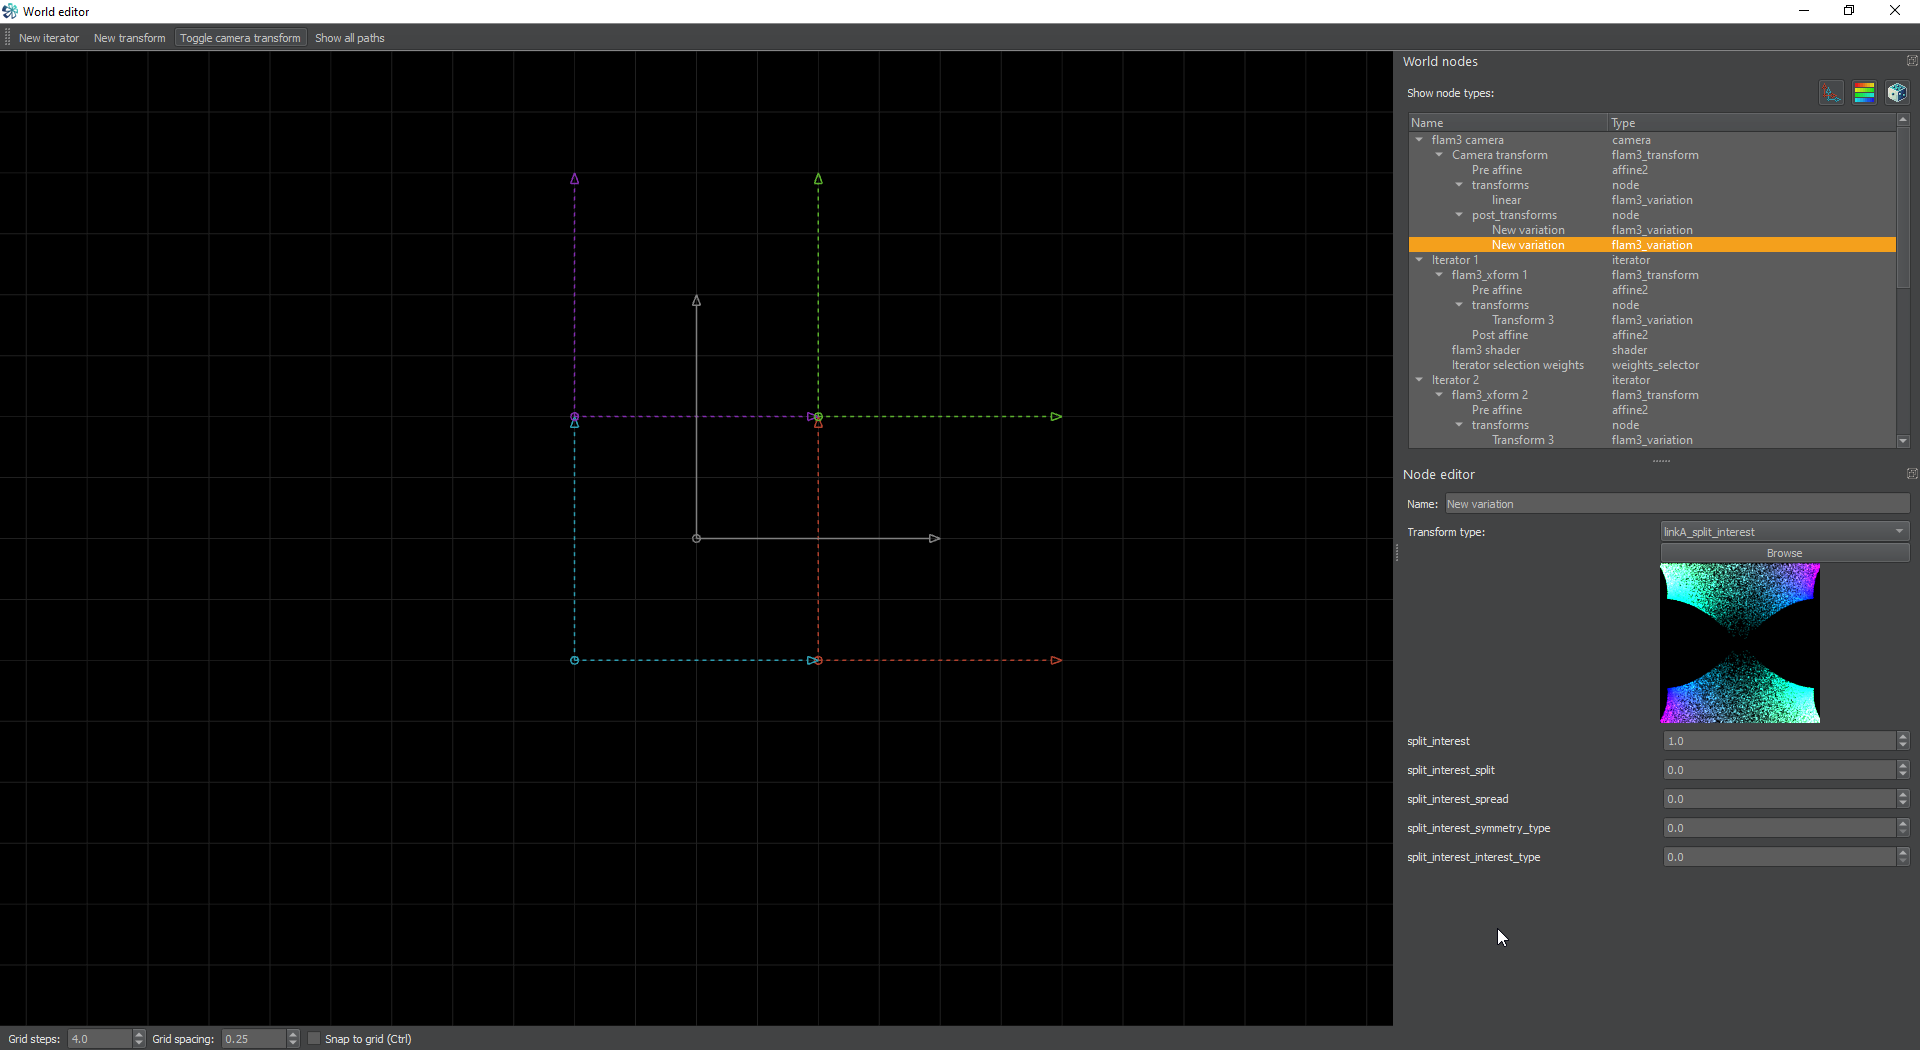
<p>Next, go to the camera transform. Click on the second post transform and change that to the transform you want an image of. Save the image.</p>

<p><a href="/assets/images/chaotica-generating-transform-previews/chaotica_2021-06-26_09-16-38.png"><img src="/assets/images/chaotica-generating-transform-previews/chaotica_2021-06-26_09-16-38.png" alt="Editor Window" /></a></p>

<p>Move this generated image to the following folder.</p>

<p><code class="language-plaintext highlighter-rouge">C:\Program Files\Chaotica\data\transform_thumbs</code></p>

<p>Yeah…that was a bit too easy, right?</p>

<h3 id="note">Note</h3>

<p>Sometimes it may be a good idea to adjust the transform’s variables in order to get a preview image that better reflects what the transform does. I would suggest using your own judgement and making it look the way you prefer.</p>

<p>Optional: If you did change the variables for the preview to look better, you may want to save those values inside the transform code using the “demoval” tag. For example, the default values for the curl transform are <code class="language-plaintext highlighter-rouge">curl_c1=0, curl_c1=0&lt;&gt;</code>, but the preview uses the values <code class="language-plaintext highlighter-rouge">curl_c1=0.25, curl_c2=-0.2</code>. And this is how it looks like inside curl’s code:</p>

<div class="language-plaintext highlighter-rouge"><div class="highlight"><pre class="highlight"><code>&lt;transform_def name="curl"&gt;
        &lt;node name="input_params"&gt;
            &lt;real name="curl"&gt;1&lt;/real&gt;
            &lt;real name="curl_c1" demoval="0.25"&gt;0&lt;/real&gt;
            &lt;real name="curl_c2" demoval="-0.2"&gt;0&lt;/real&gt;
        &lt;/node&gt;
</code></pre></div></div>

<p>Good luck friends!</p>]]></content><author><name>Pugnacious</name></author><category term="fractal" /><category term="chaotica" /><summary type="html"><![CDATA[This is a tutorial on generating transform previews]]></summary></entry><entry><title type="html">Chaotica: Elliptic-Splits Part 2</title><link href="https://www.pug.fyi/chaotica/elliptic/splits/part2" rel="alternate" type="text/html" title="Chaotica: Elliptic-Splits Part 2" /><published>2021-06-17T00:00:00+00:00</published><updated>2021-06-17T00:00:00+00:00</updated><id>https://www.pug.fyi/chaotica/elliptic/splits/Choatica-Elliptic-Splits-Part2</id><content type="html" xml:base="https://www.pug.fyi/chaotica/elliptic/splits/part2"><![CDATA[<p><a href="/assets/images/chaotica-esplits-part2/Roman Arcana.png"><img src="/assets/images/chaotica-esplits-part2/Roman Arcana.png" alt="Final Image" /></a></p>

<h2 id="introduction">Introduction</h2>

<p>This tutorial will build on the <a href="https://www.pug.fyi/chaotica/elliptic/splits">Elliptic Splits</a> tutorial. If you haven’t read it yet, please check it out first as this starts where that one leaves off. Start with Method 2 from the previous tutorial. Once you’re there, make a save so we can come back there at a later point. It’s a very good habit to get into. I tend to create a basic effect and then save at a point where I can start modifying. That way I can come back to that point and take it in new directions and play with various effects.</p>

<h2 id="credits">Credits</h2>

<p>This is a collaboration between myself and Crystalize but a huge thanks to the fractal community is also in order.</p>

<blockquote>
  <p><em>If I have seen further than others, it is by standing upon the shoulders of giants. - Isaac Newton</em></p>
</blockquote>

<h2 id="beginnings">Beginnings</h2>

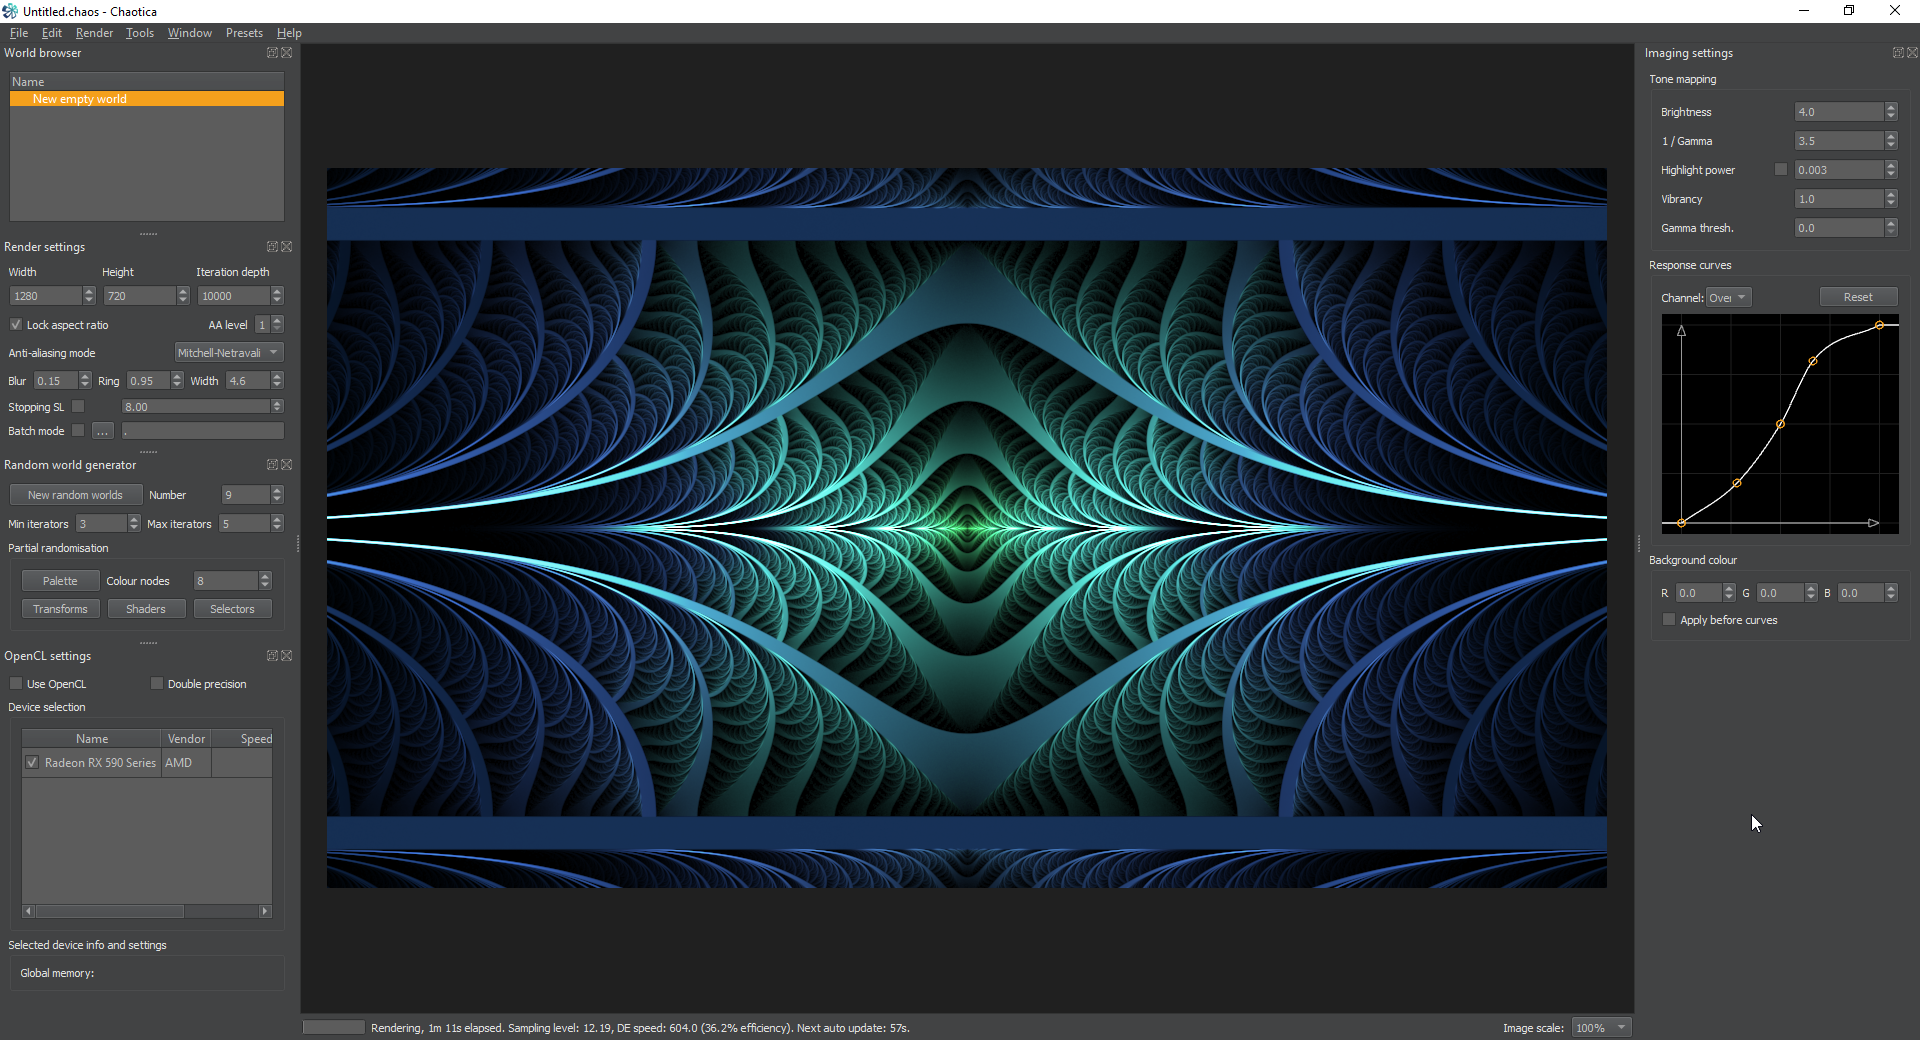
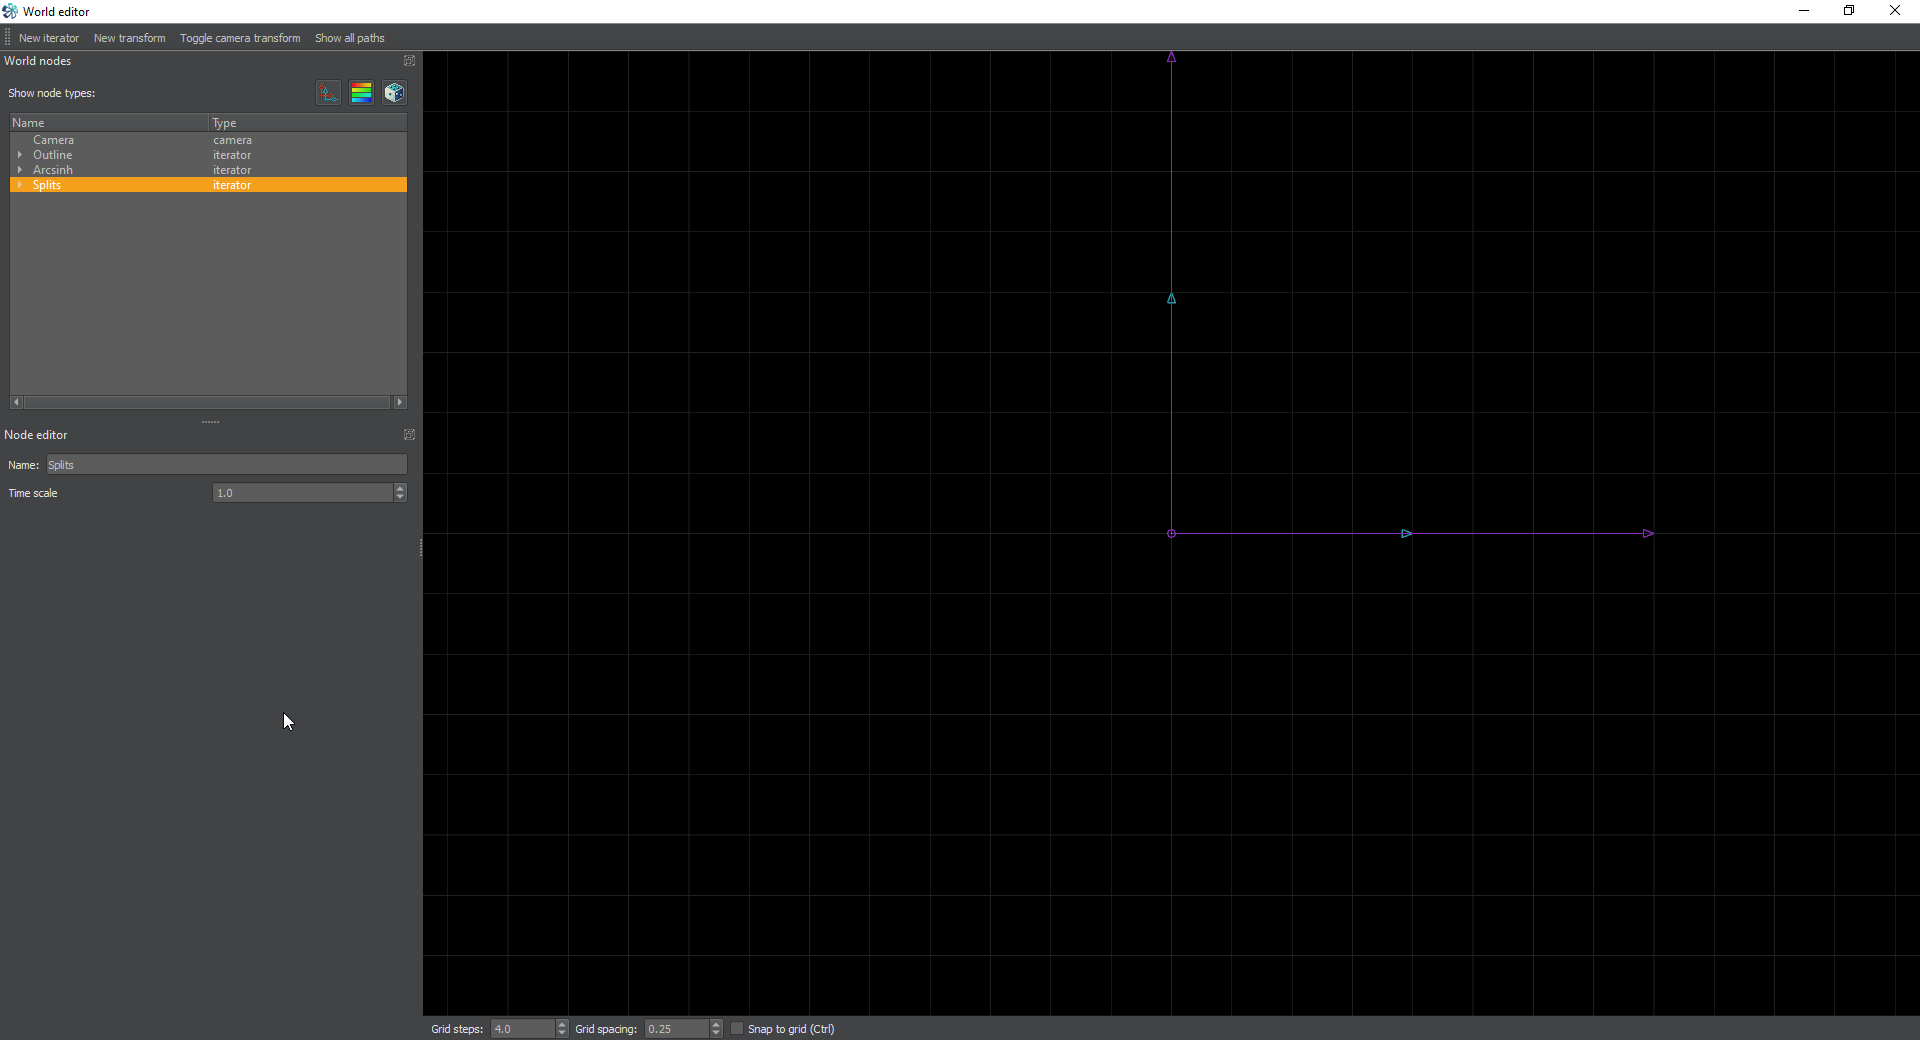
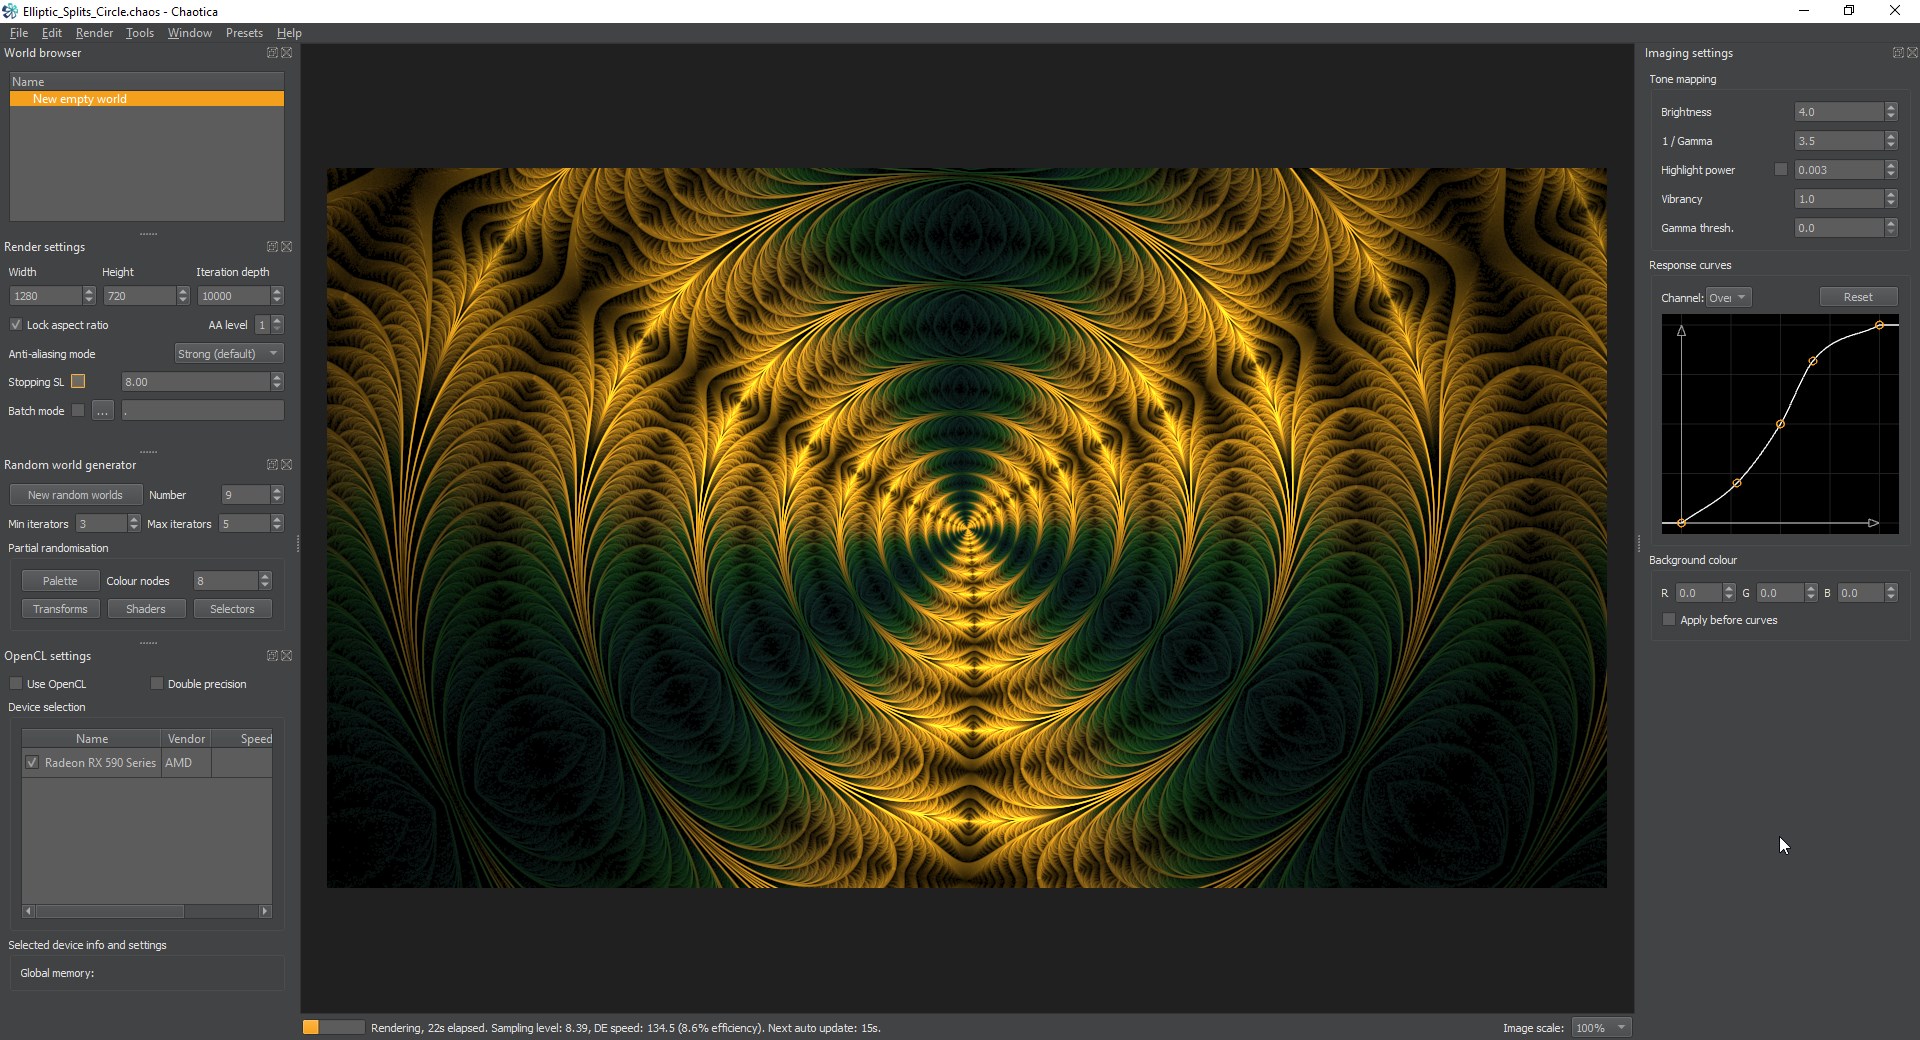
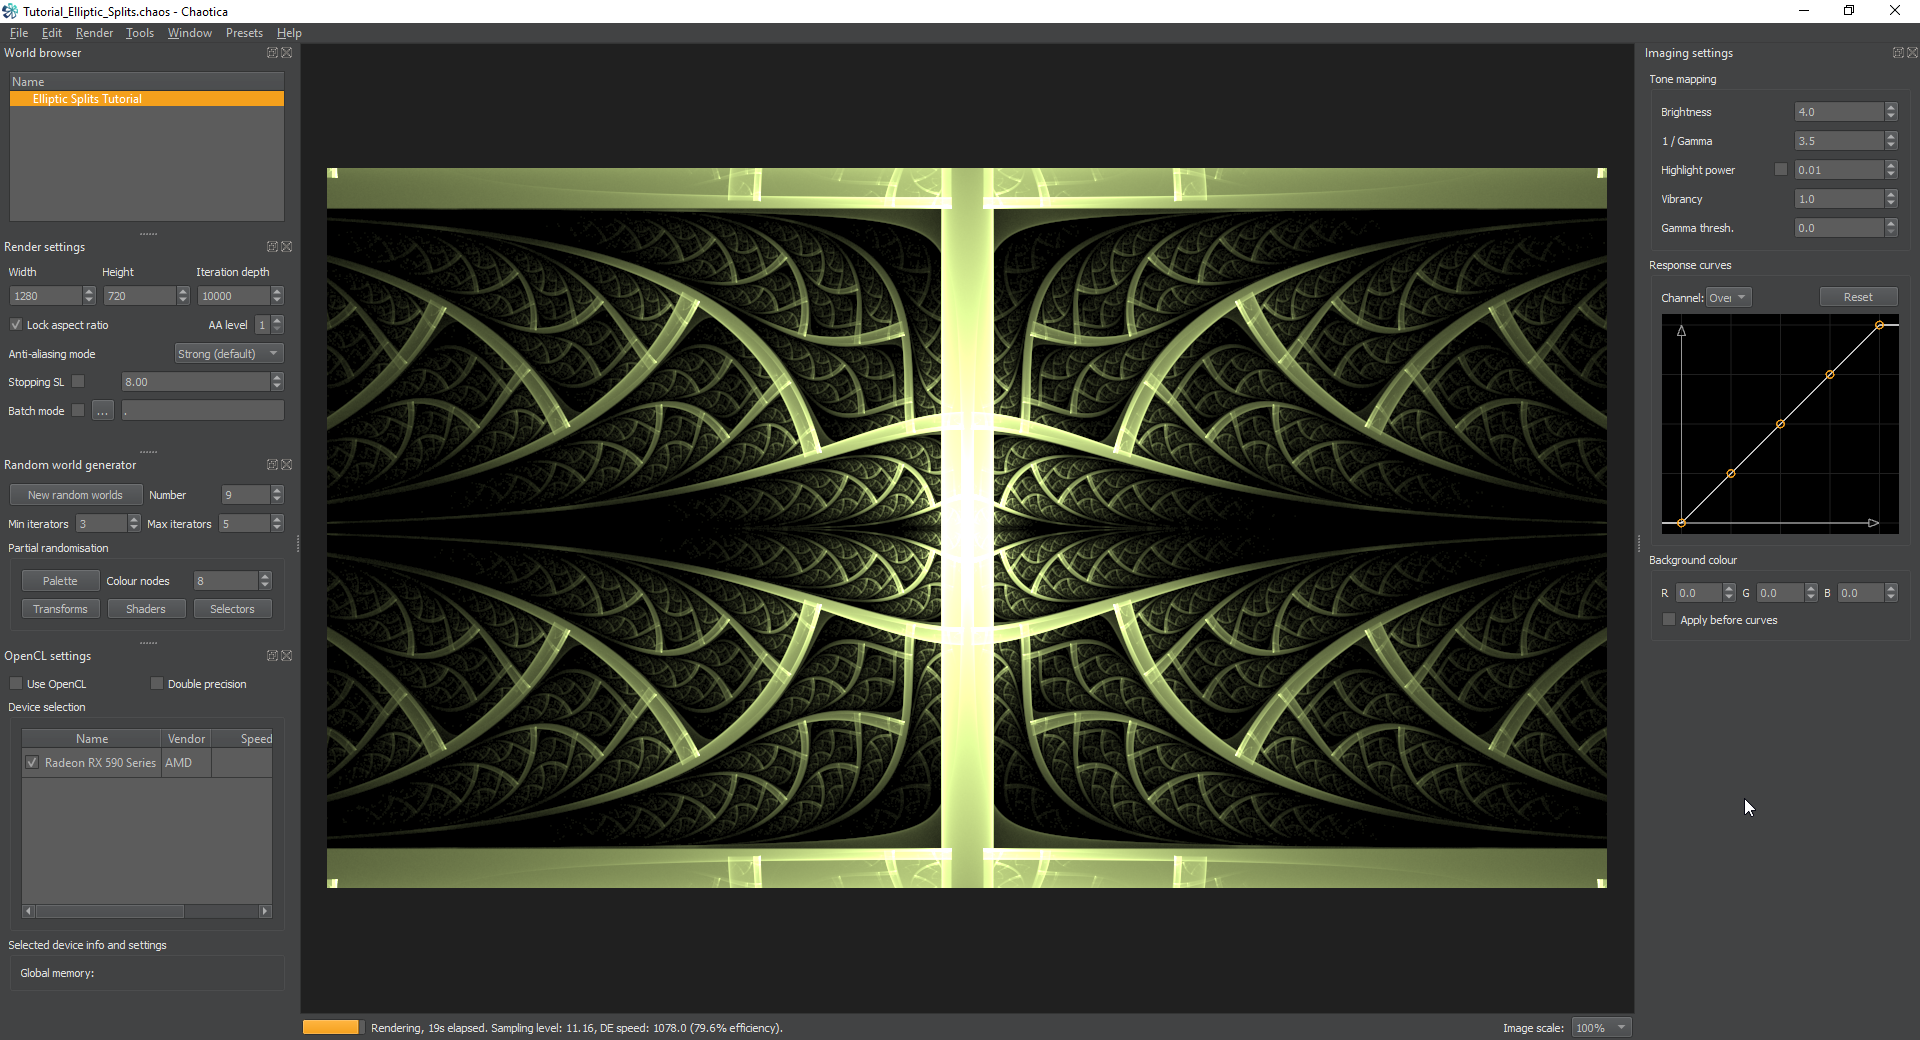
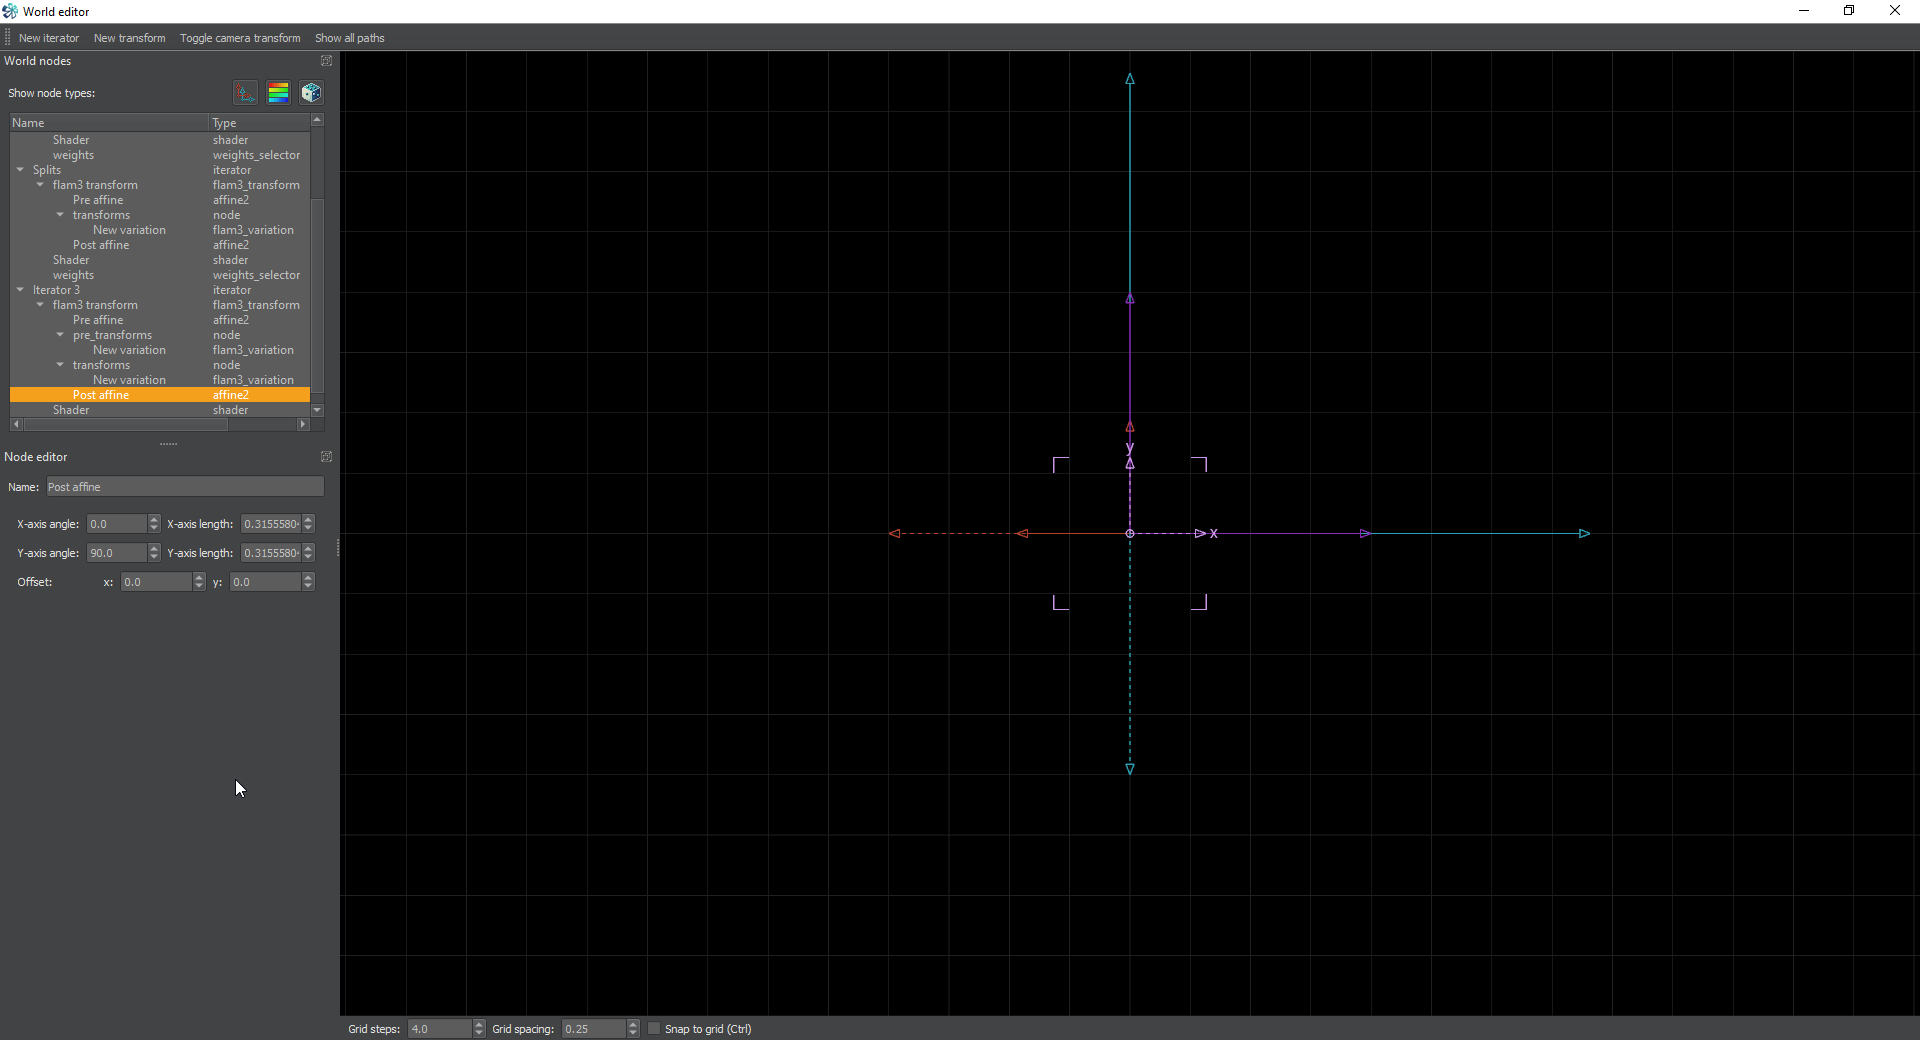
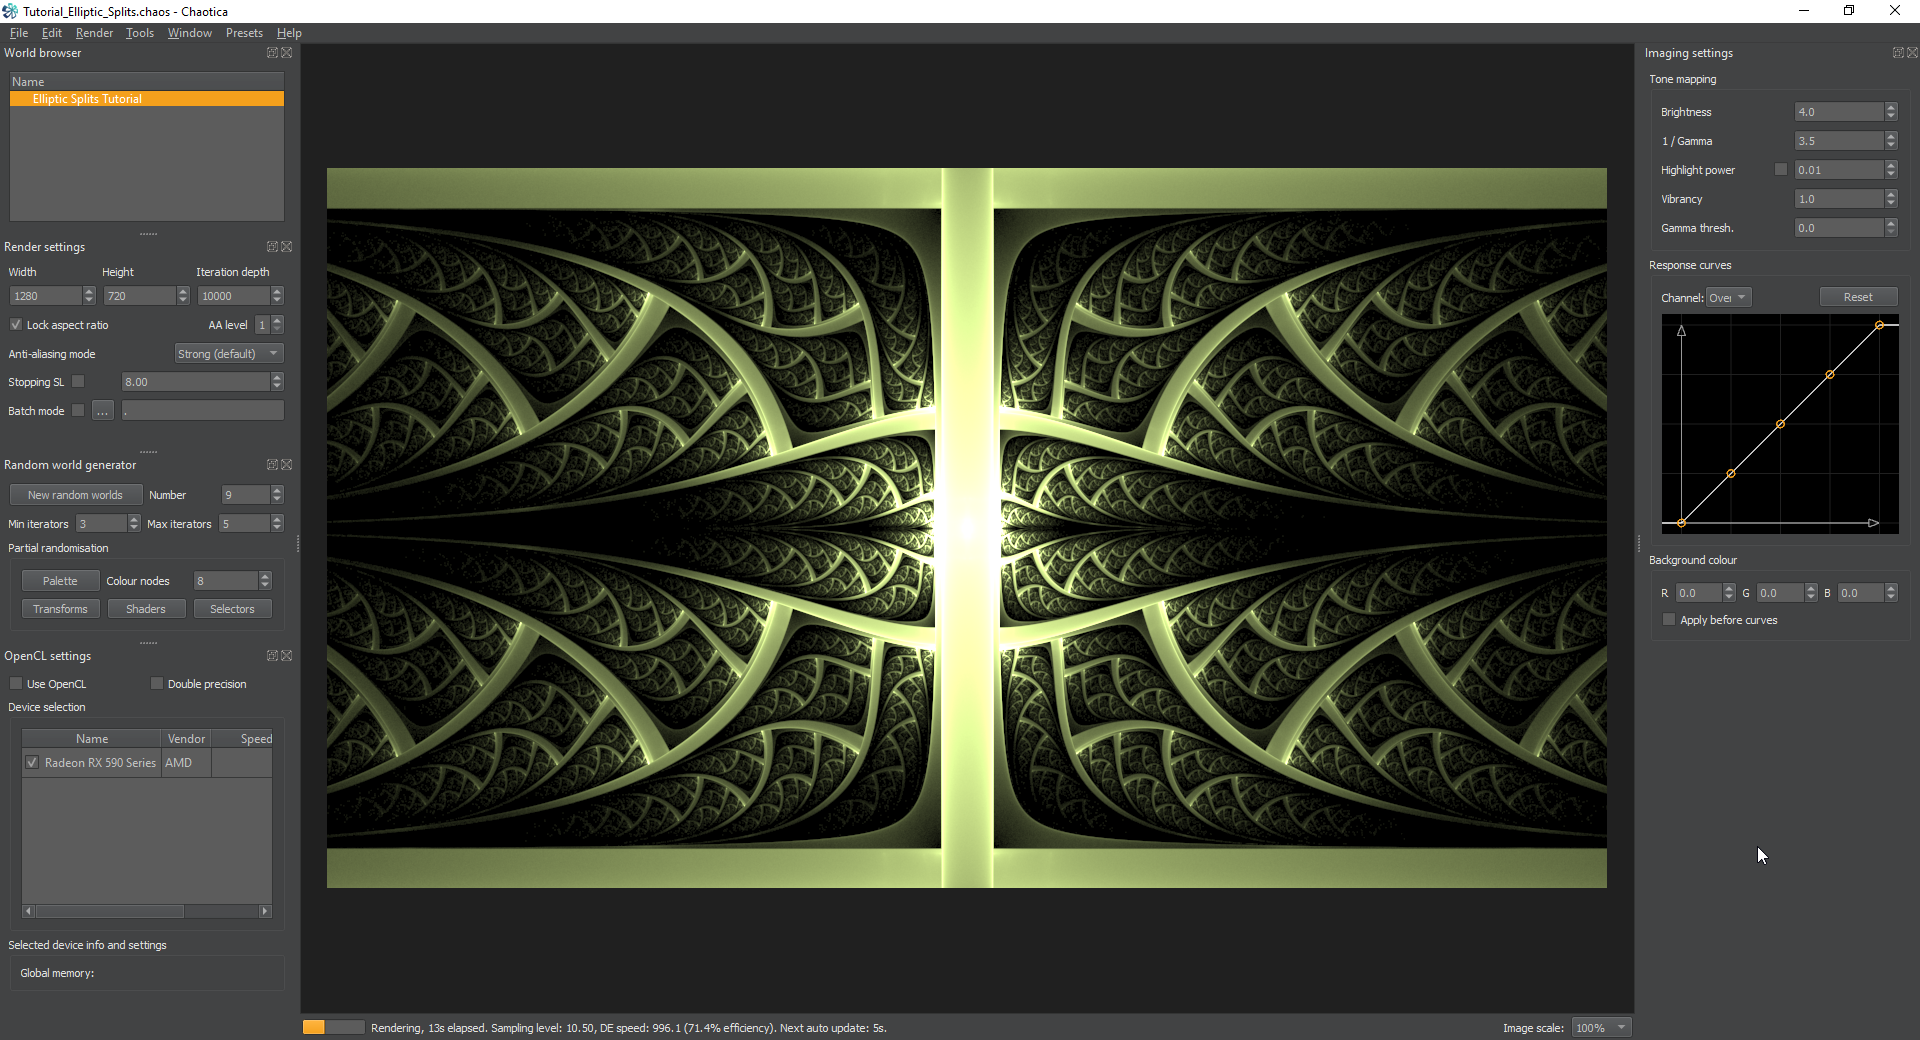
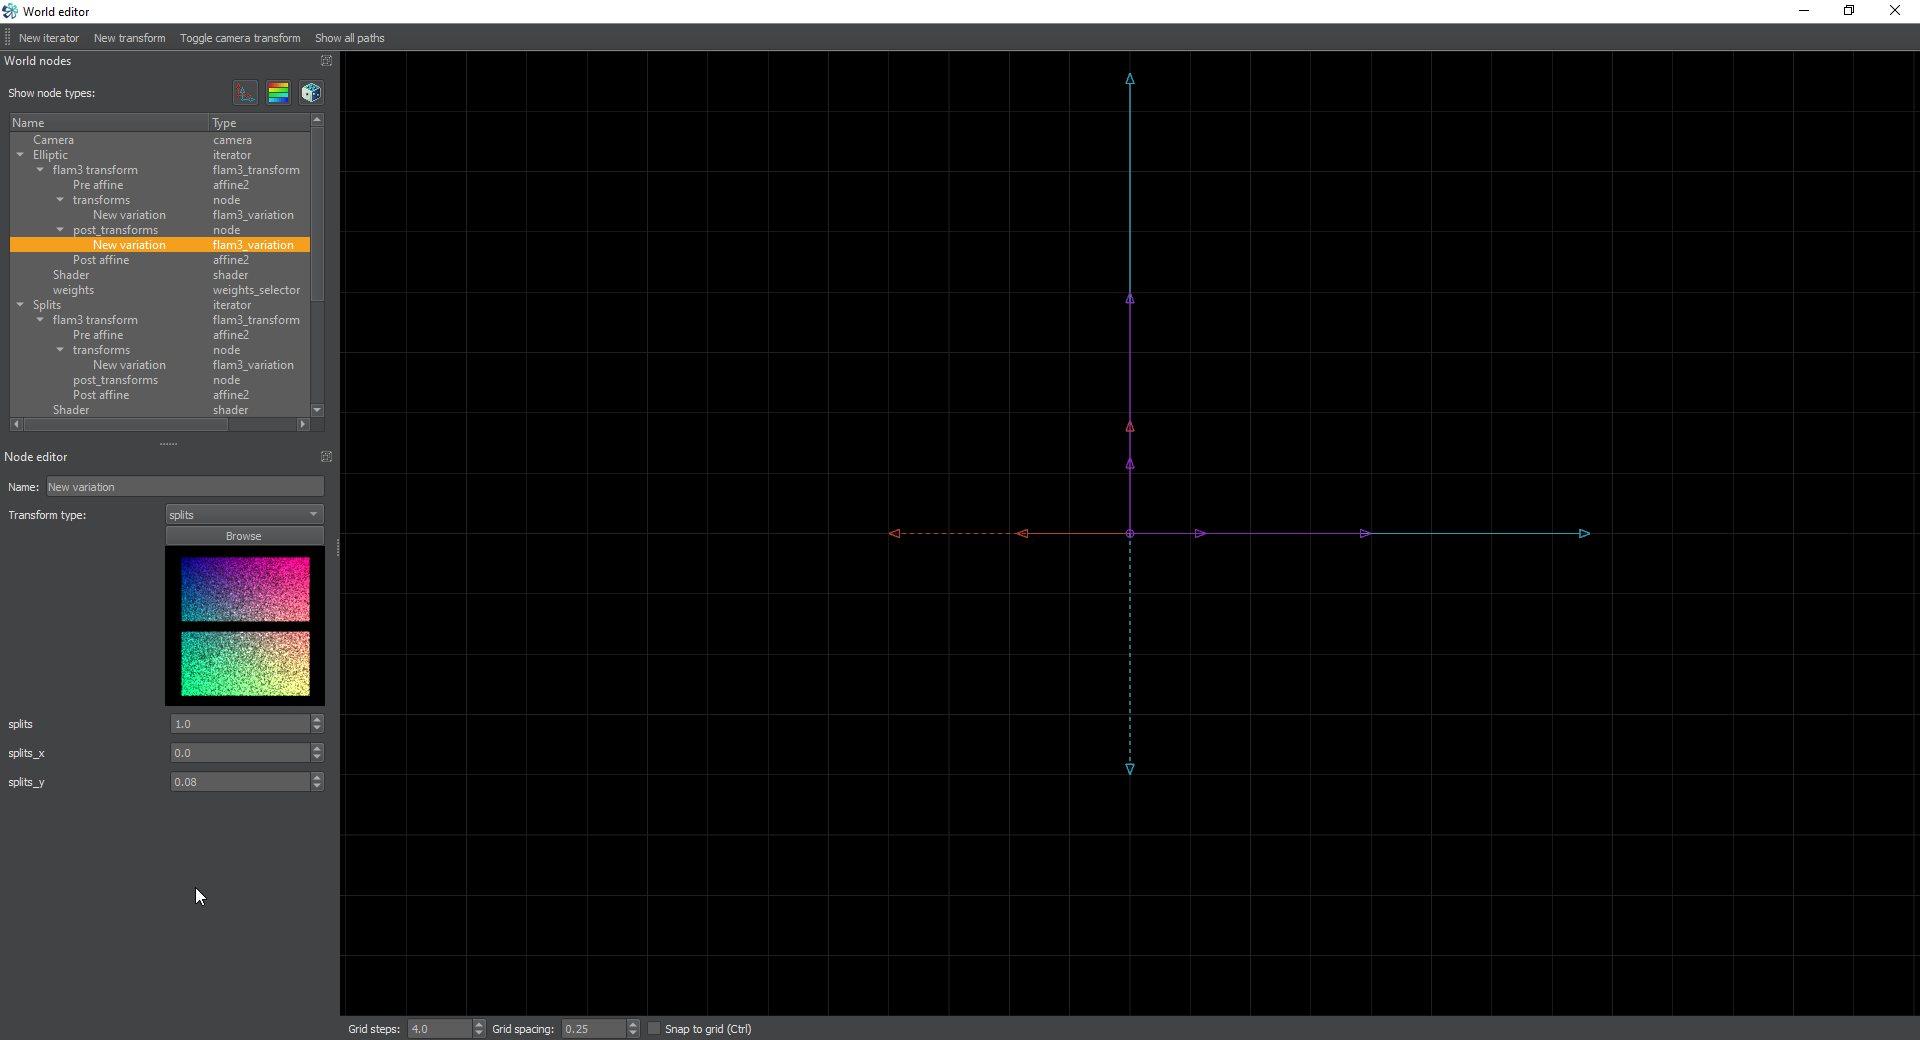
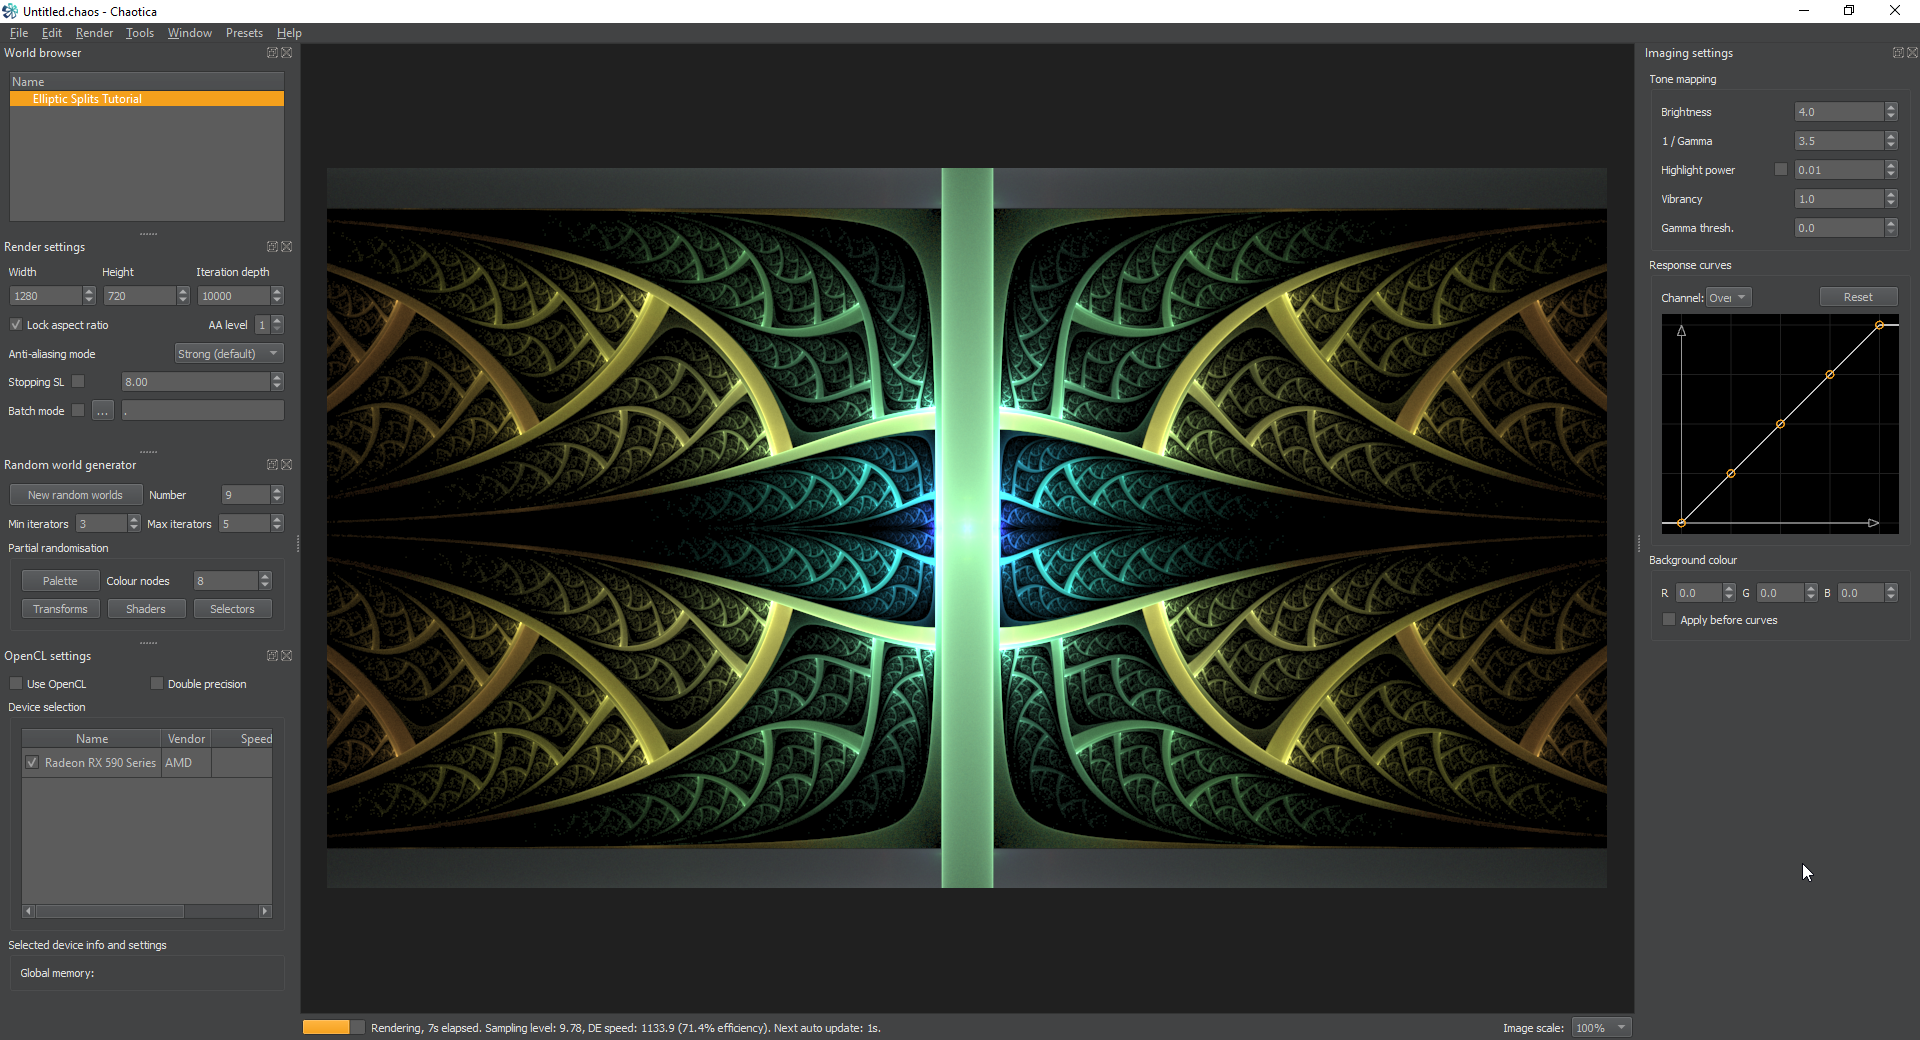
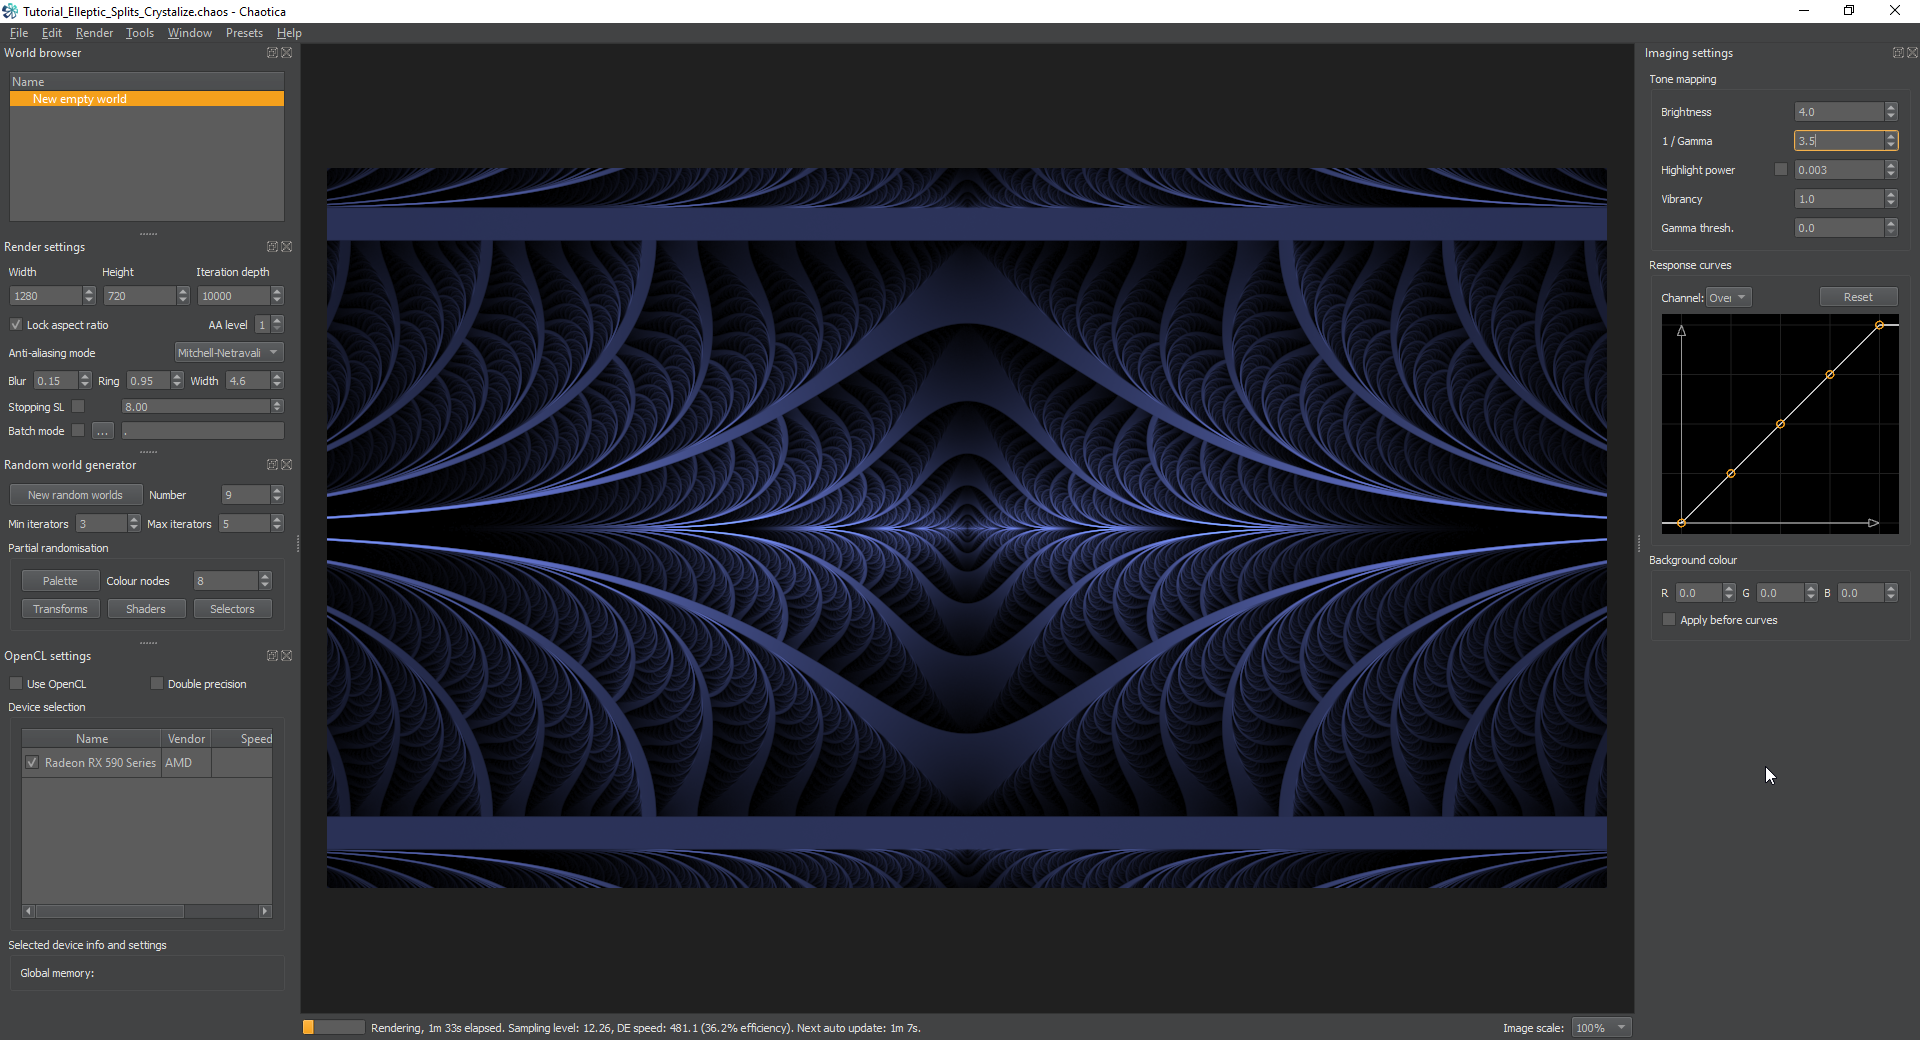
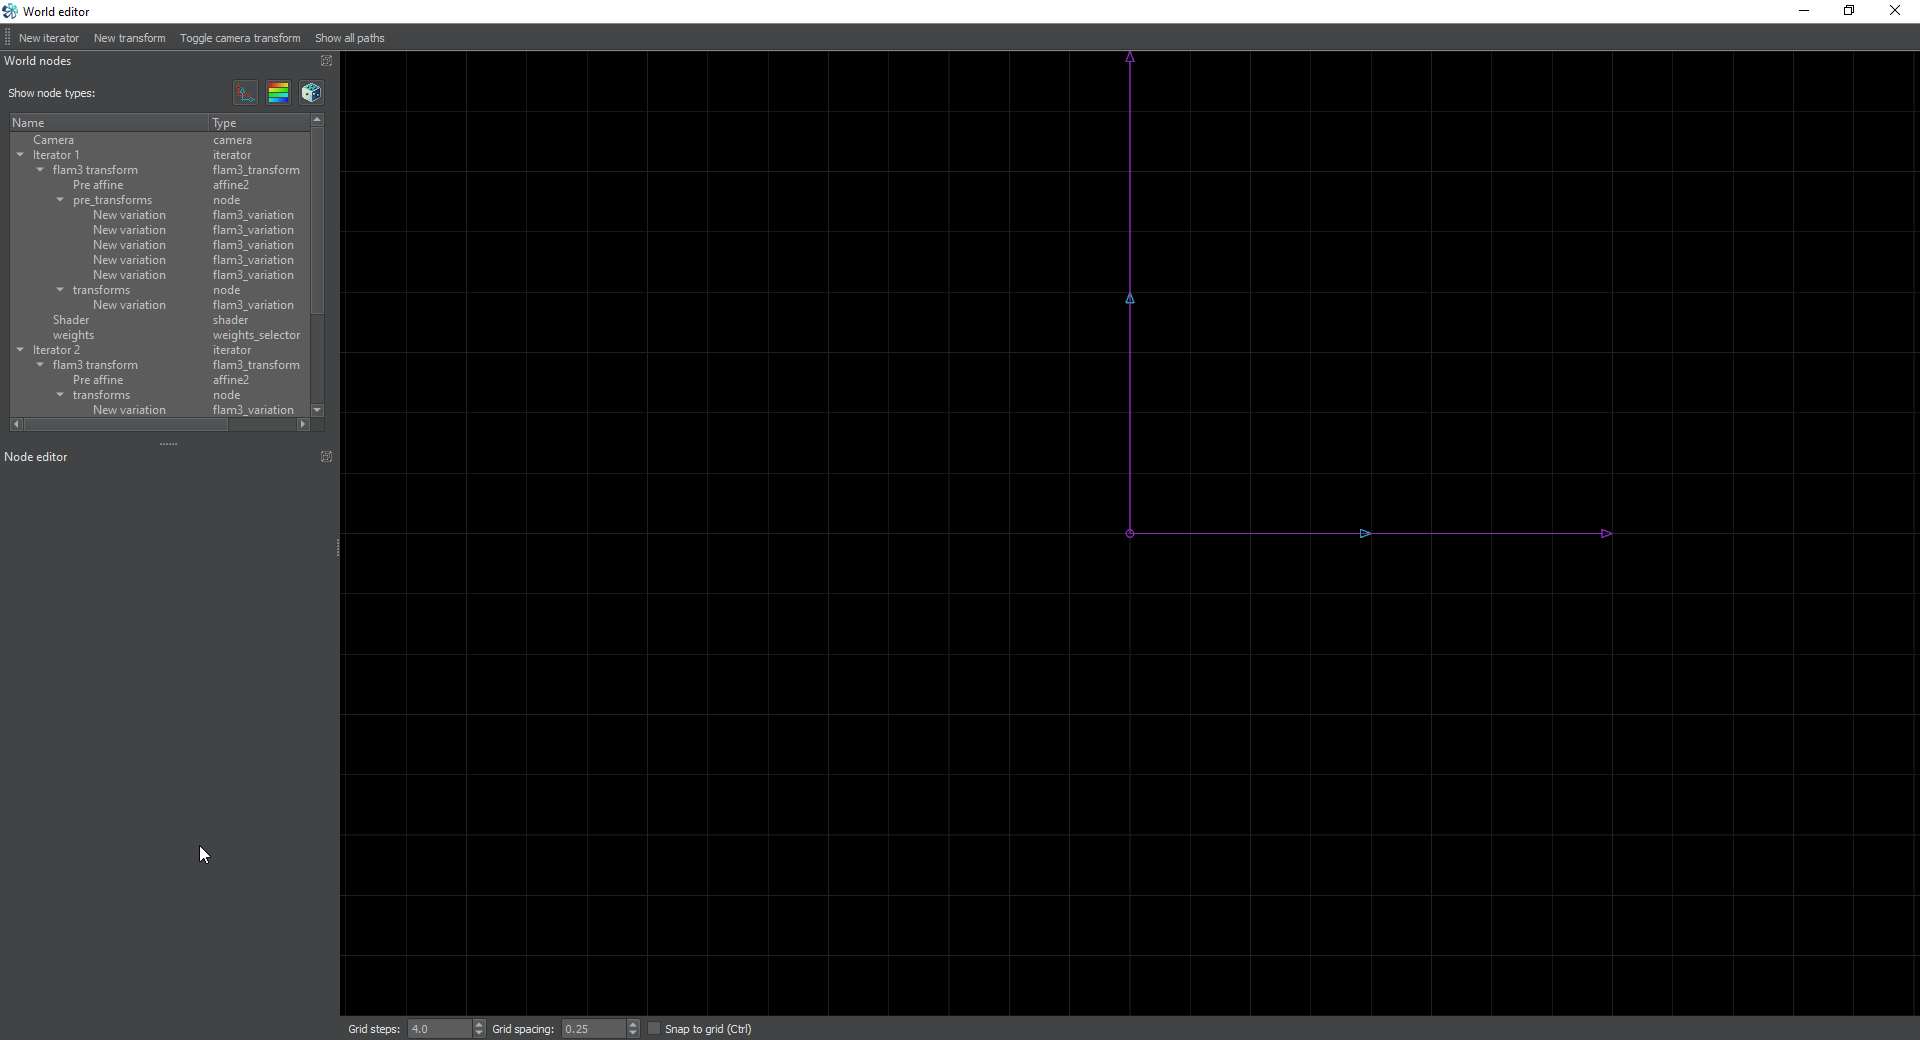
<p>To start off with, you should be at roughly this point with no modifications.</p>

<p><a href="/assets/images/chaotica-esplits-part2/chaotica_aVRjmNSECZ.png"><img src="/assets/images/chaotica-esplits-part2/chaotica_aVRjmNSECZ.png" alt="Intro main" /></a> <a href="/assets/images/chaotica-esplits-part2/chaotica_VVyZWVQZam.png"><img src="/assets/images/chaotica-esplits-part2/chaotica_VVyZWVQZam.png" alt="Intro editor" /></a></p>

<p>We’re going to use another iterator to wrap this into a circle.</p>

<h2 id="circle-wrap">Circle wrap</h2>

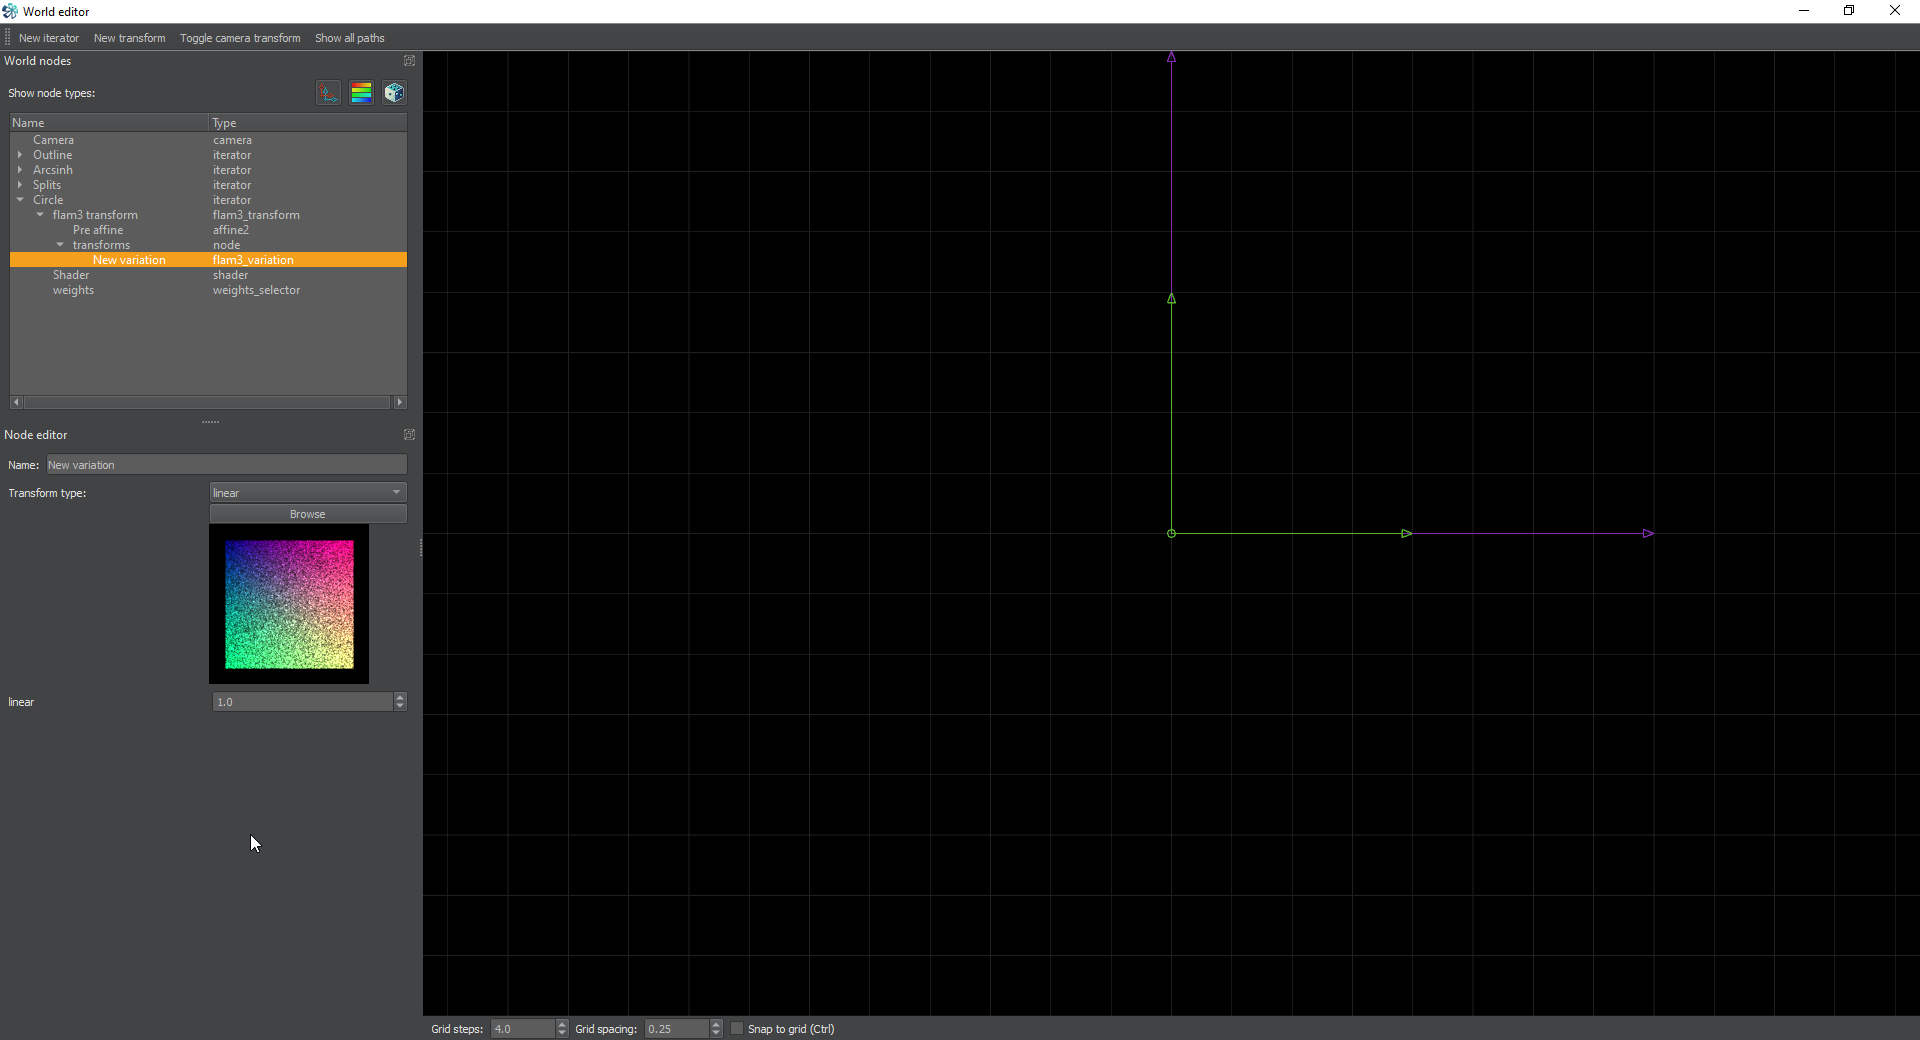
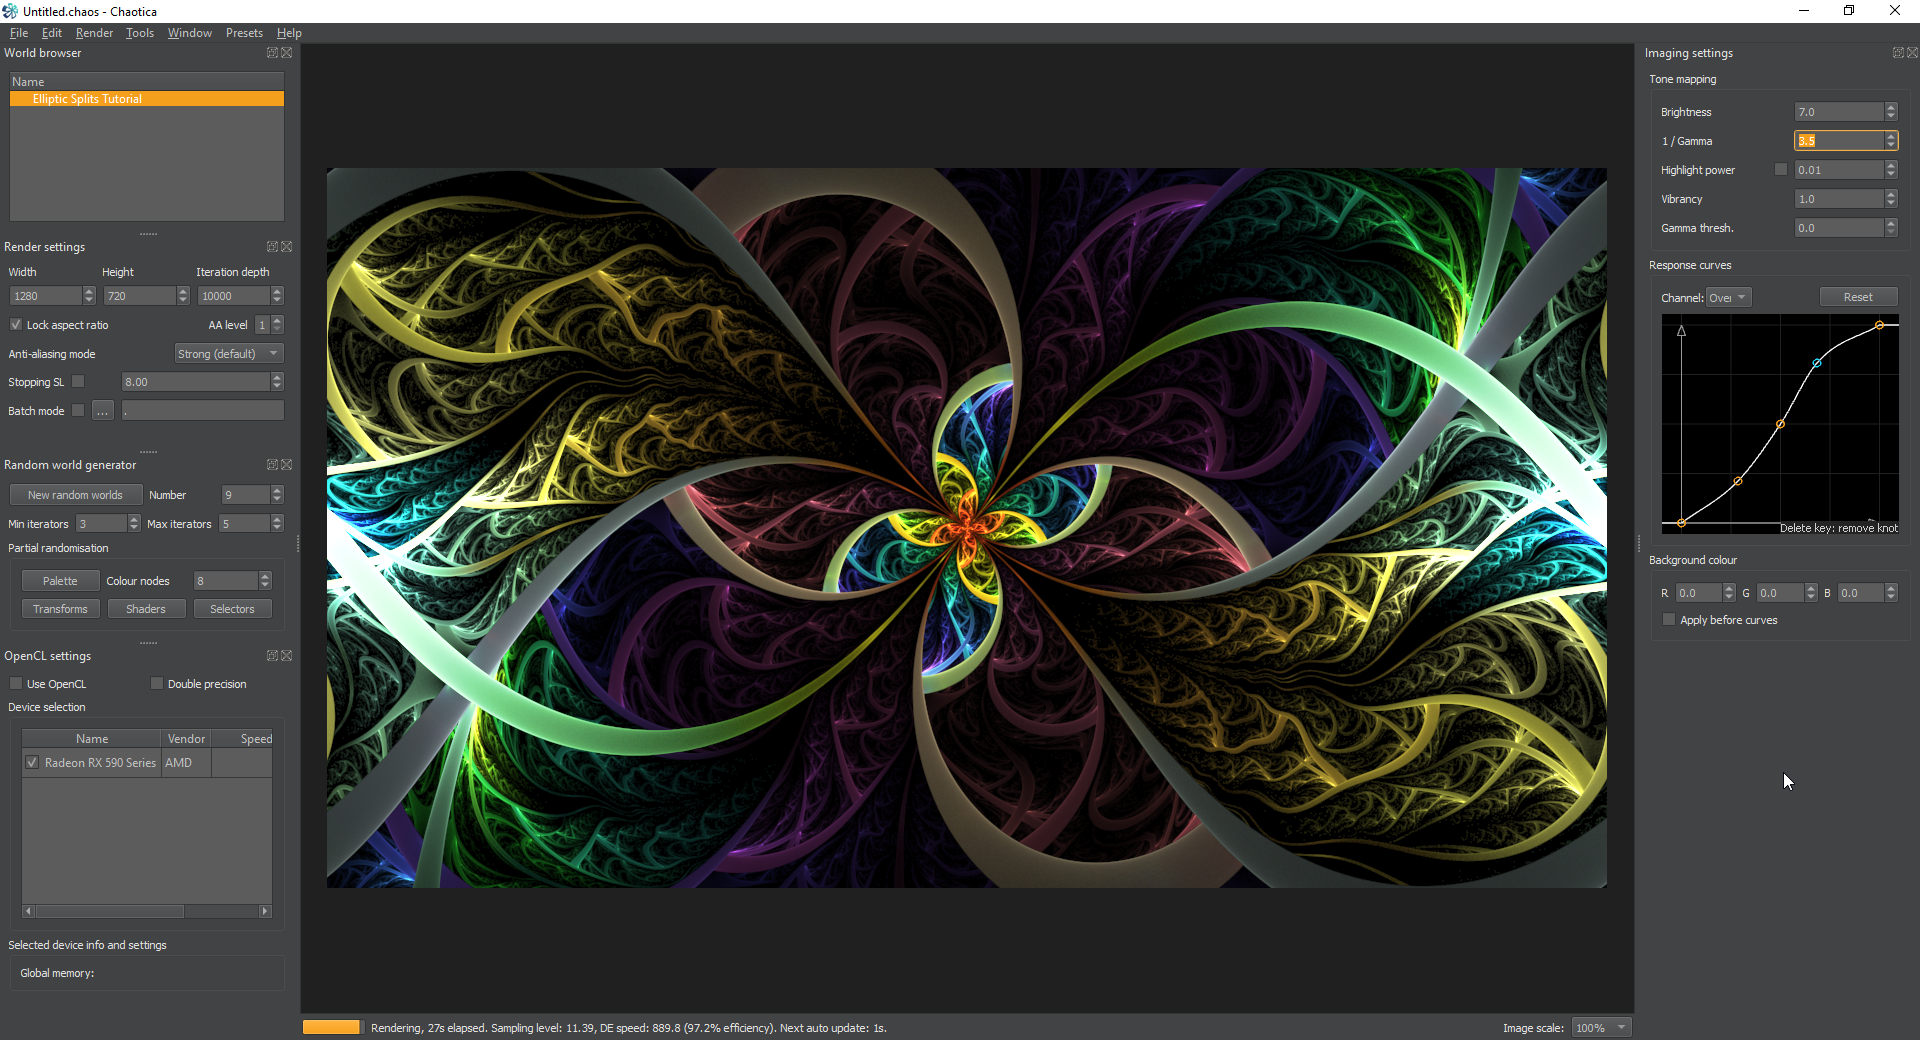
<p>Similar to other tutorials, we’re going to create a circle out of this. However, for this one we’re going to use an iterator instead of a camera setup. Start by creating a new iterator and setting it’s transform to linear. We’re not going to make it do anything other than wrap the previous set of iterators into a circle, so setting it to linear is like telling the fractal that we’re going to take everything and start translating it, but if we don’t move the pre-affine, nothing happens beyond what we do in the pre and post transforms. If you think that’s complicated, just set it up and play with it and you should get the general idea.</p>

<p><a href="/assets/images/chaotica-esplits-part2/chaotica_mHL7CPrgB6.jpg"><img src="/assets/images/chaotica-esplits-part2/chaotica_mHL7CPrgB6.jpg" alt="circle main" /></a> <a href="/assets/images/chaotica-esplits-part2/chaotica_fNFeNvcDb6.png"><img src="/assets/images/chaotica-esplits-part2/chaotica_fNFeNvcDb6.png" alt="circle editor" /></a></p>

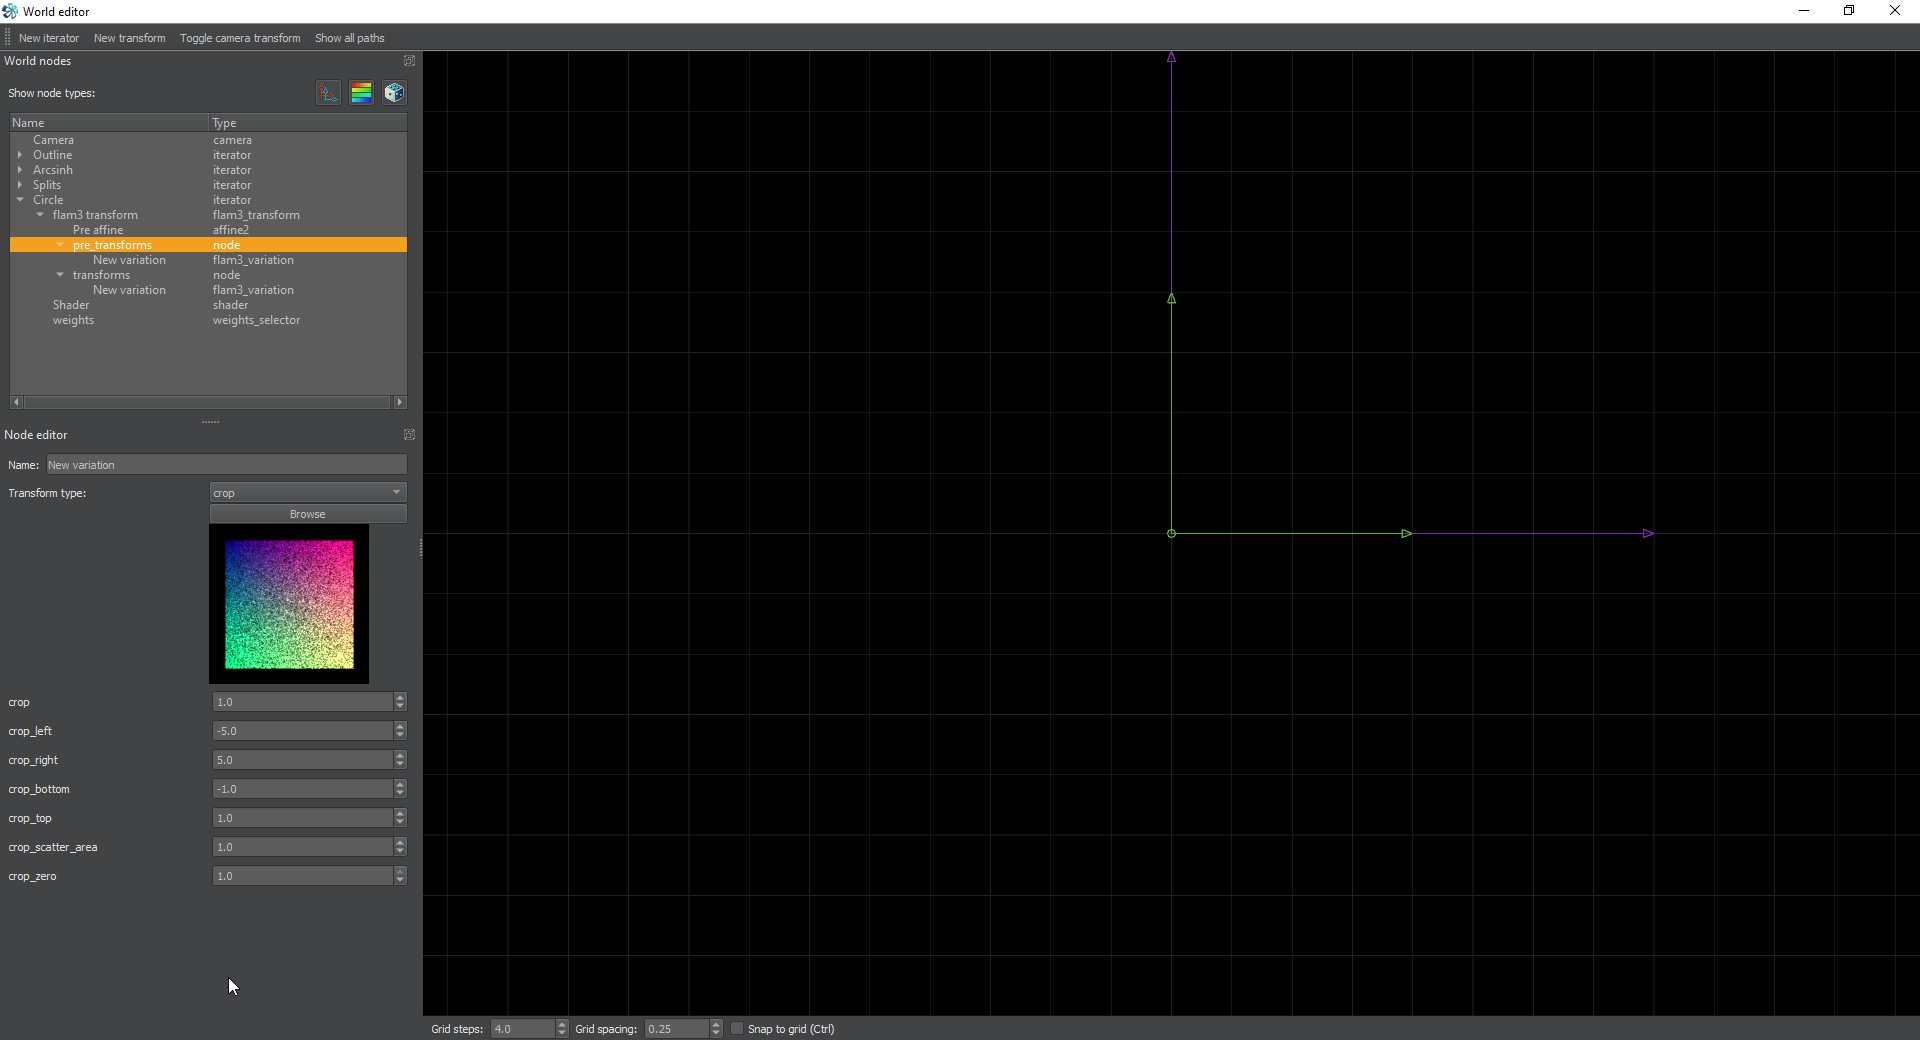
<p>Next, start a pre-transform for this iterator and we’re going to start by adding a crop transform. It’s going to look a bit weird, but to start off with change the variables like so.</p>

<div class="language-plaintext highlighter-rouge"><div class="highlight"><pre class="highlight"><code>transform: crop
    crop_left: -5.0
    crop_right: 5.0
    crop_zero: 1.0
</code></pre></div></div>

<p><a href="/assets/images/chaotica-esplits-part2/chaotica_3ek9C2PAlw.jpg"><img src="/assets/images/chaotica-esplits-part2/chaotica_3ek9C2PAlw.jpg" alt="crop main" /></a> <a href="/assets/images/chaotica-esplits-part2/chaotica_FLRLu4cgy5.png"><img src="/assets/images/chaotica-esplits-part2/chaotica_FLRLu4cgy5.png" alt="crop editor" /></a></p>

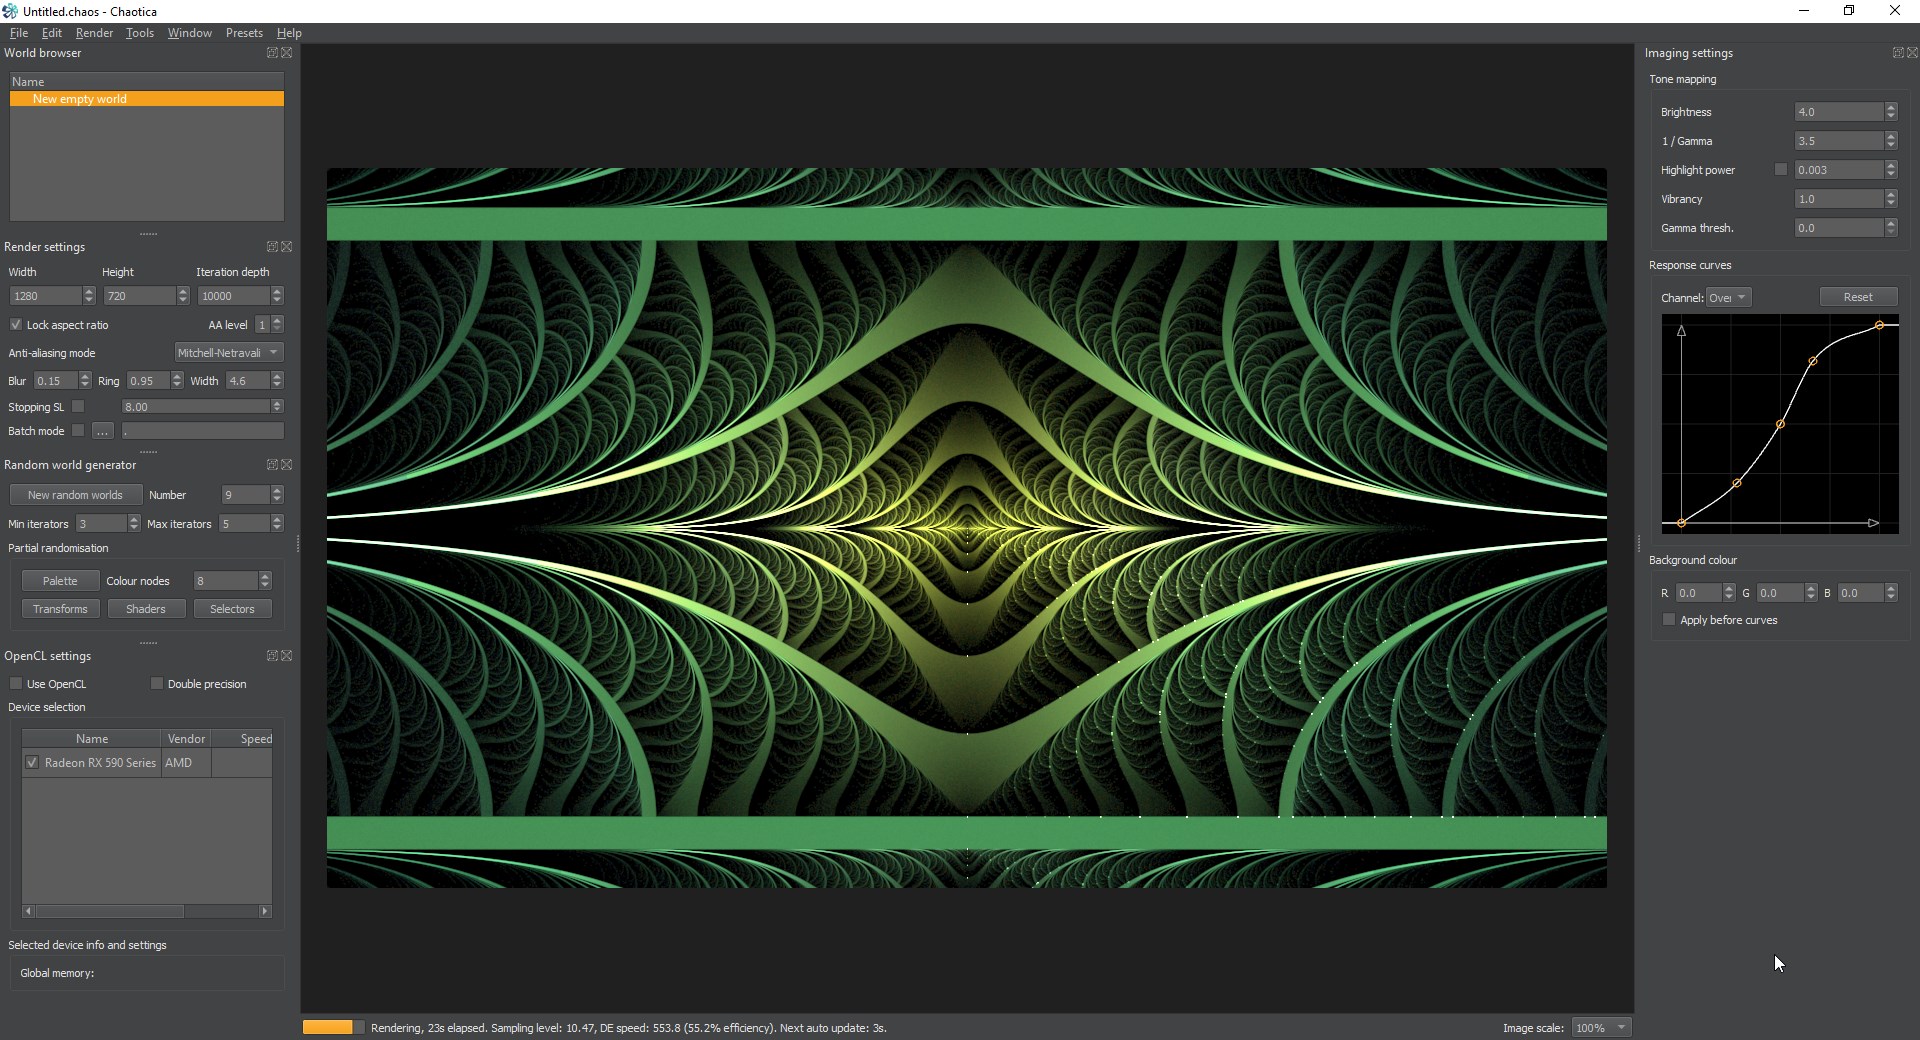
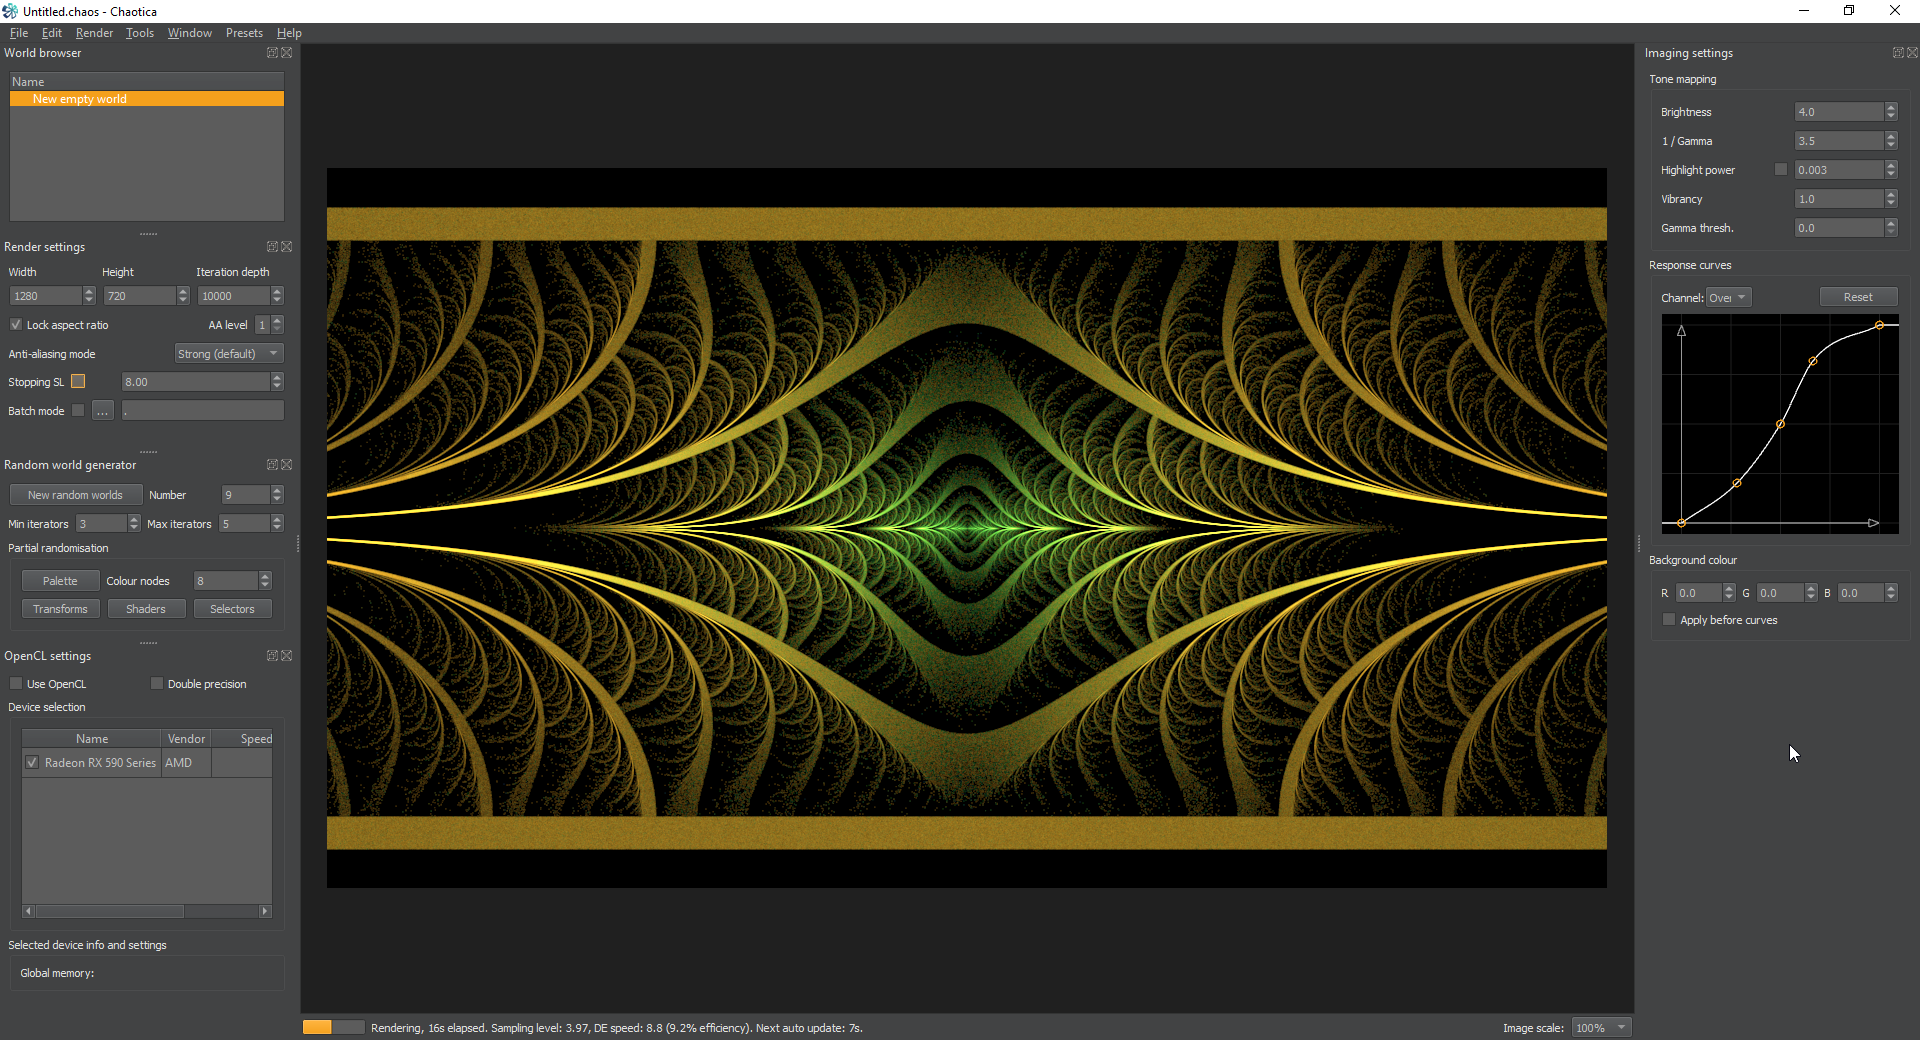
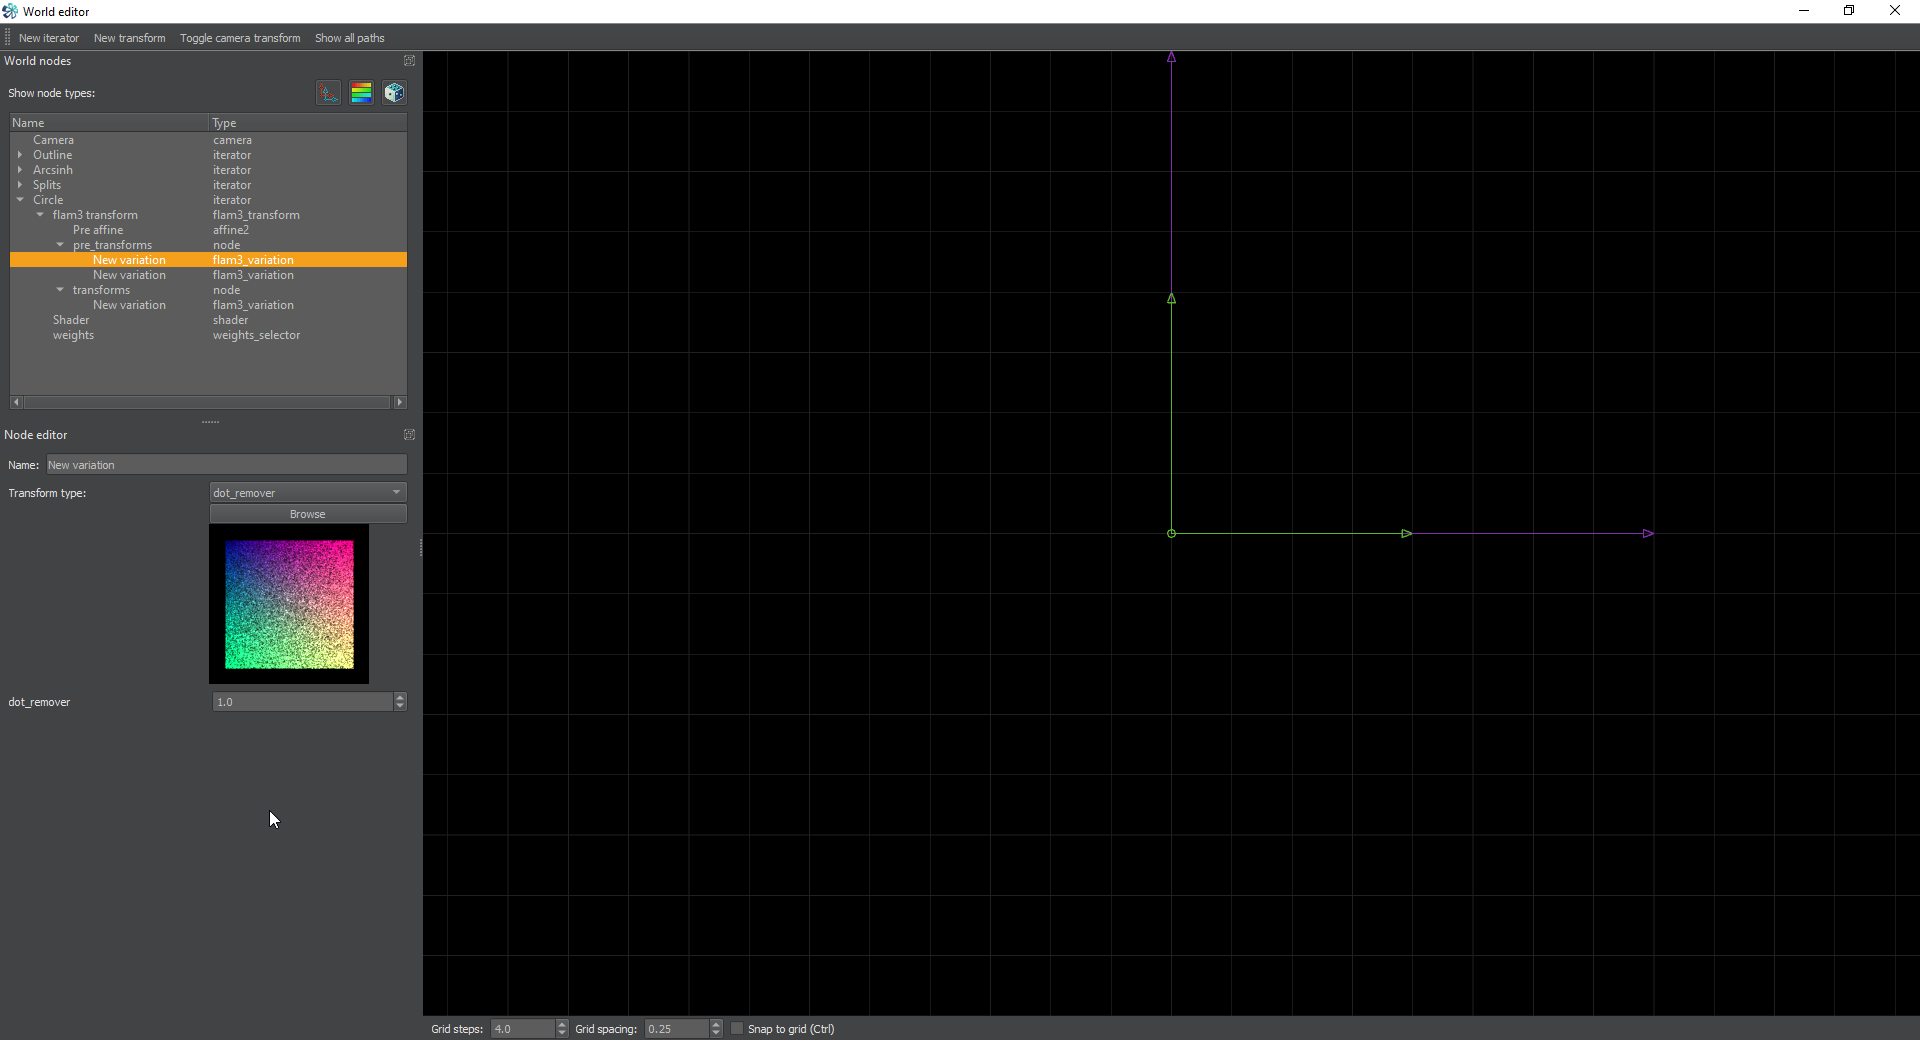
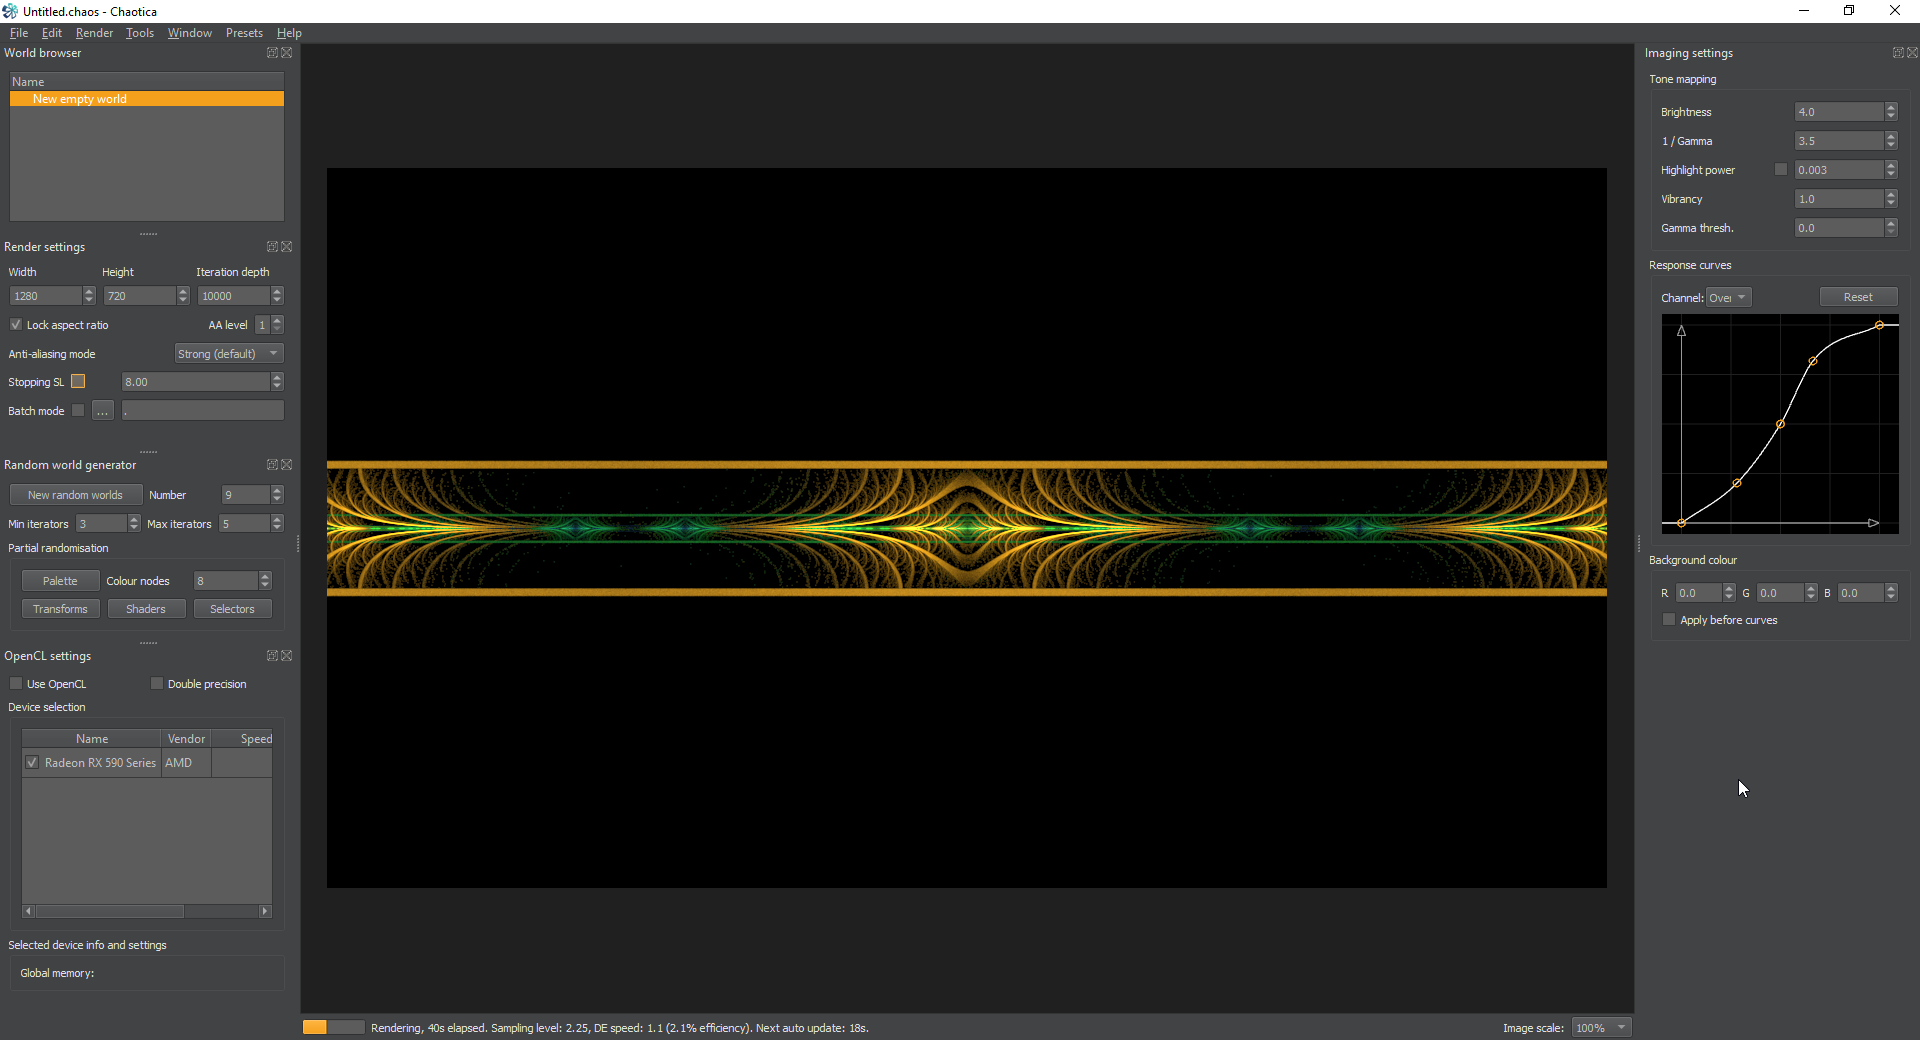
<p>You’ll notice at this point that we have a lot of white dots scattered all over the place. The crop transform puts them everywhere. At this point I’m going to do two things. I’m going to turn the opacity on all the other iterators to 0 and then I’m going to add a new pre transform called dot_remover. You don’t have to use the dot remover. It simply cleans up the image. It’s one of <a href="https://www.pug.fyi/chaotica/crystalize/xforms">Crystalize’s xforms</a> and it comes with one caveat. It doesn’t work with OpenCL. That means that if you’re going to render this with a GPU, don’t use it. At the time of this tutorial, I’m moving it to the main branch on the code repository, so you may have to download it if you already have his stuff installed. The last thing i’m going to do is drop the value of the dot_remover down to 0.1 to make everything line up later. If you’re not using the dot remover transform, you may have to lower the size of your pattern to get it to where we need it. A linear transform can substitute.</p>

<p><a href="/assets/images/chaotica-esplits-part2/chaotica_DRzpDwbsND.png"><img src="/assets/images/chaotica-esplits-part2/chaotica_DRzpDwbsND.png" alt="dot main" /></a> <a href="/assets/images/chaotica-esplits-part2/chaotica_J7RGQM2dLb.png"><img src="/assets/images/chaotica-esplits-part2/chaotica_J7RGQM2dLb.png" alt="dot editor" /></a></p>

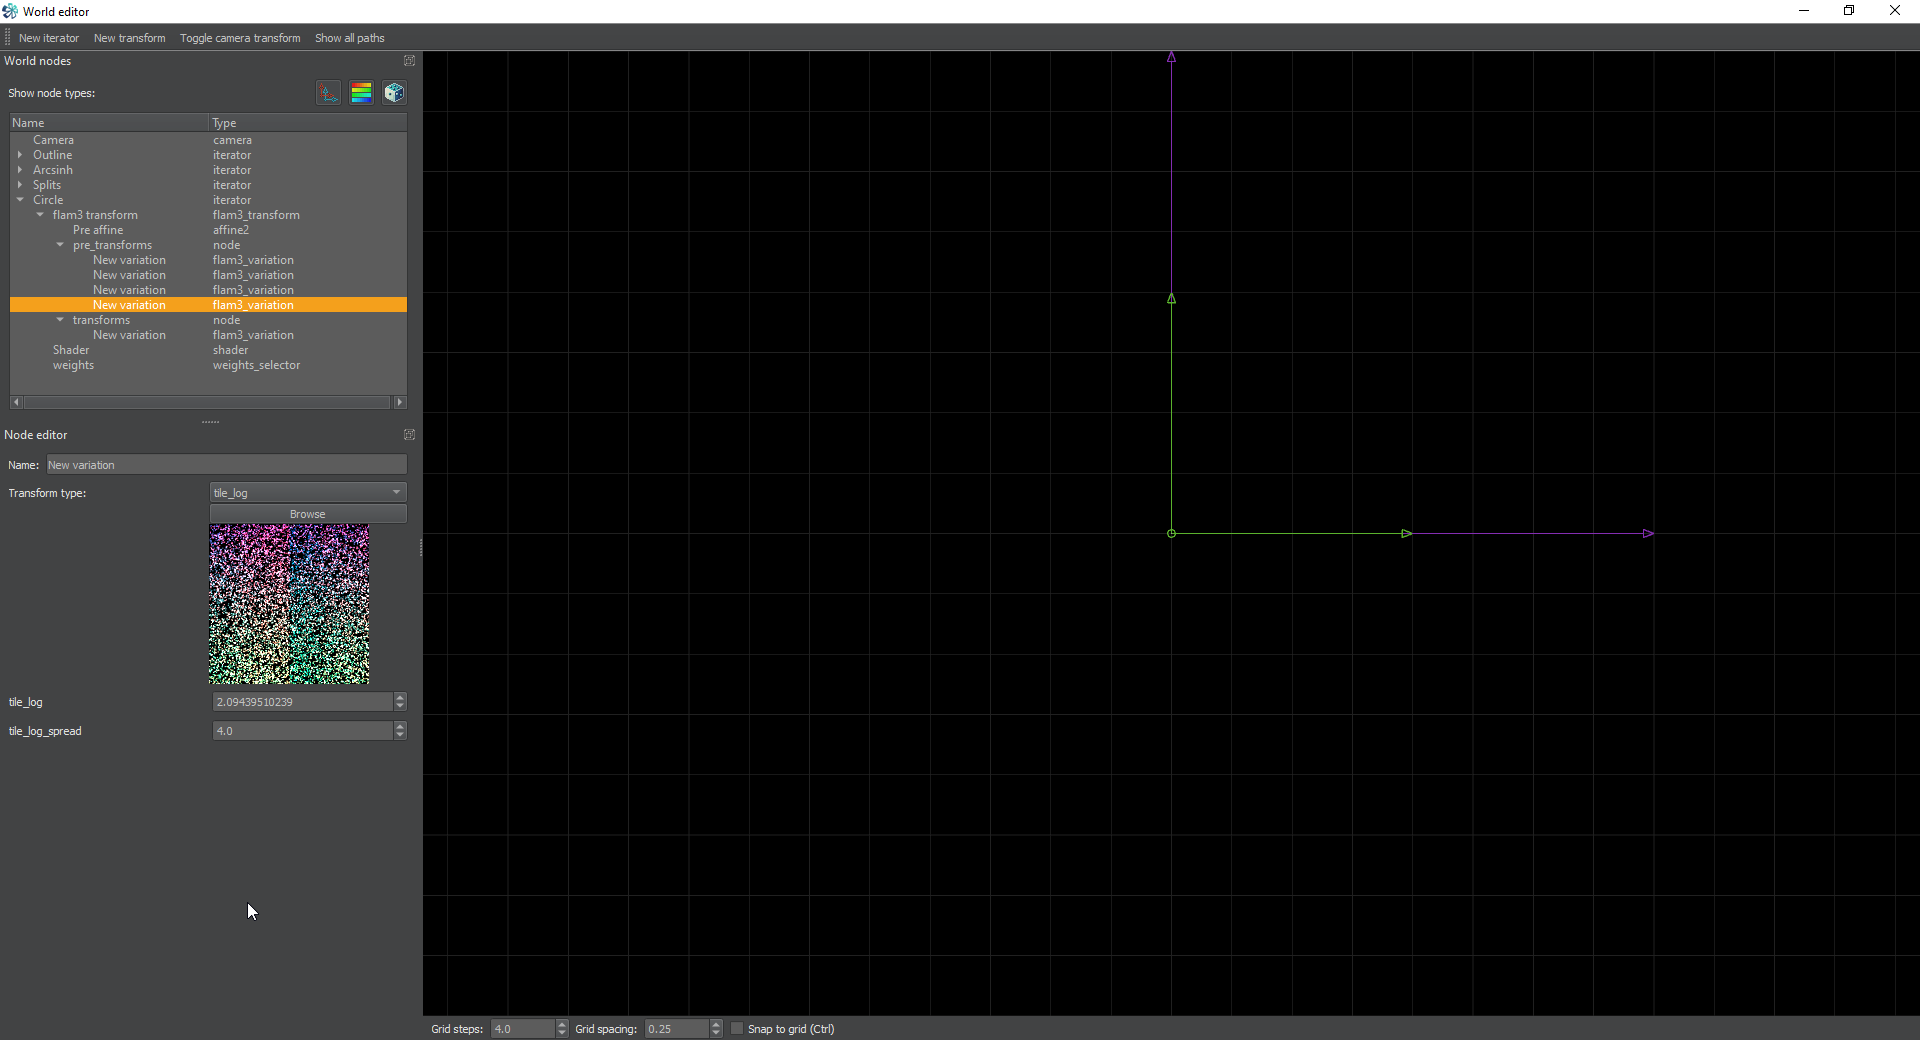
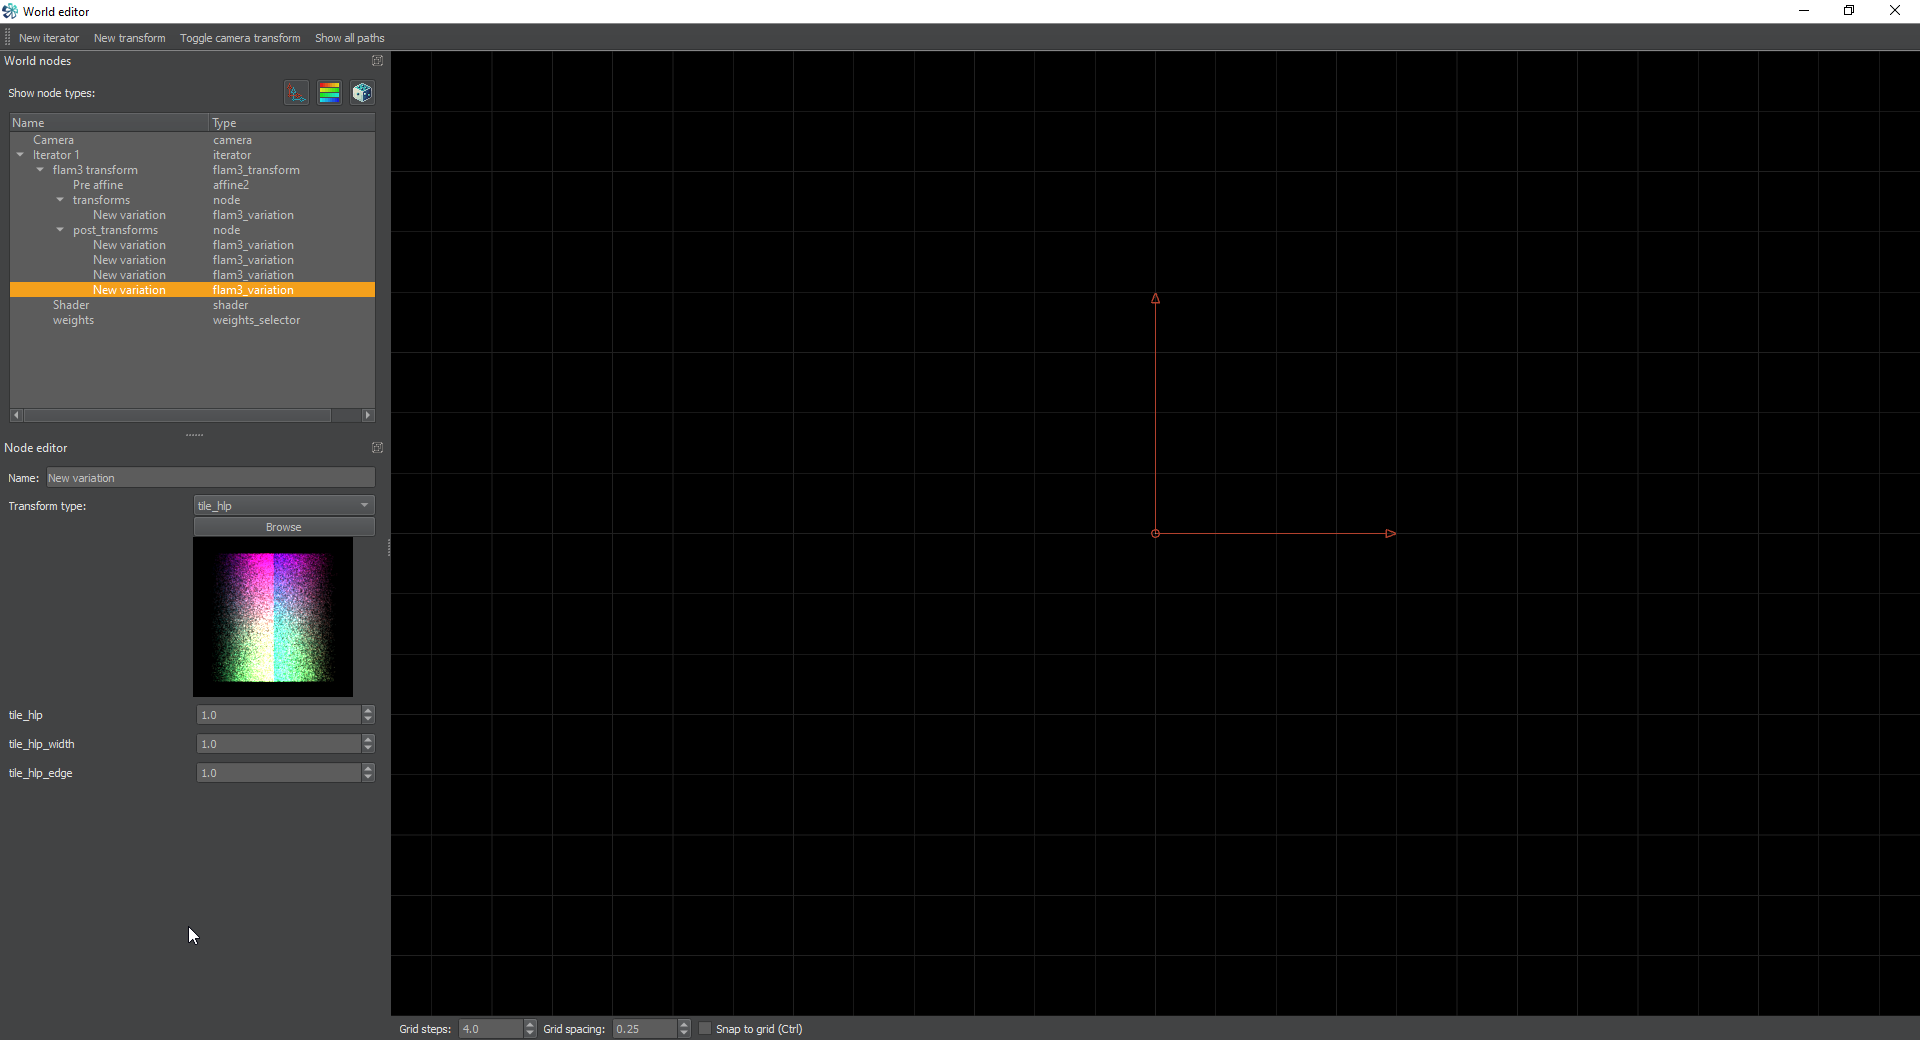
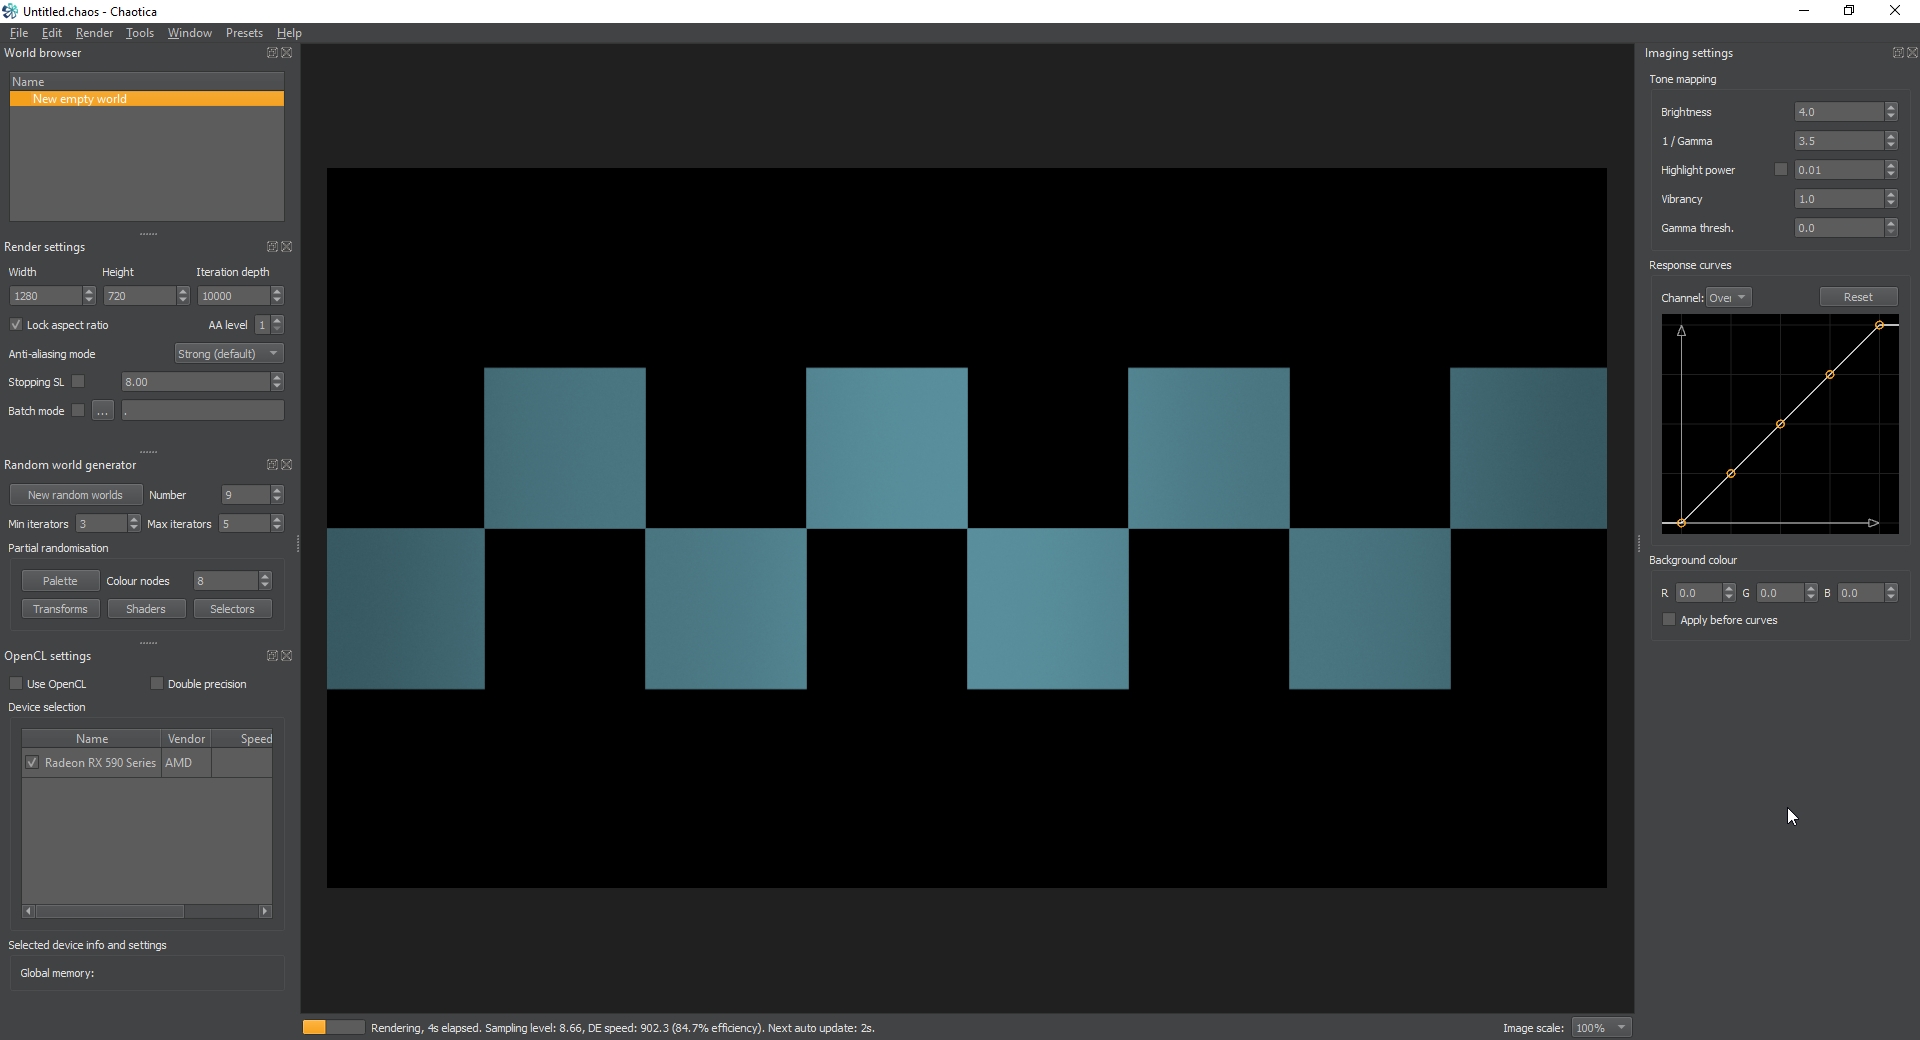
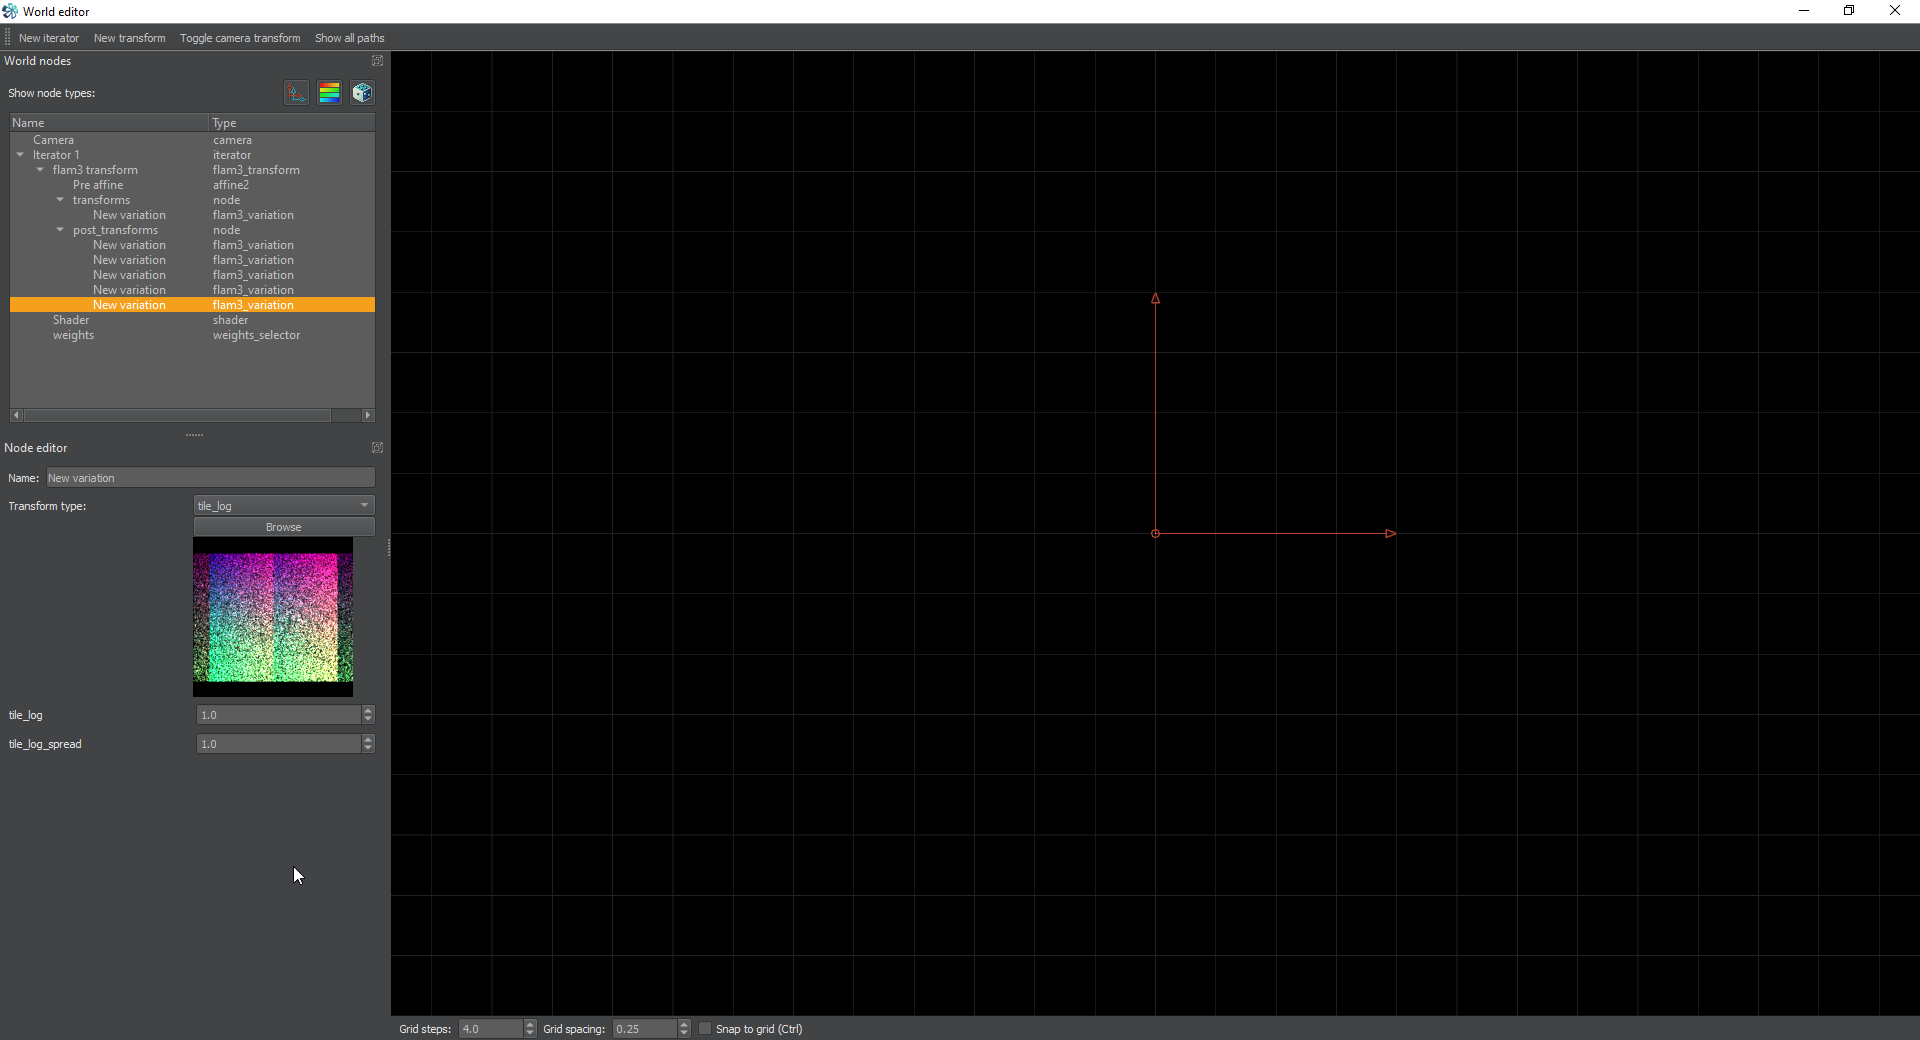
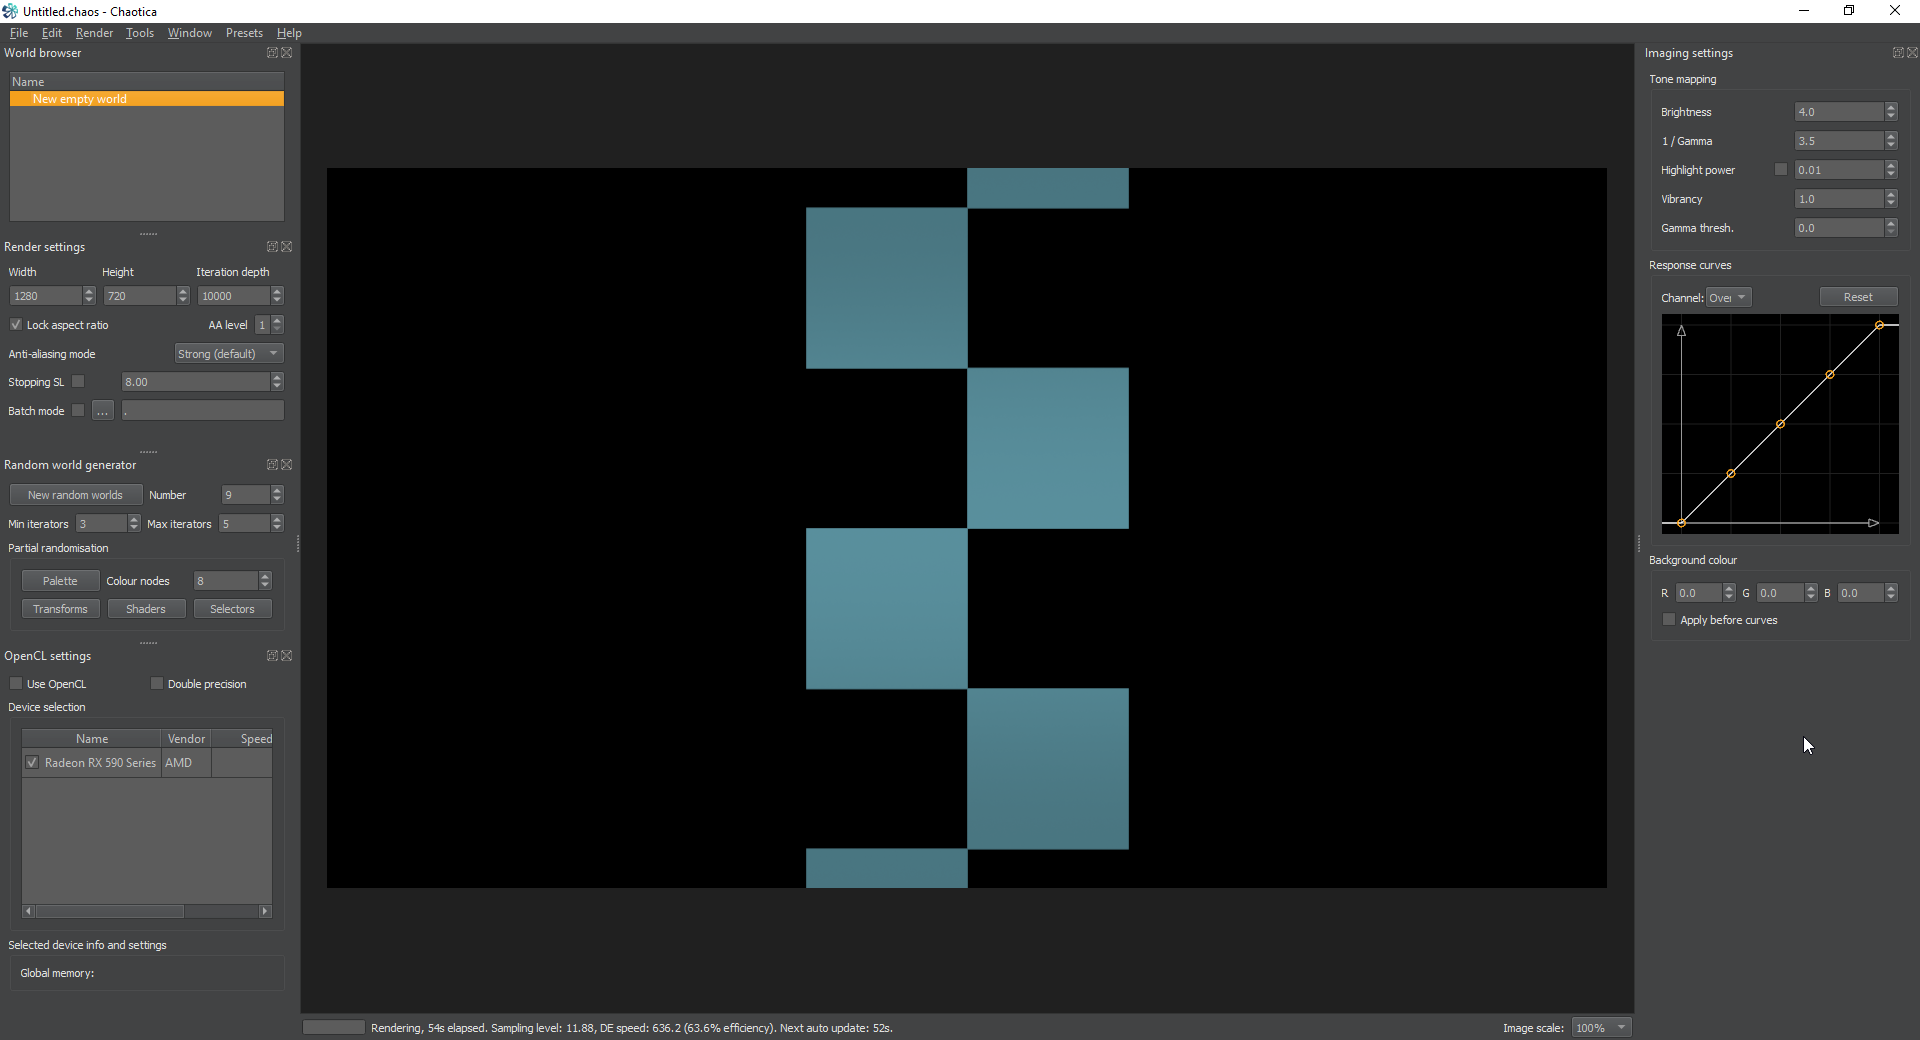
<p>Let me pause a moment here and explain what we’ve done. This crop has taken the output of the other iterators, which are now invisible, and cropped it 5 units wide and 1 unit tall. Then it’s had the white dots removed. Next we’re going to tile it left and right with tile_hlp and tile_log. So make two more pre transforms, the first tile_hlp with default settings, and the next tile_log with a spread of 4. Last, since we’re going to be making this into a circle, change the value of the tile_log to 2pi/3 or 2.09439510239.</p>

<p><a href="/assets/images/chaotica-esplits-part2/chaotica_8hz8MK7kXe.png"><img src="/assets/images/chaotica-esplits-part2/chaotica_8hz8MK7kXe.png" alt="tile main" /></a> <a href="/assets/images/chaotica-esplits-part2/chaotica_boH5v3a6UG.png"><img src="/assets/images/chaotica-esplits-part2/chaotica_boH5v3a6UG.png" alt="tile editor" /></a></p>

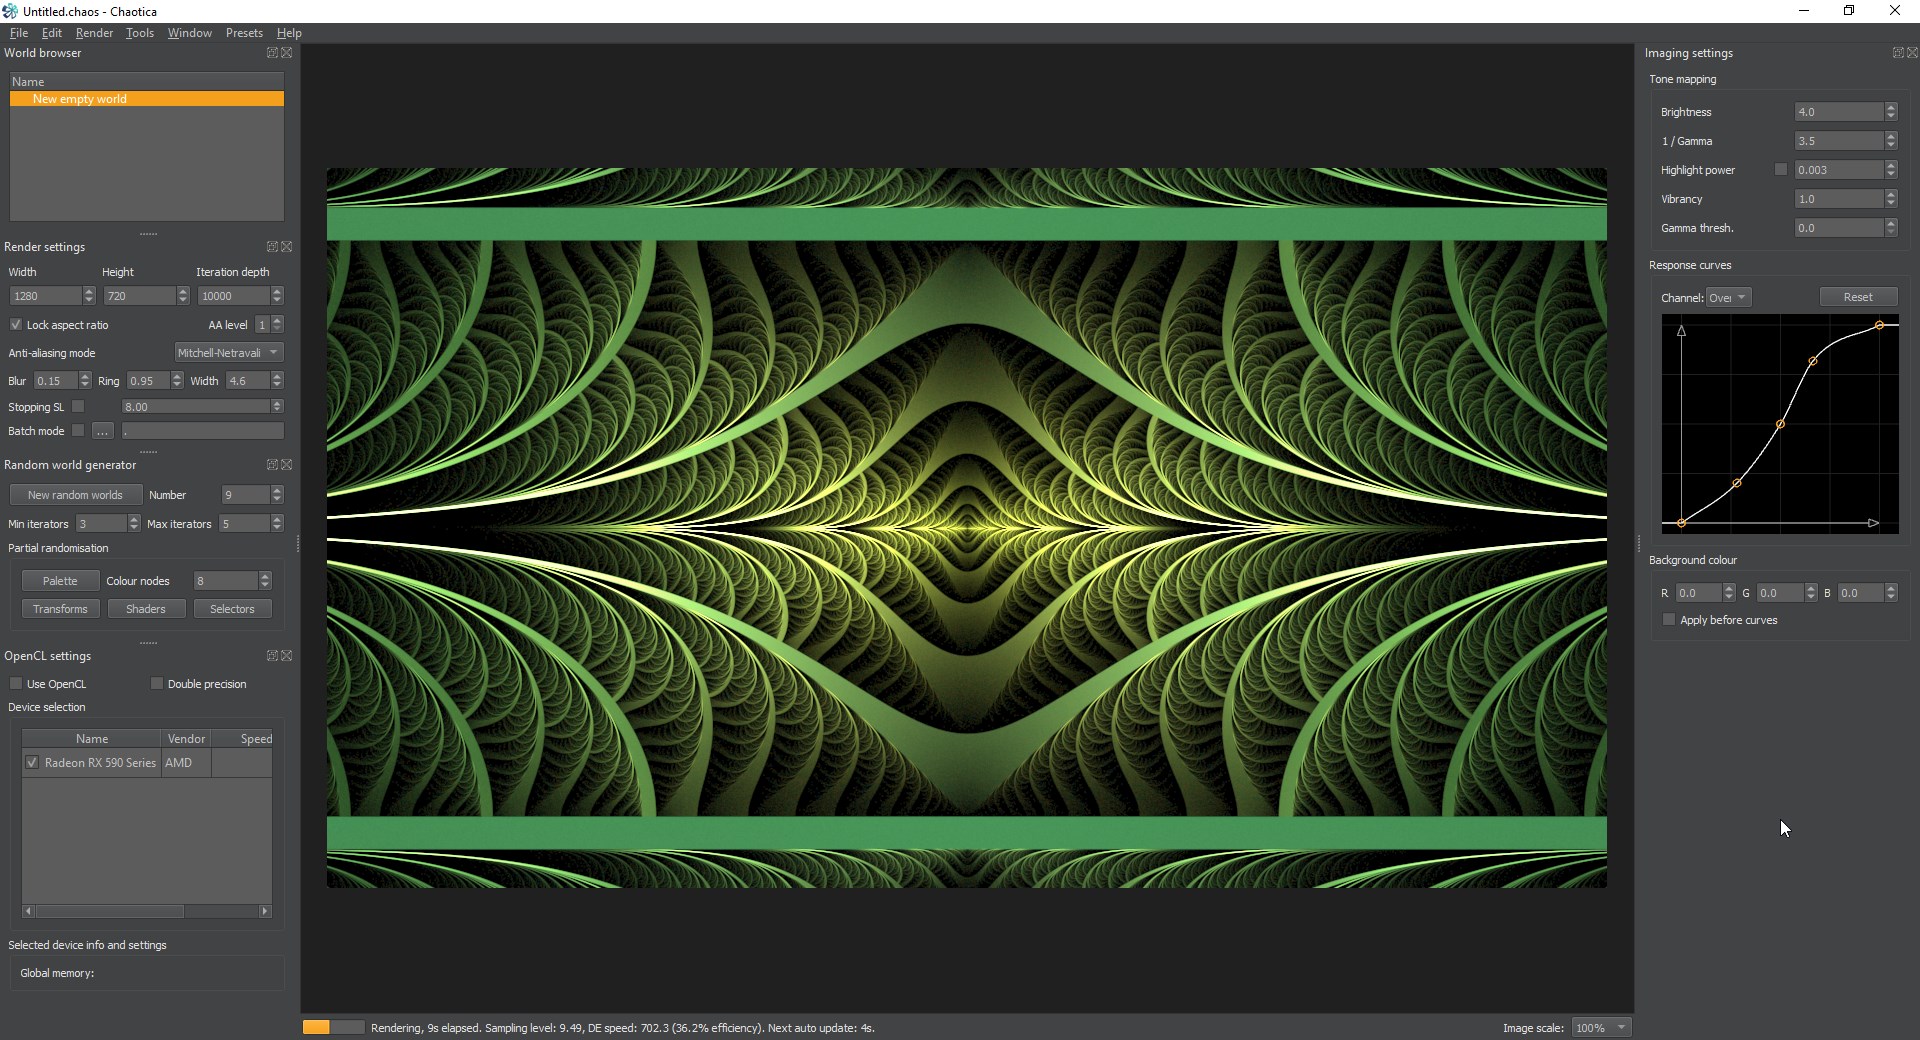
<p>Now if you’re paying attention, you can see a little copy of the whole thing in the background already. Lets fix that. This is going to be the first time I’m using weights in a tutorial, but it won’t be the last. We are going to tell the iterators which ones they can jump to. <strong>TIP: Naming your iterators is insanely helpful when dealing with weights.</strong> It lets us see what effects what without having to trace it back in our heads.</p>

<h2 id="weights-intro">Weights Intro</h2>

<p>Ok, now we’re going to go into the weights node for each iterator. I named my iterators as follows.</p>

<div class="language-plaintext highlighter-rouge"><div class="highlight"><pre class="highlight"><code>Outline
Arcsinh
Splits
Circle
</code></pre></div></div>

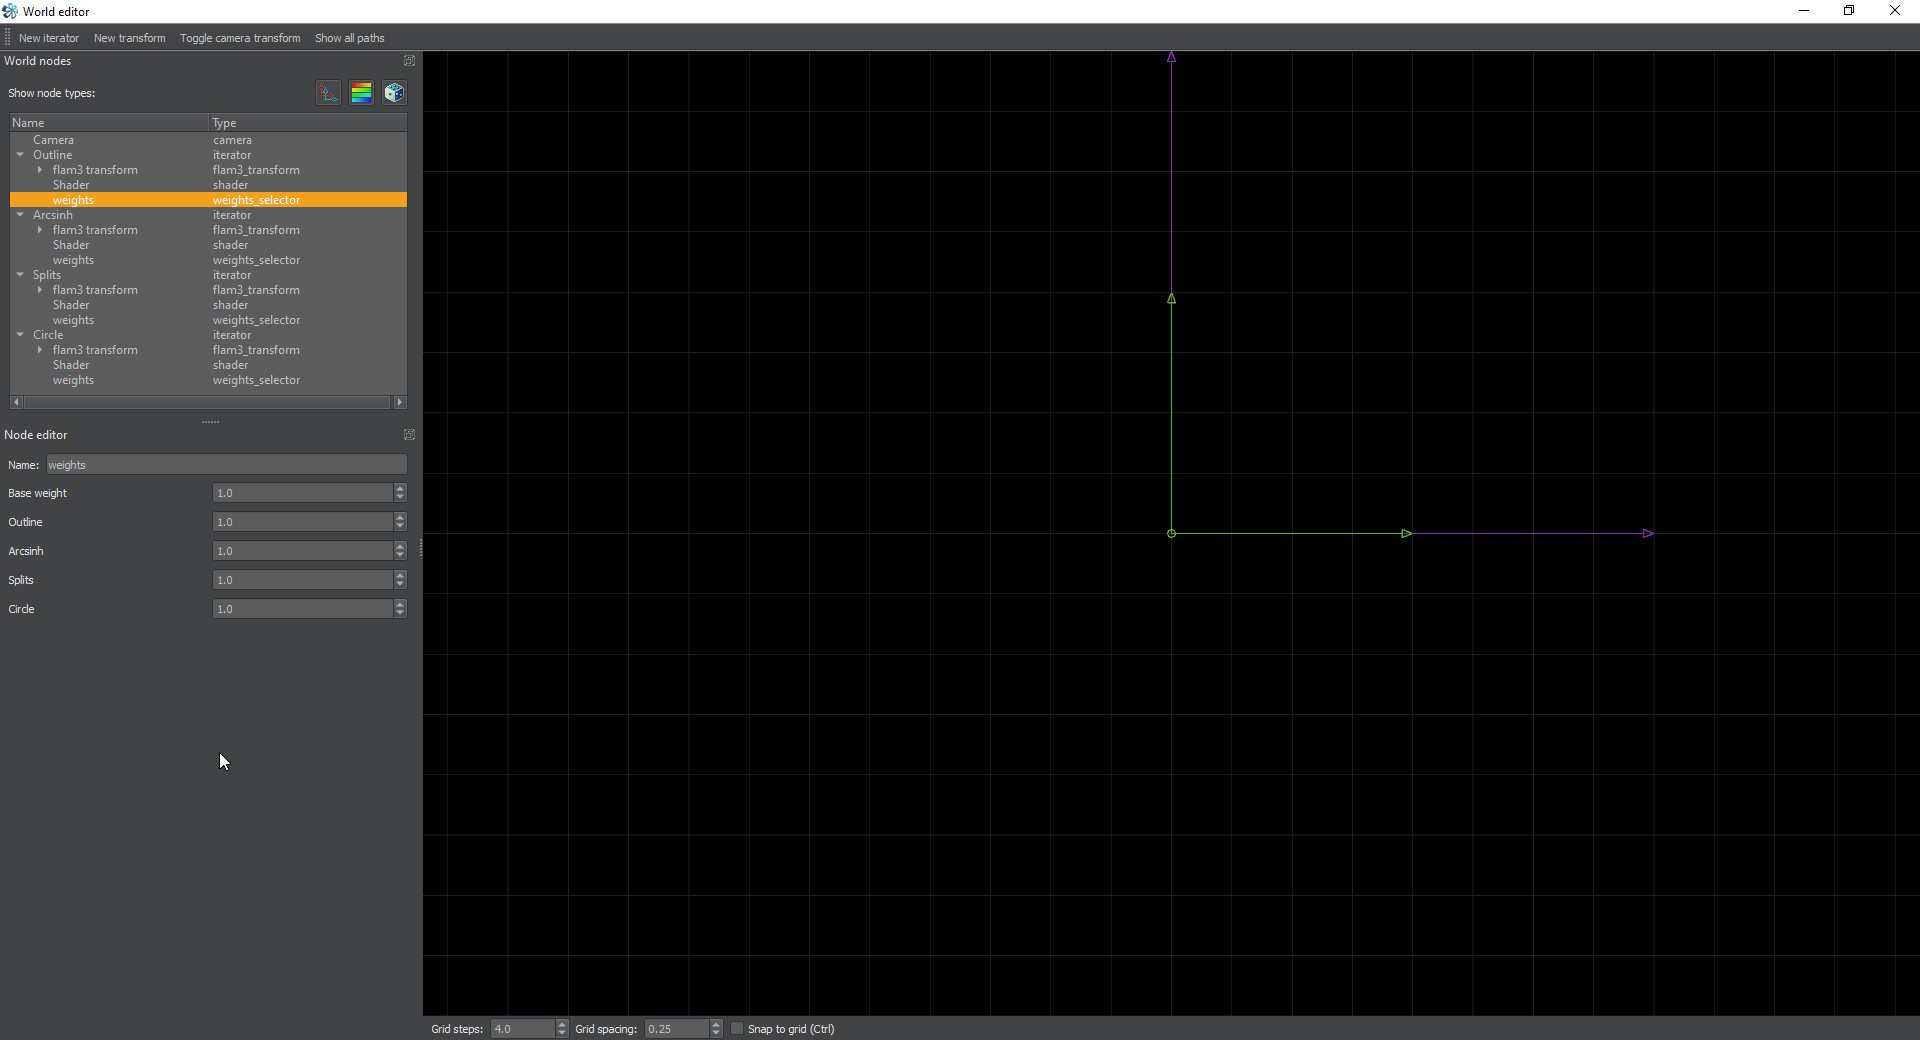
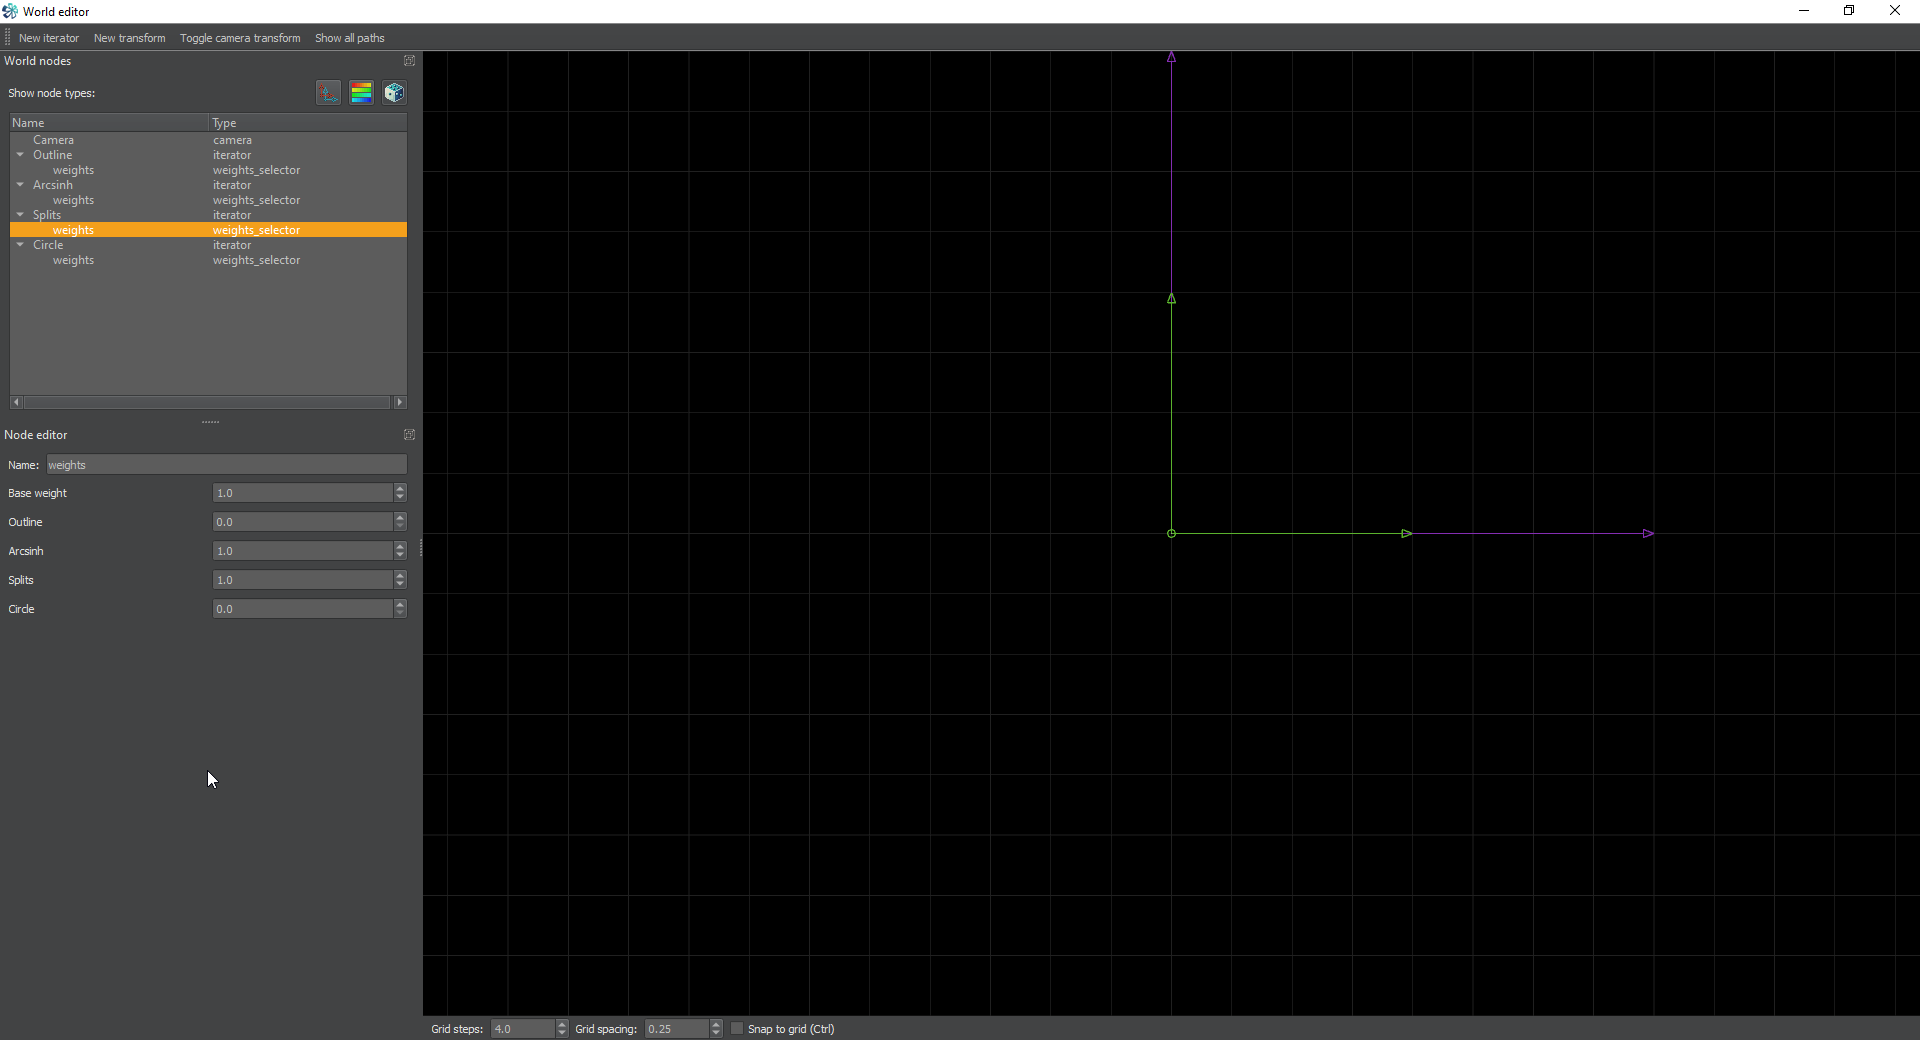
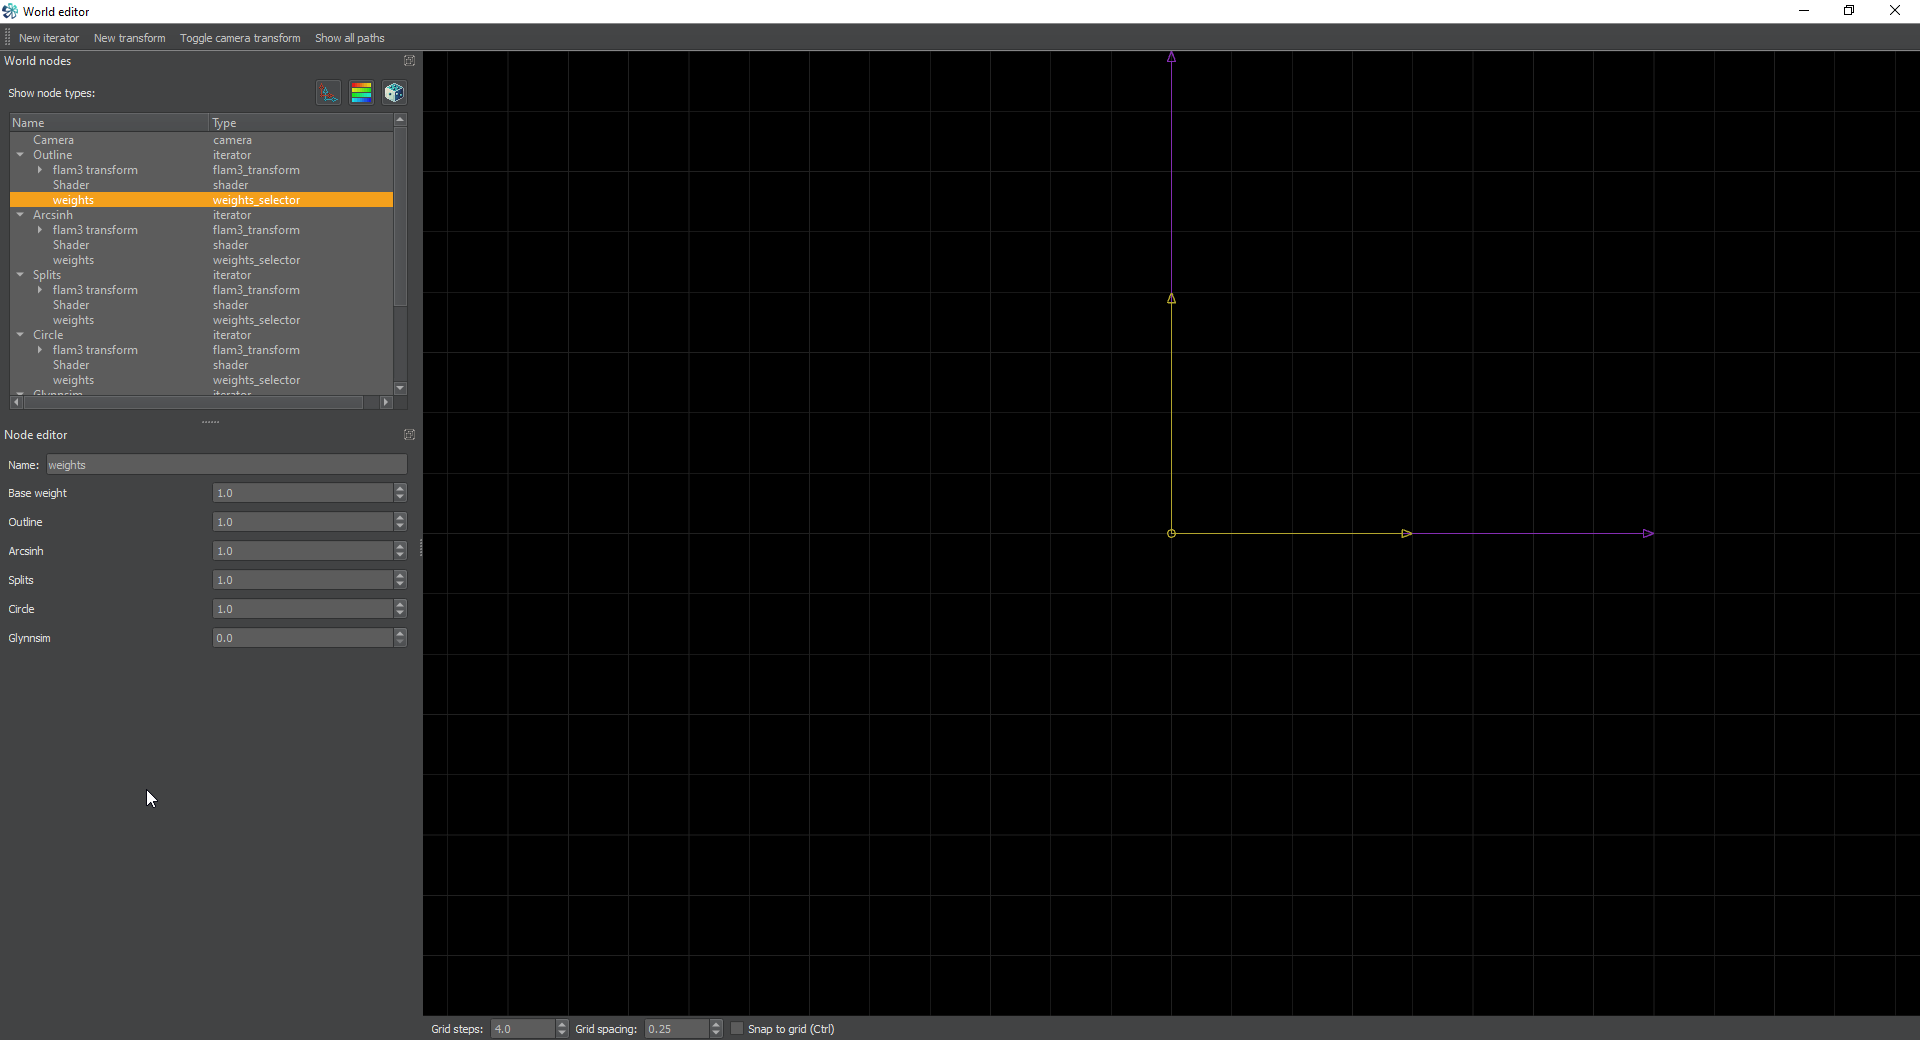
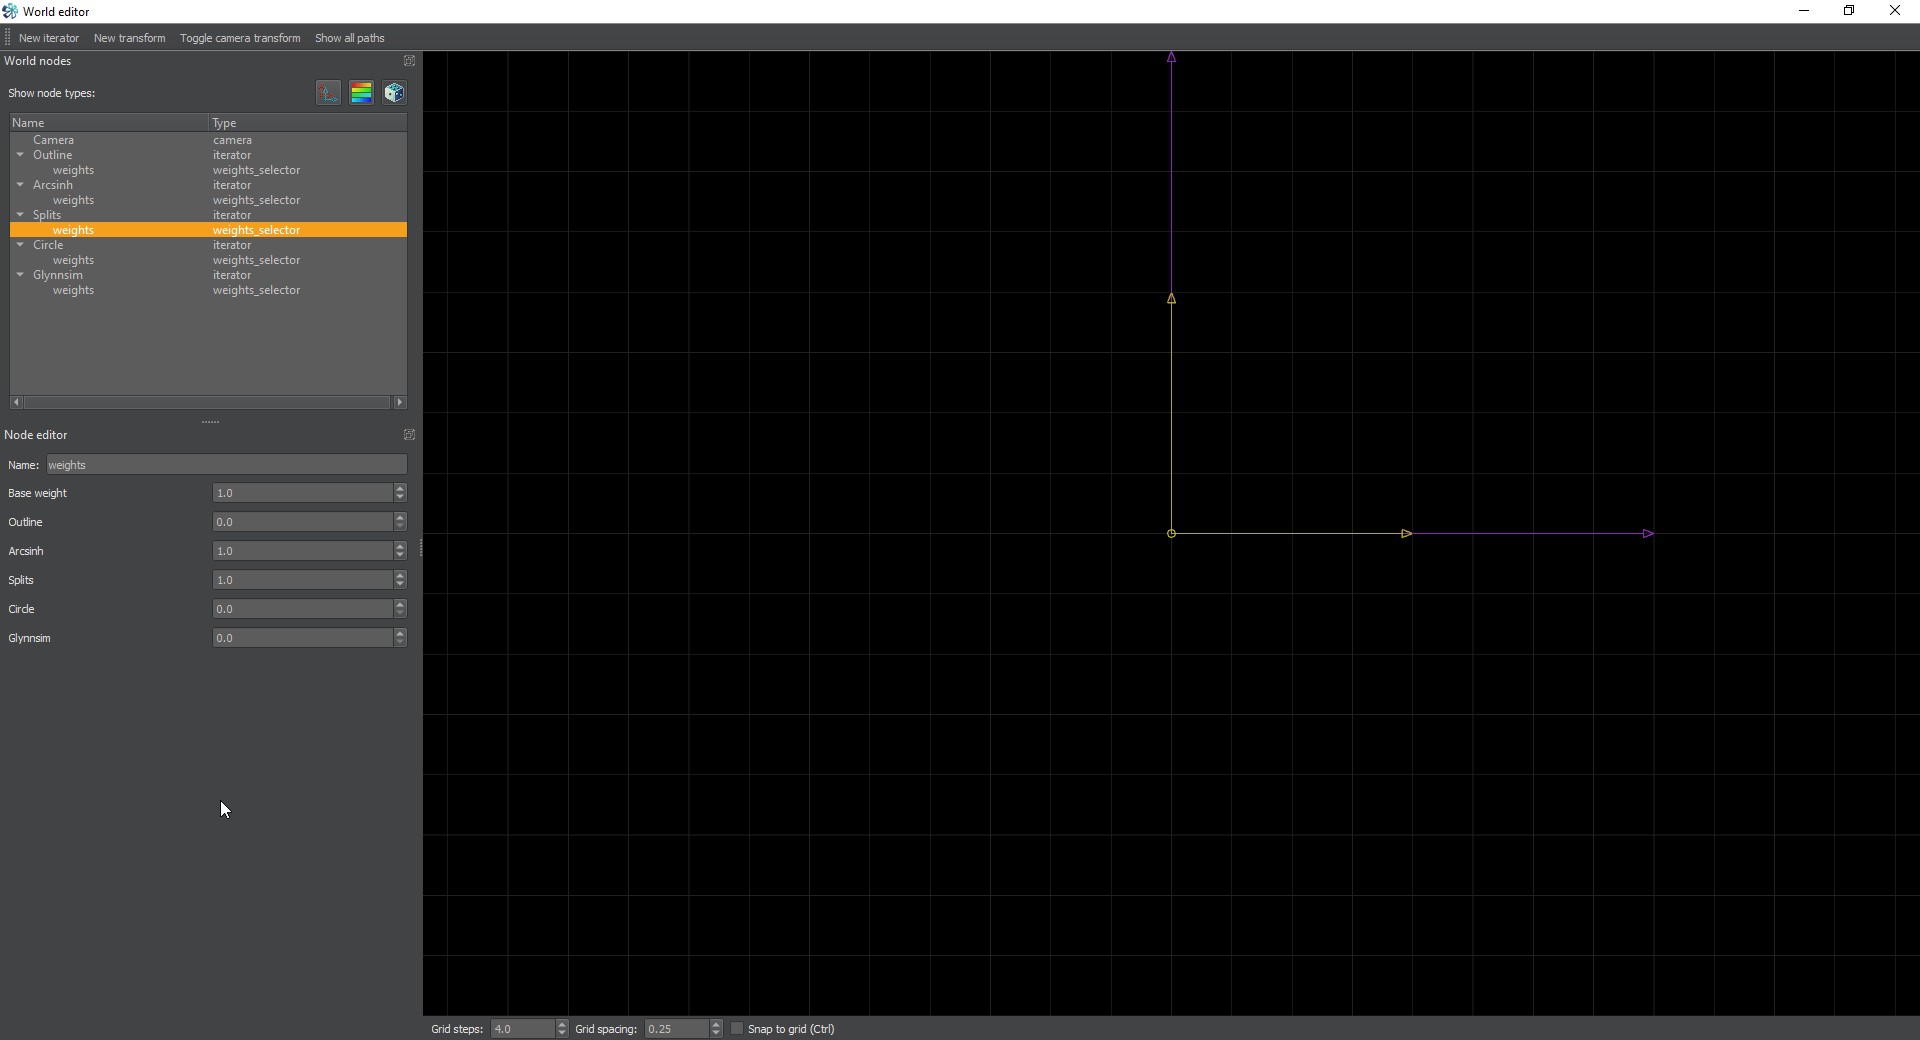
<p>If we click on the weights node for Outline, we will see the base weight, and all the weights of the other iterators. We can turn these weights to 0 to prevent this iterator from jumping to another one. This is how we specify weights. For Outline, It’s going to be allowed to jump to Arcsinh, Splits, and Circle. So We set it like this.</p>

<p><a href="/assets/images/chaotica-esplits-part2/chaotica_Nv9sB4nYeD.png"><img src="/assets/images/chaotica-esplits-part2/chaotica_Nv9sB4nYeD.png" alt="Outline Weights" /></a></p>

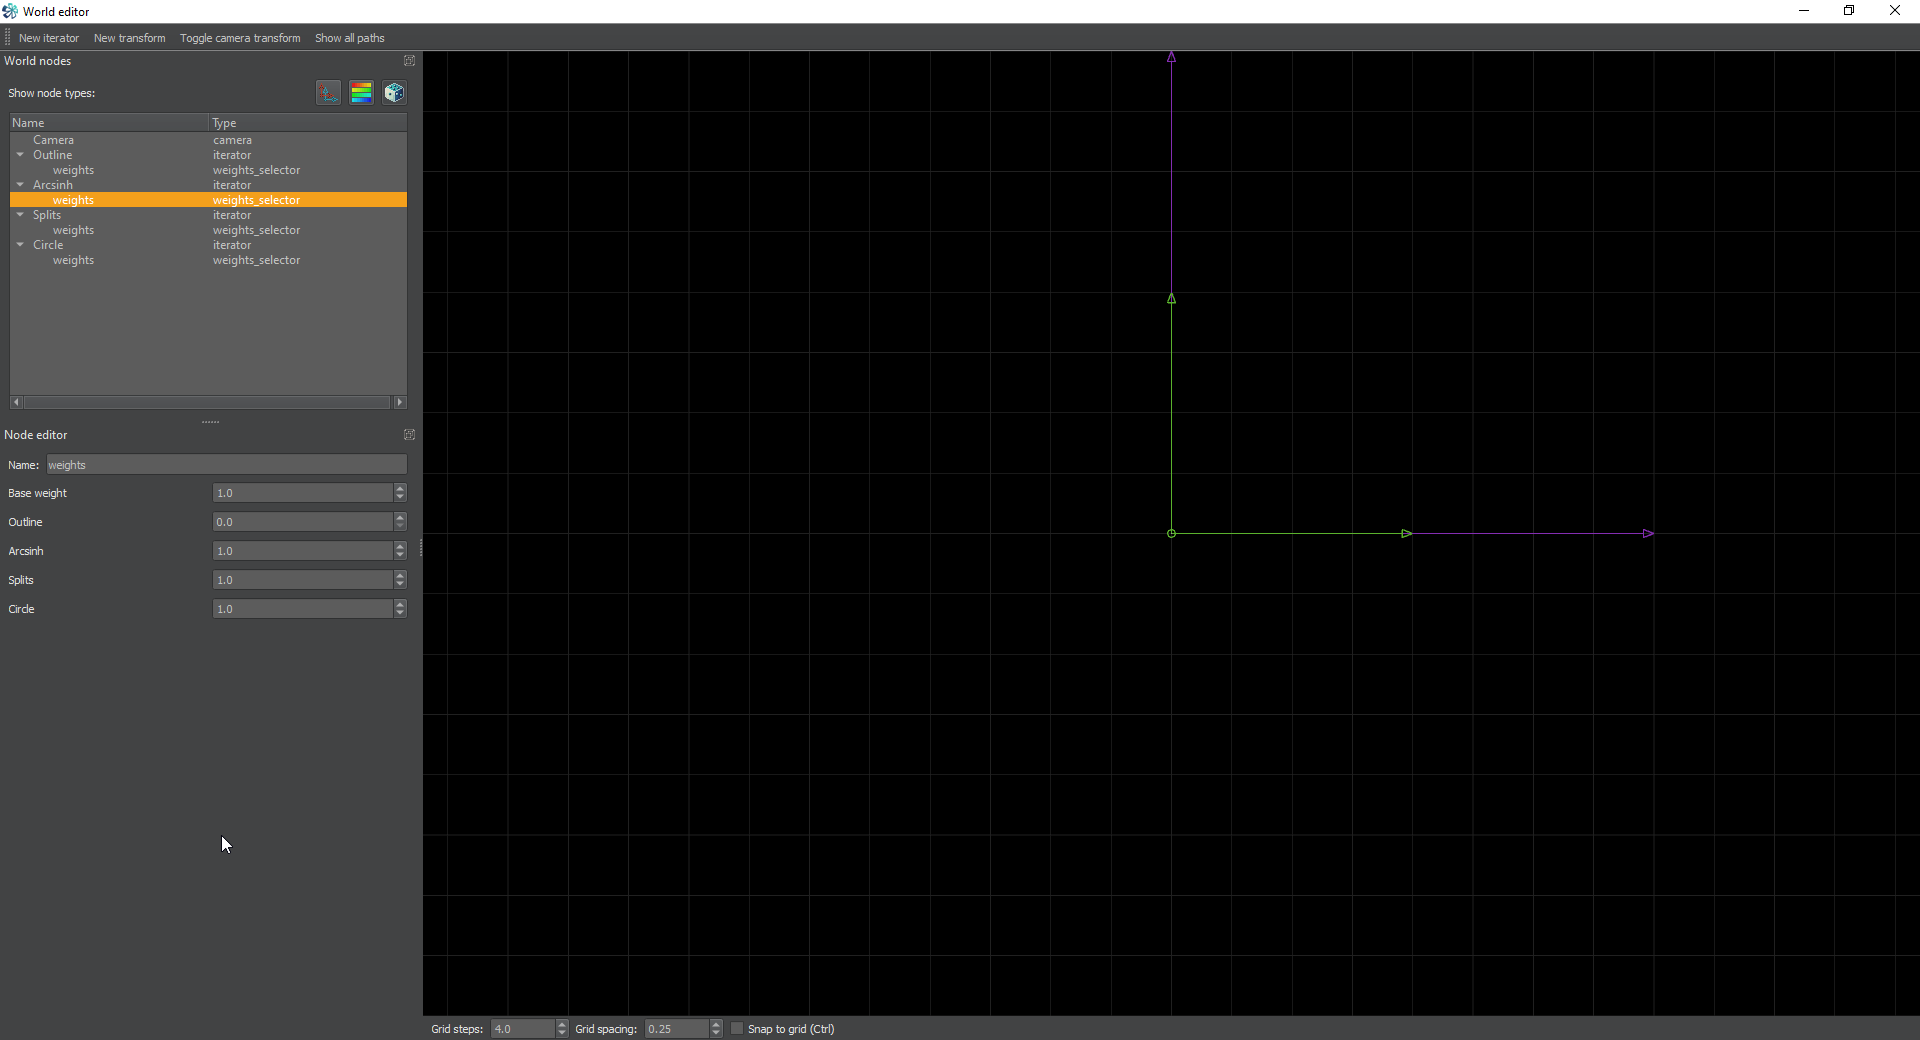
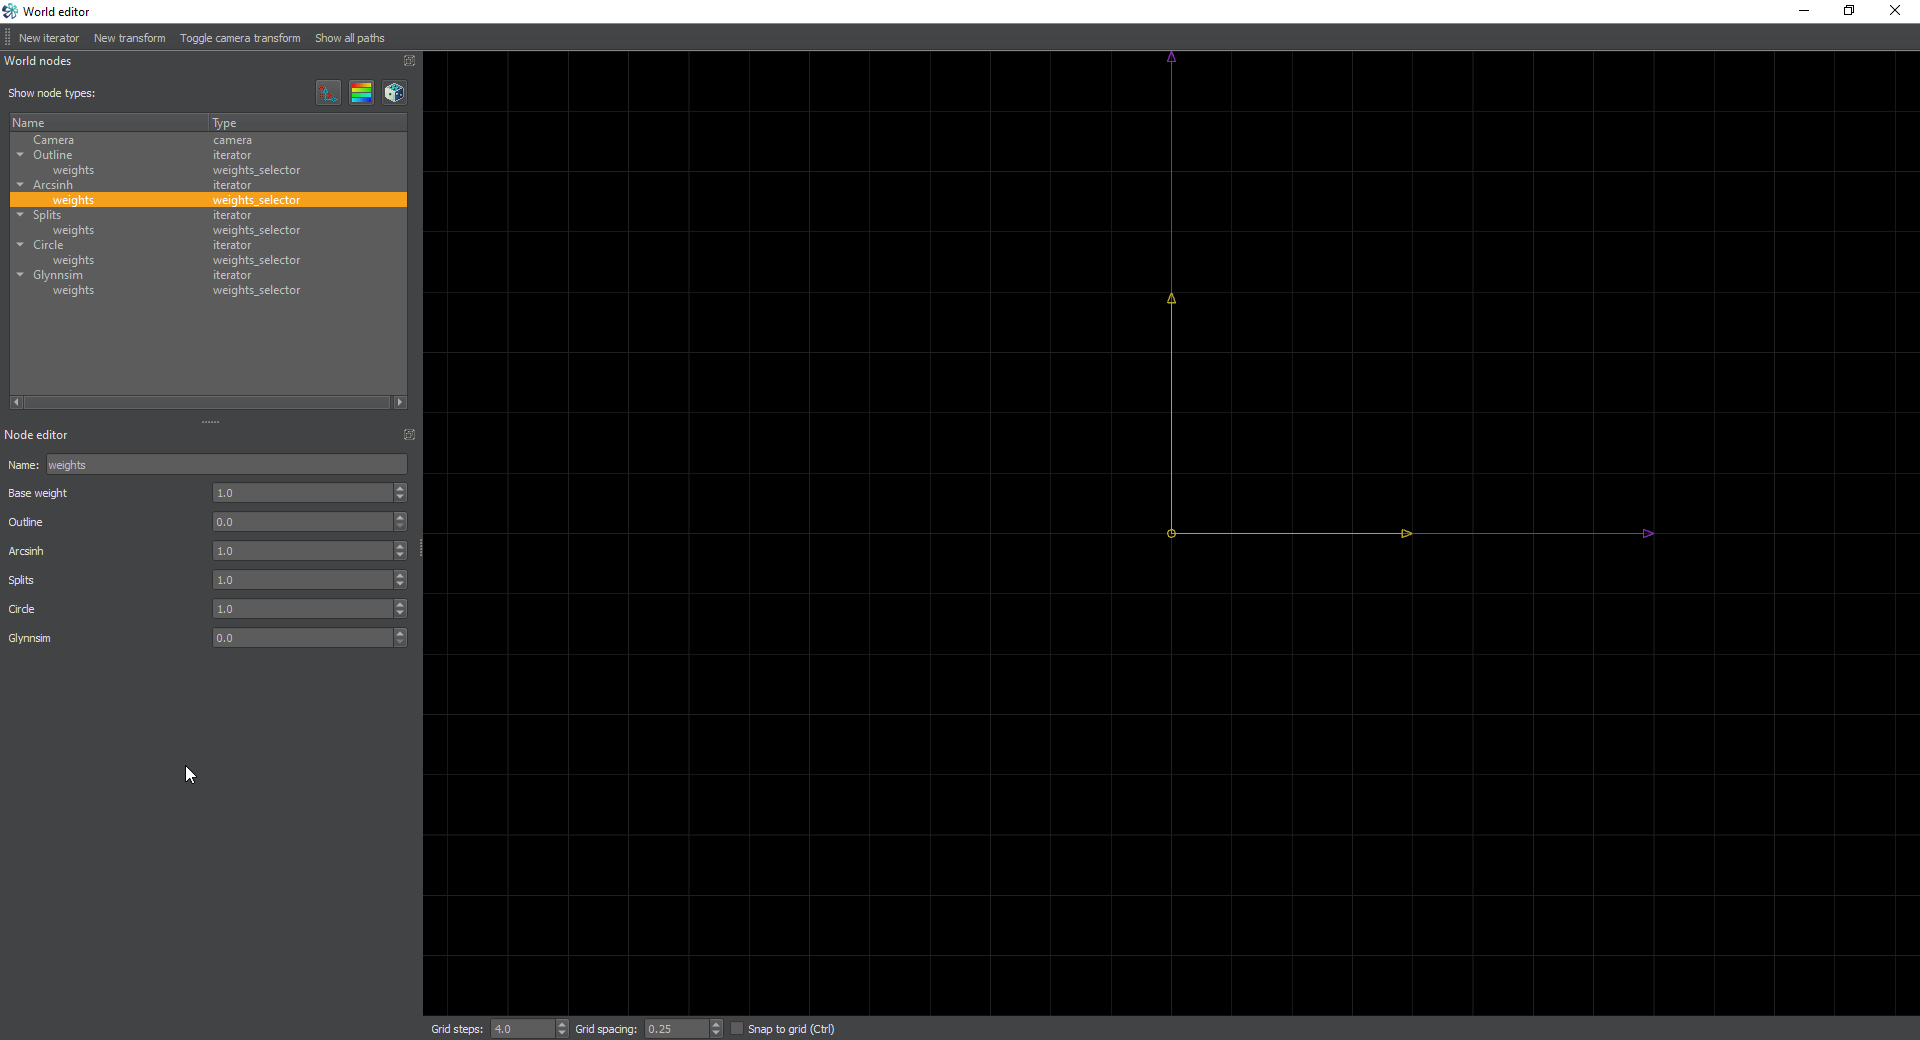
<p>Next, we’re going to go to the weights for the arcsinh iterator and we’re going to allow it to only go to Arcsinh, Splits, and Circle.</p>

<p><a href="/assets/images/chaotica-esplits-part2/chaotica_wnBL7pRcMK.png"><img src="/assets/images/chaotica-esplits-part2/chaotica_wnBL7pRcMK.png" alt="Arcsinh Weights" /></a></p>

<p>Next we’re going to go to the Splits iterator and only allow it to go to Arcsinh, and itself (Splits)</p>

<p><a href="/assets/images/chaotica-esplits-part2/chaotica_DYcybJfn9j.png"><img src="/assets/images/chaotica-esplits-part2/chaotica_DYcybJfn9j.png" alt="Splits Weights" /></a></p>

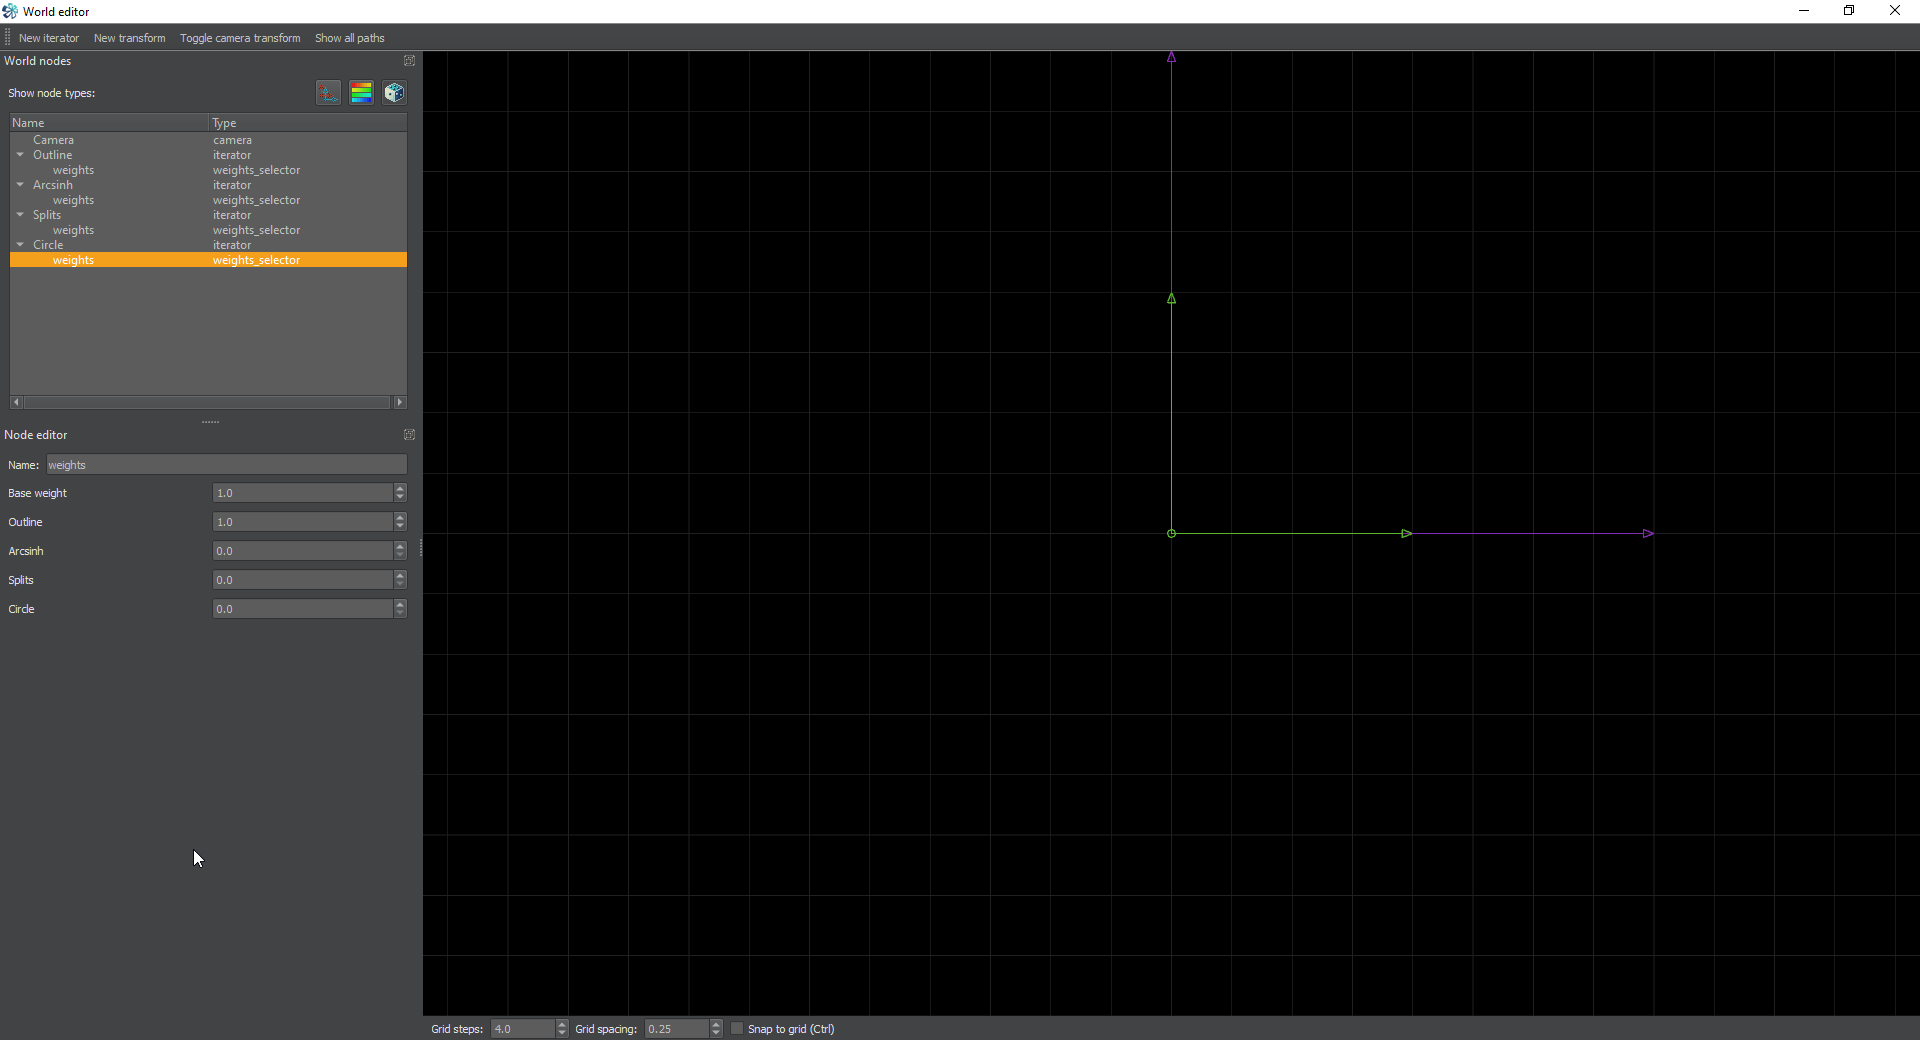
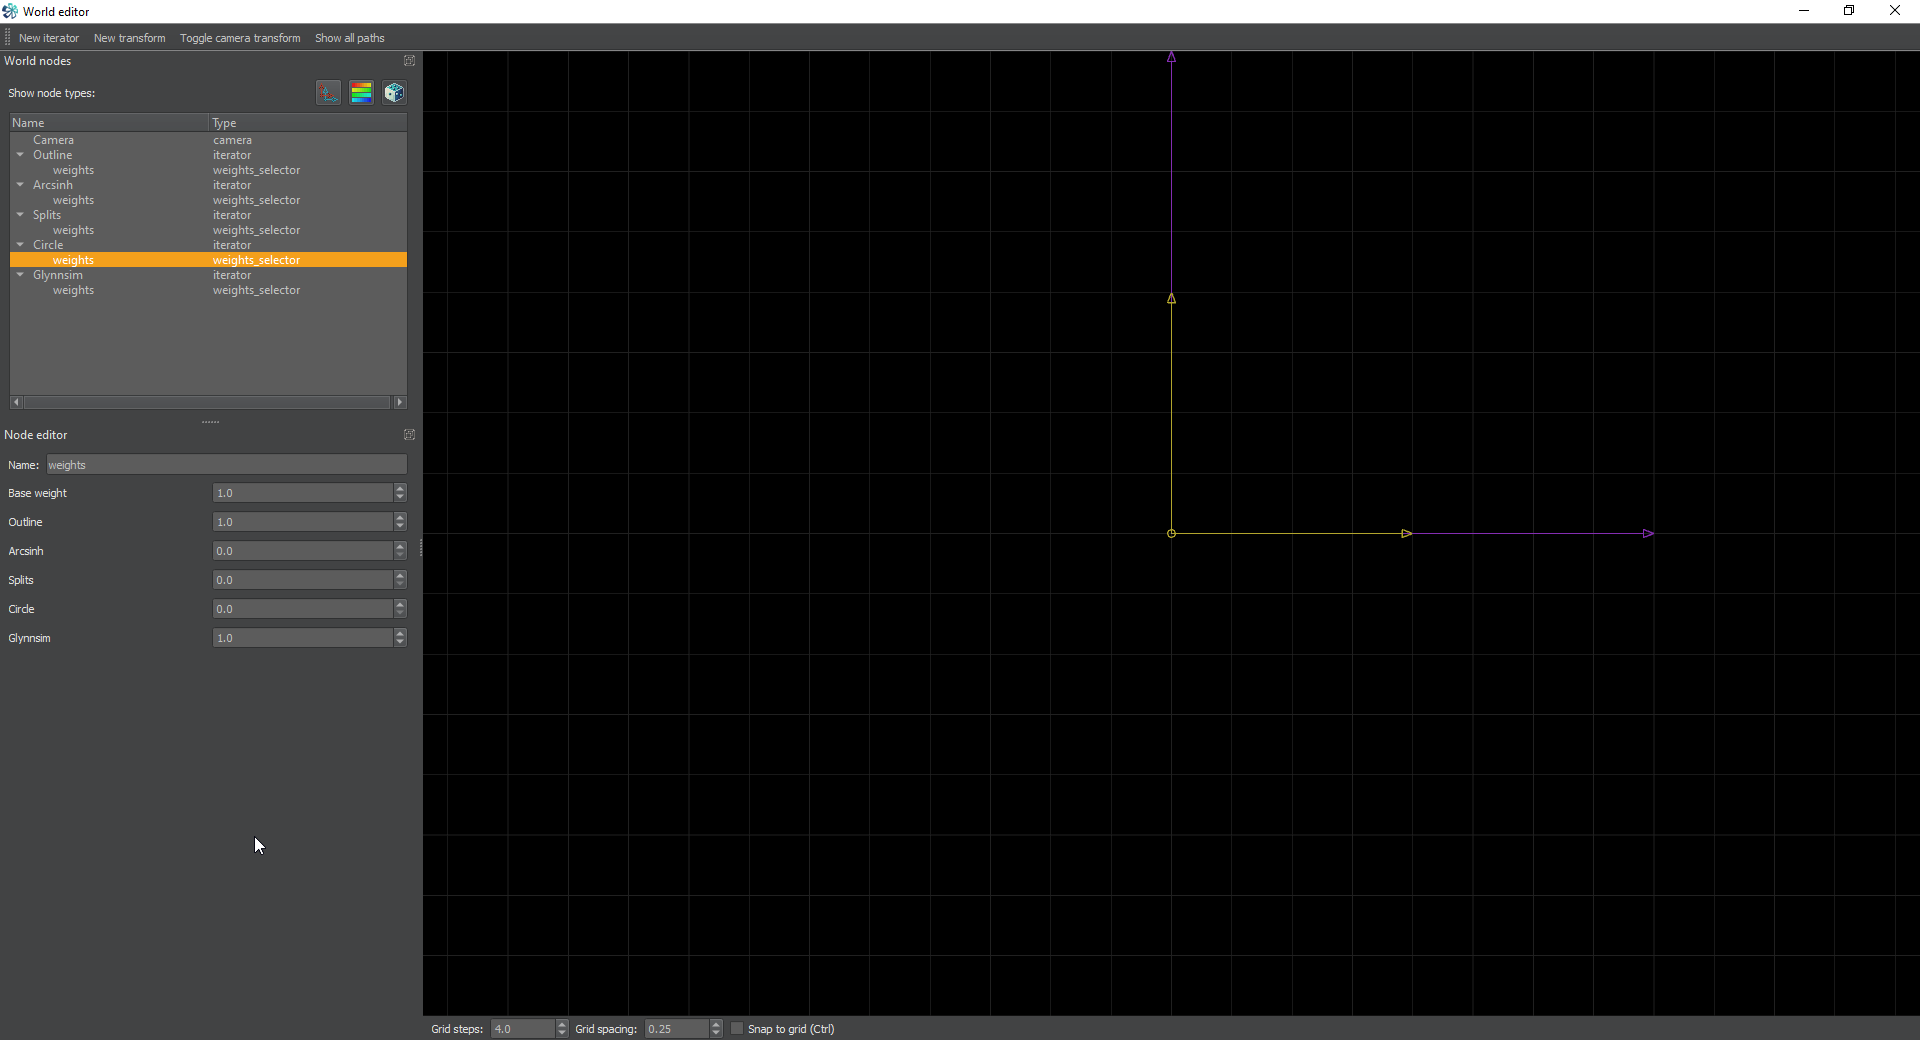
<p>Finally we’re going to go to the Circle Iterator and allow it to go to outline for now.</p>

<p><a href="/assets/images/chaotica-esplits-part2/chaotica_XyxZASl7DR.png"><img src="/assets/images/chaotica-esplits-part2/chaotica_XyxZASl7DR.png" alt="Splits Weights" /></a></p>

<h2 id="weights-background">Weights Background</h2>

<p>One way to think of it is like this. When you create a pre or pre transform chain, you’re only allowing the order of transforms that you choose to happen. You specify the order. You can use weights the same way but with whole iterators. You can tell one iterator to go to the next and then go to another, and finally back to the beginning. <strong>NOTE: There must be a way back to the start or the whole process only happens once and the result fails.</strong> Chaotica inserts the default weights when an iterator is created. I could have gone over this whole process at the end, which is where you usually setup the weights, but I wanted to illustrate something. When we add the next iterator, Chaotica will automatically insert weights for the last iterator into the others and we will need to go back and correct this. You’ll see what I mean in a moment. The point is that this is something you’ll need to watch out for when you’re playing with weights. I personally find it way easier to create a flow chart on paper of each step and then setup the weights according to that.</p>

<h2 id="back-to-the-fractal">Back to the fractal</h2>

<p>Now the next step is to go back to our iterator and setup a new pre transform. This one will be mobius with Im_B set to 1.84. Have no fear, this is just going to move the whole thing down to compensate for the unpolar, which we’re going to add next. Go ahead and do that, and you should have something a lot like this.</p>

<blockquote>
  <p>Some of you have asked how I got this number. There’s no complex math involved in this. It can definitely be calculated, but my personal method is to do small tweaks to the values until it’s a close approximation to what I want, and then zoom in and tweak the numbers by very tiny amounts until I get the right value. You can usually tell it’s right when everything lines up and doesn’t overlap. Or if you’re going for a look with overlaps, go for it. The idea is to make yourself happy with what you’re creating.</p>
</blockquote>

<p><a href="/assets/images/chaotica-esplits-part2/chaotica_2RIV0JSC7y.png"><img src="/assets/images/chaotica-esplits-part2/chaotica_2RIV0JSC7y.png" alt="unpolar main" /></a> <a href="/assets/images/chaotica-esplits-part2/chaotica_UJa0N2G6ty.png"><img src="/assets/images/chaotica-esplits-part2/chaotica_UJa0N2G6ty.png" alt="unpolar editor" /></a></p>

<h2 id="final-steps">Final Steps</h2>

<p>We have successfully turned our elliptic-splits fractal into a circle. From this point there are a lot of things you can do. I’ll cover three possibilities here. The main one we’re going to cover is sending this to circus, but I would create a save file at this point and explore for later. The next three sections are branches and diverge from this point, so saving here is important for you to swap back to this point.</p>

<h3 id="spiral">Spiral</h3>

<p>The first possibility is spiraling this. It’s covered in the <a href="https://www.pug.fyi/chaotica/camera/spiral">Camera Spiral</a> Tutorial. Feel free to explore that path. It looks a lot like this when you apply it.</p>

<p><a href="/assets/images/chaotica-esplits-part2/chaotica_9zUzyaPnWt.jpg"><img src="/assets/images/chaotica-esplits-part2/chaotica_9zUzyaPnWt.jpg" alt="Spiral" /></a> <a href="/assets/images/chaotica-esplits-part2/chaotica_HC64mvI8Ma.png"><img src="/assets/images/chaotica-esplits-part2/chaotica_HC64mvI8Ma.png" alt="Spiral Editor" /></a></p>

<h3 id="glynnsim">Glynnsim</h3>

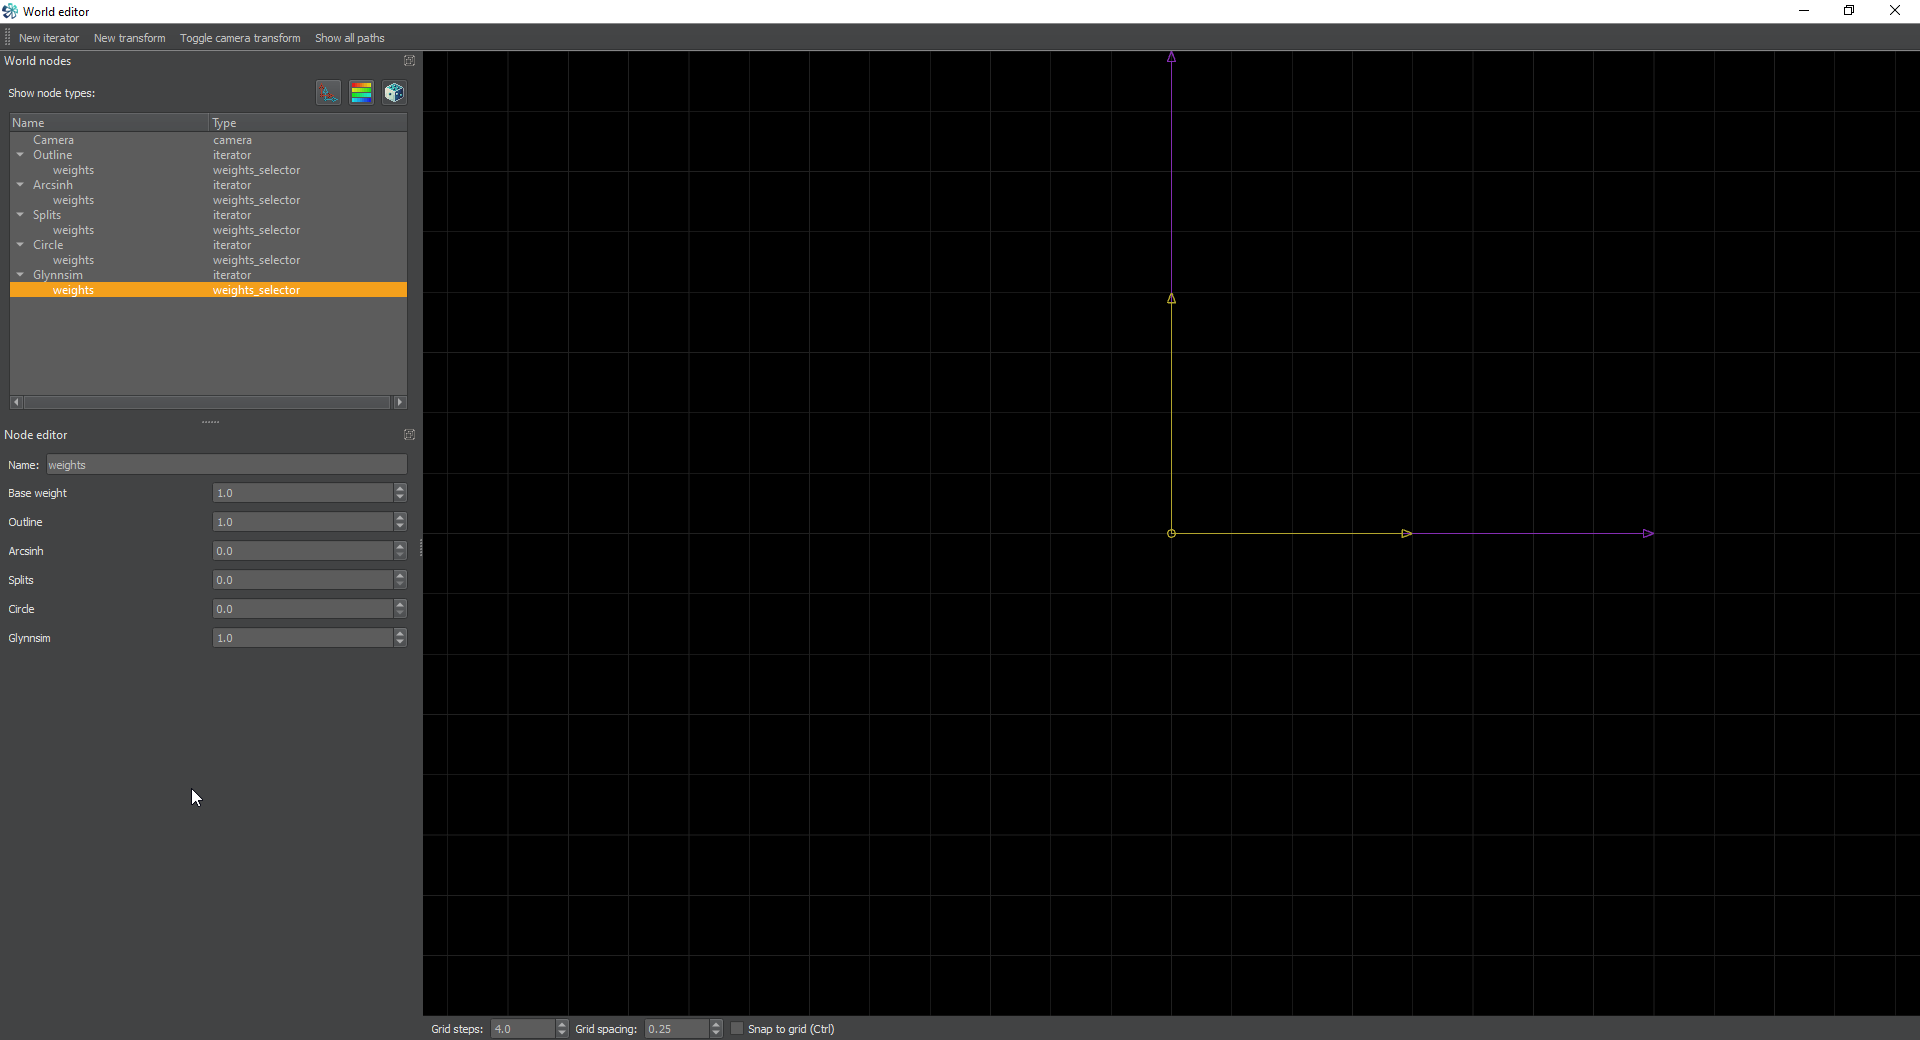
<p>Another Possibility is filling a Glynnsim like we covered in the <a href="https://www.pug.fyi/chaotica/transform/chains">Transform Chains</a> tutorial. We simply create a new iterator and set it’s transform to glynnsim3. Next we’re going to have to fiddle with the weights so it comes out right. We don’t want to Outline, Arcsinh, or Splits iterators to go to the new glynnsim iterator. So we go into the weights for each of those and disable that link. Then we want the glynnsim to only go to the Outline iterator and itself. So the weights will look like this.</p>

<p><a href="/assets/images/chaotica-esplits-part2/chaotica_HOsrsvkGoA.png"><img src="/assets/images/chaotica-esplits-part2/chaotica_HOsrsvkGoA.png" alt="Outline Glynnsim" /></a> <a href="/assets/images/chaotica-esplits-part2/chaotica_9zpUS5j0mc.png"><img src="/assets/images/chaotica-esplits-part2/chaotica_9zpUS5j0mc.png" alt="Arcsinh Glynnsim" /></a> <a href="/assets/images/chaotica-esplits-part2/chaotica_e1kL7XJw0v.png"><img src="/assets/images/chaotica-esplits-part2/chaotica_e1kL7XJw0v.png" alt="Splits Glynnsim" /></a> <a href="/assets/images/chaotica-esplits-part2/chaotica_QDP4343YYp.png"><img src="/assets/images/chaotica-esplits-part2/chaotica_QDP4343YYp.png" alt="Circle Glynnsim" /></a> <a href="/assets/images/chaotica-esplits-part2/chaotica_rzTXHyOwuo.png"><img src="/assets/images/chaotica-esplits-part2/chaotica_rzTXHyOwuo.png" alt="Glynnsim" /></a></p>

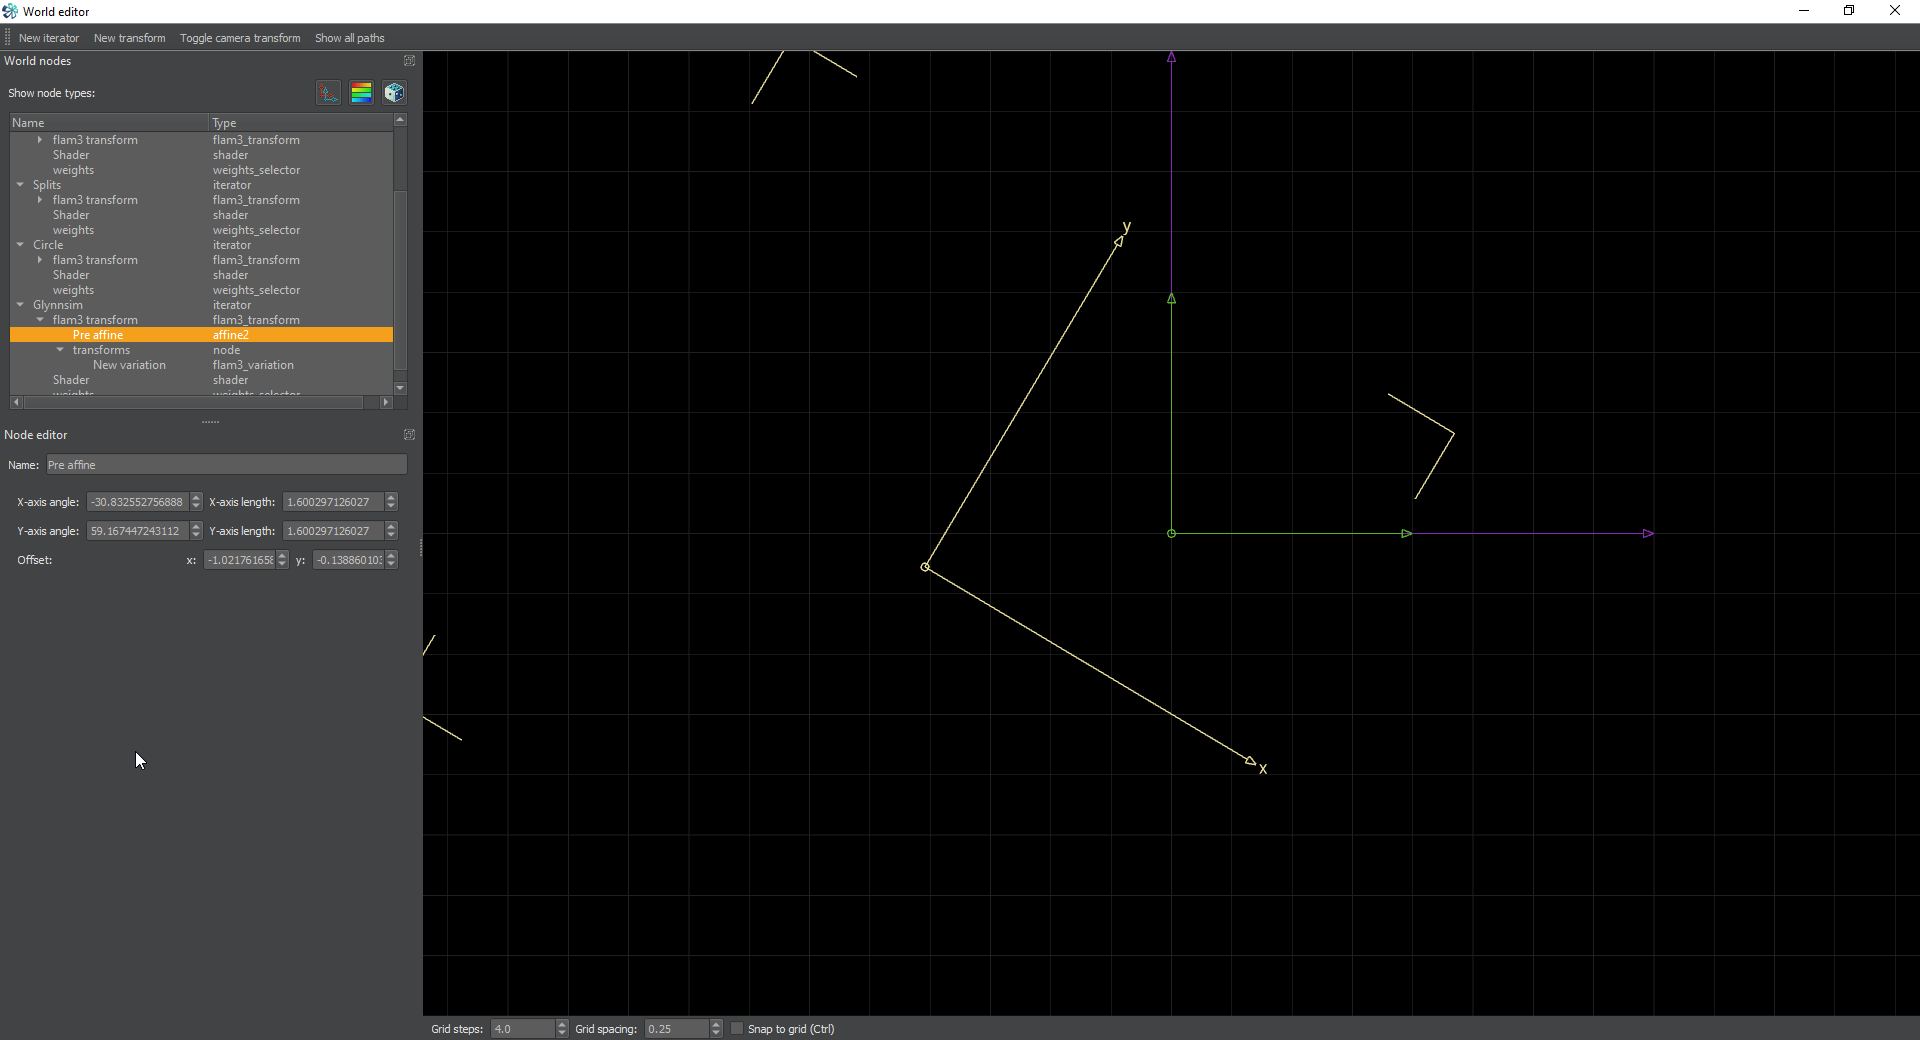
<p>Finally adjust the thickness value to match our ring. Mine came out to 0.24. And then move the pre-affine for that iterator to make pretty circles.</p>

<p><a href="/assets/images/chaotica-esplits-part2/chaotica_N0VOoc9loU.png"><img src="/assets/images/chaotica-esplits-part2/chaotica_N0VOoc9loU.png" alt="glynnsim main" /></a> <a href="/assets/images/chaotica-esplits-part2/chaotica_EpYqkXMRQJ.png"><img src="/assets/images/chaotica-esplits-part2/chaotica_EpYqkXMRQJ.png" alt="glynnsim Editor" /></a></p>

<h3 id="circus">Circus</h3>

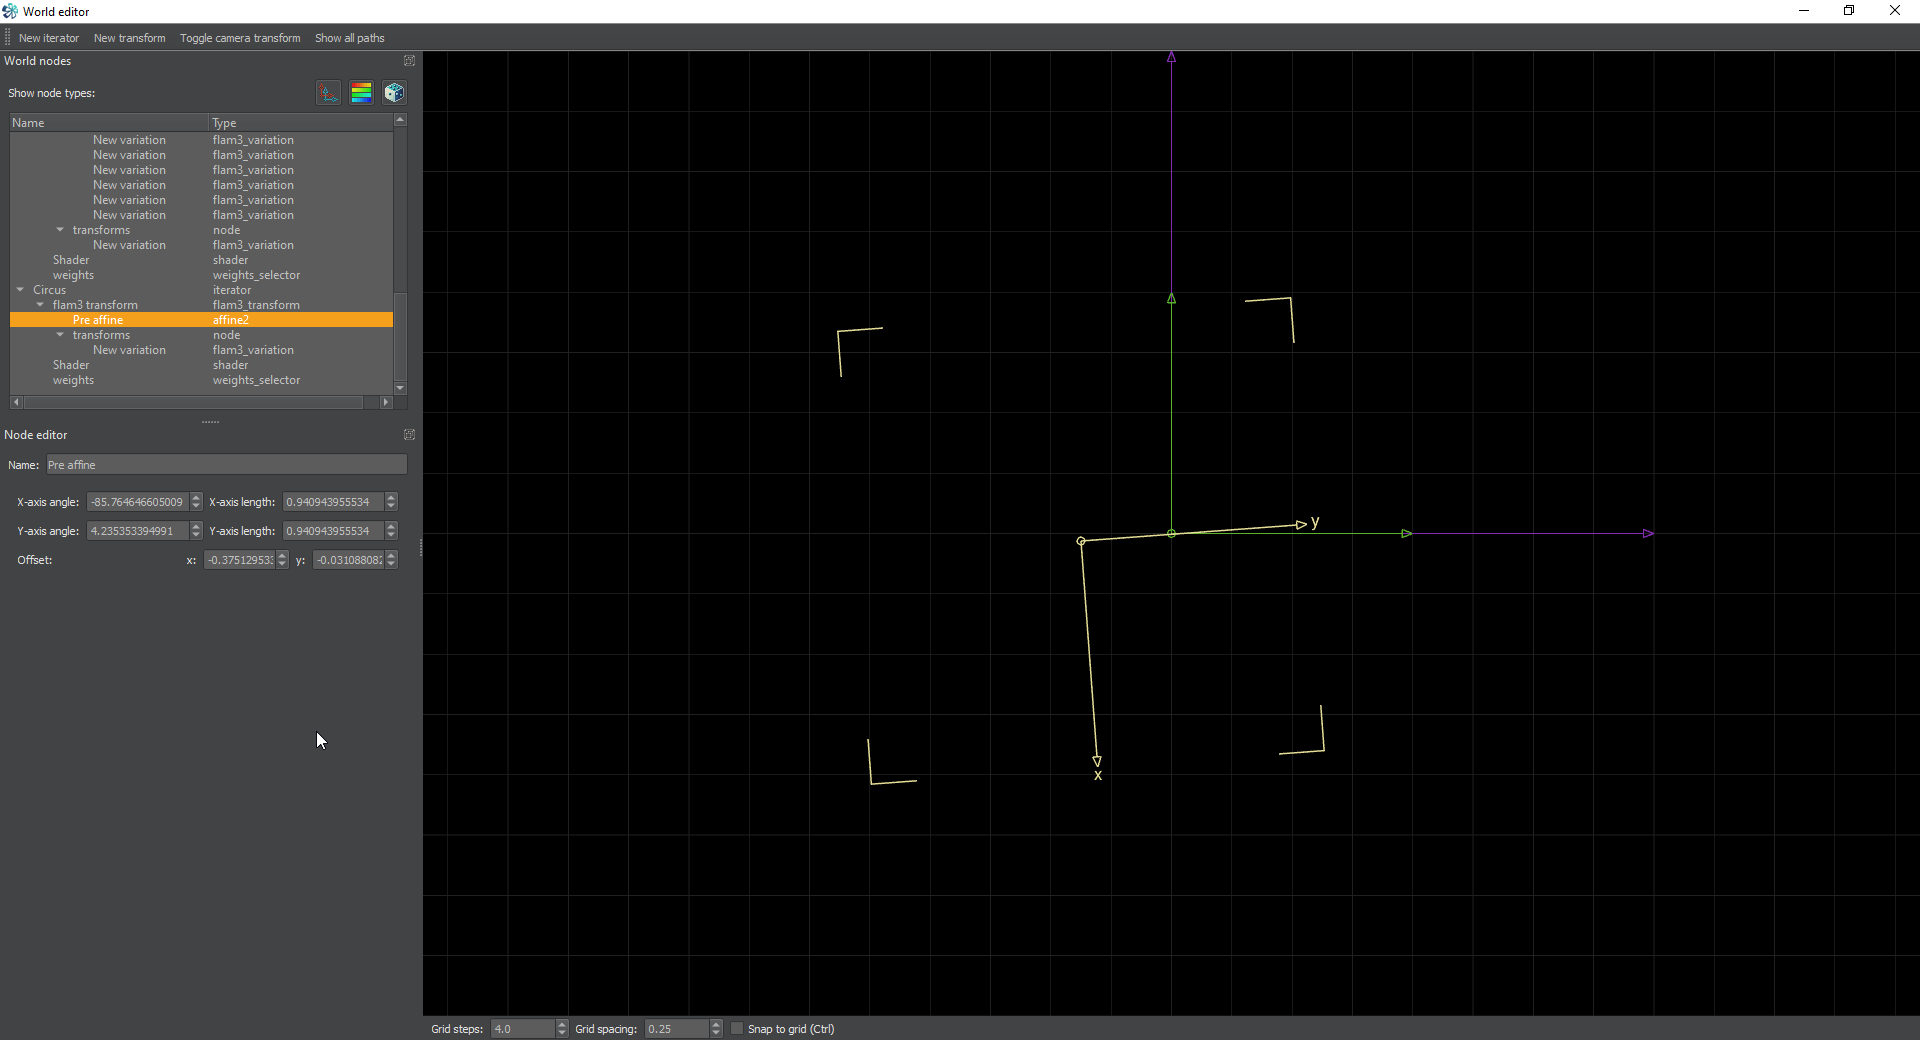
<p>The main focus of this tutorial is to use Circus though. If you’ve been following along, we can set the weights exactly like the glynnsim weights except with the name changed to Circus. The transform will be circus and set the scale to whatever makes you happy. I ended up with 0.81 for that value. Next use the pre-affine to spin, move and size it until you’re happy. Here’s my result.</p>

<p><a href="/assets/images/chaotica-esplits-part2/chaotica_ZqC1yqBG02.jpg"><img src="/assets/images/chaotica-esplits-part2/chaotica_ZqC1yqBG02.jpg" alt="Circus main" /></a> <a href="/assets/images/chaotica-esplits-part2/chaotica_WxhJH2ugCh.png"><img src="/assets/images/chaotica-esplits-part2/chaotica_WxhJH2ugCh.png" alt="Circus Editor" /></a></p>

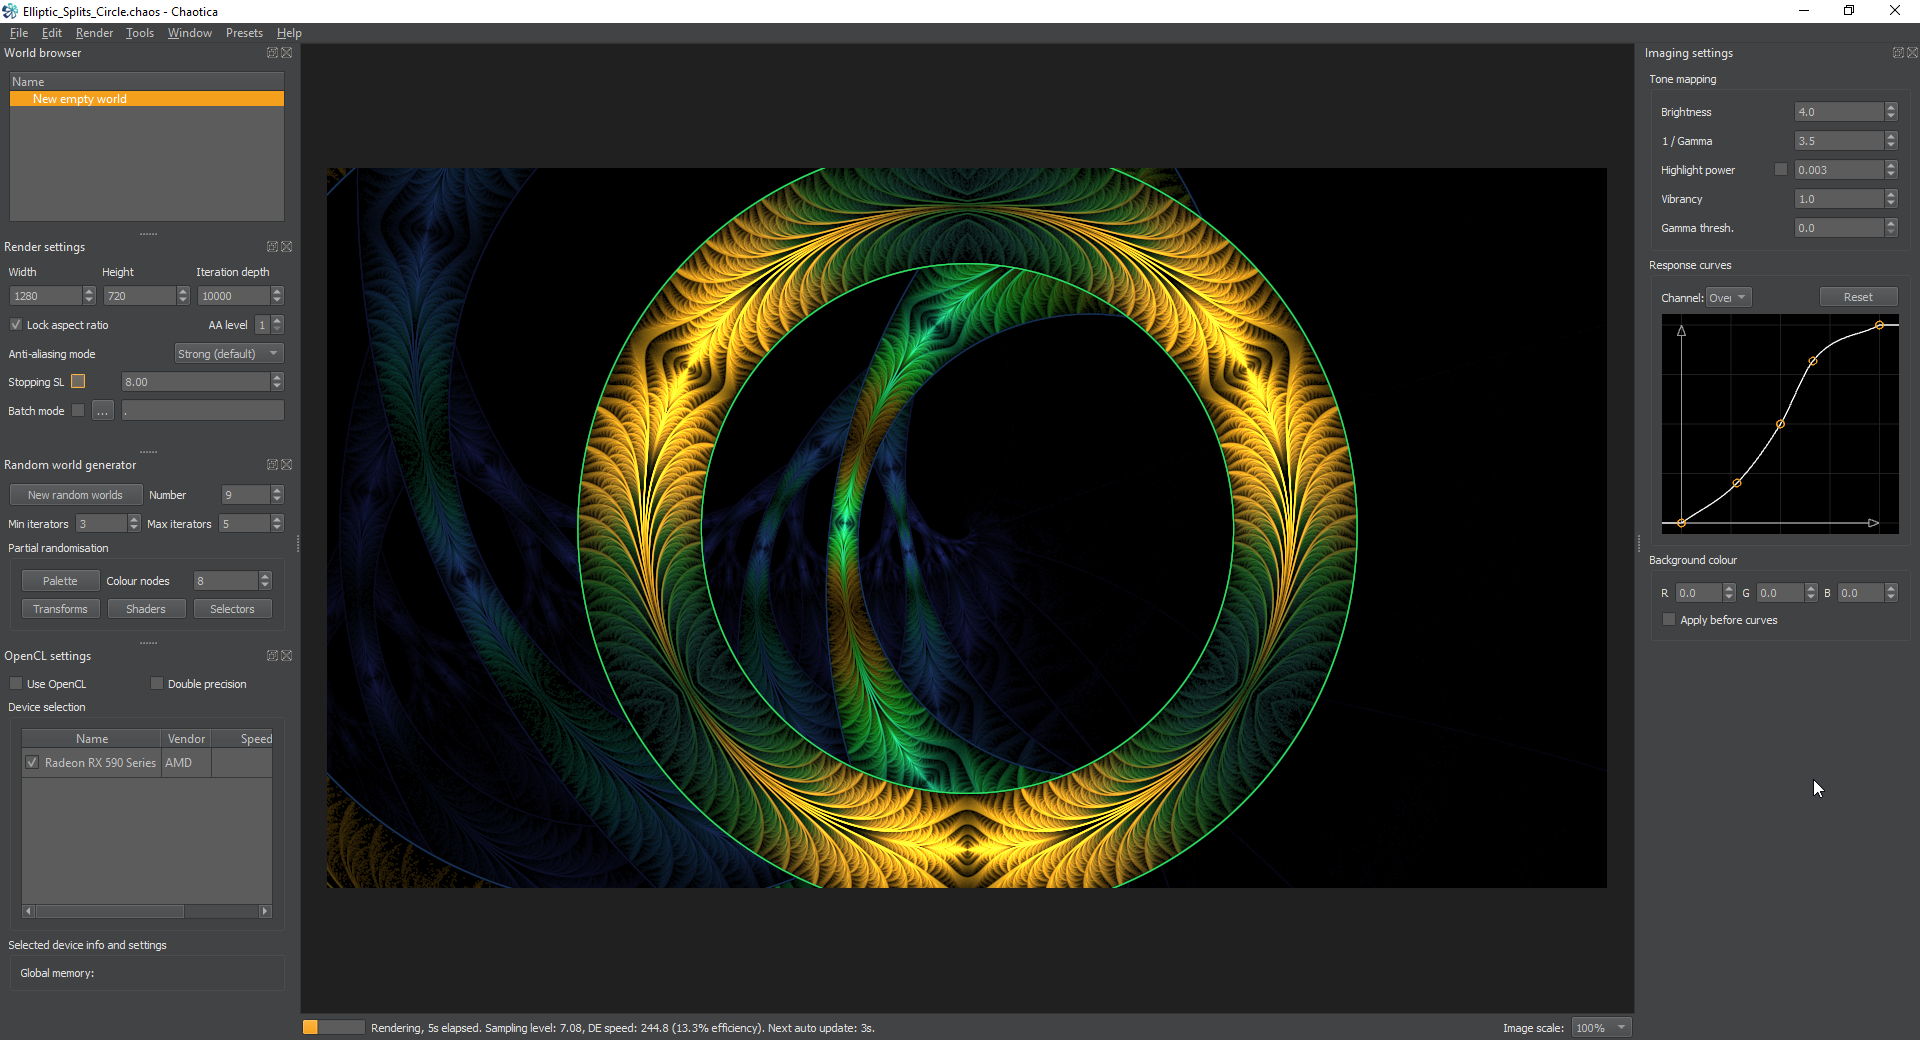
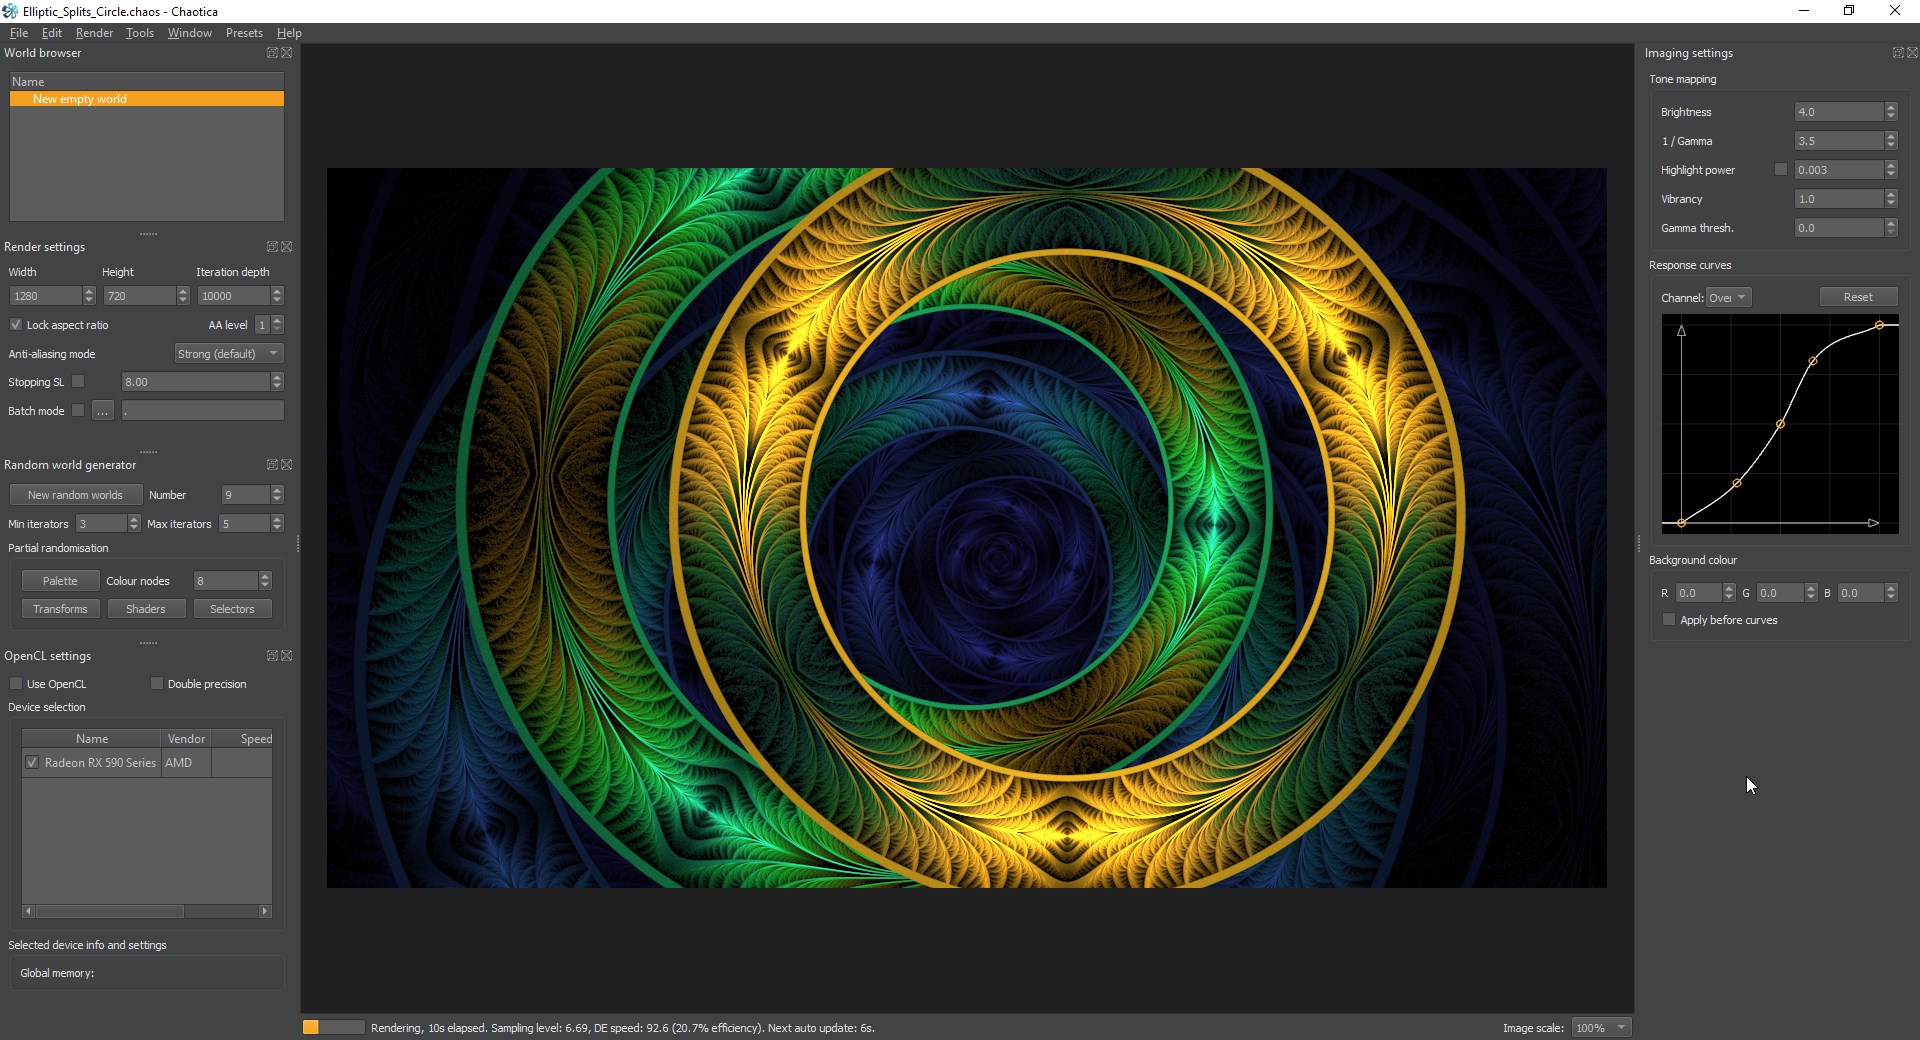
<p>Finally, get your palette and shaders where you like, and you’ll have some awesome to show off later.</p>

<p><a href="/assets/images/chaotica-esplits-part2/Roman Arcana.png"><img src="/assets/images/chaotica-esplits-part2/Roman Arcana.png" alt="Final Image" /></a></p>

<blockquote>
  <p>Keep in mind, it’s not about the destination. It’s about the journey and what you learned along the way. -Pugnacious</p>
</blockquote>]]></content><author><name>Pugnacious</name></author><category term="fractal" /><category term="chaotica" /><summary type="html"><![CDATA[This tutorial will show you how to turn an elliptic-splits to 11.]]></summary></entry><entry><title type="html">Command Line Active Directory Management</title><link href="https://www.pug.fyi/computers/ad_management" rel="alternate" type="text/html" title="Command Line Active Directory Management" /><published>2021-06-07T00:00:00+00:00</published><updated>2021-06-07T00:00:00+00:00</updated><id>https://www.pug.fyi/computers/active_directory_commandline</id><content type="html" xml:base="https://www.pug.fyi/computers/ad_management"><![CDATA[<h2 id="introduction">Introduction</h2>

<p>I’m sure you all have some form of IT experience. If you didn’t, you wouldn’t be here. These are some tricks that I use on a regular basis to get things done. It’s not all of the possibilities, but it’s a reference for those who need it.</p>

<h2 id="getting-information">Getting Information</h2>

<p>One of the first things you need to do when you’re looking at an AD account is to view the account. I find that the windows menu is horrible. I mean seriously Microsoft. Give us an account and permissions editor that isn’t right out of Windows 98. If anyone knows a functional replacement for those menus that works better and is more modern, please for the love of Pete, let me know. Anyway, I digress…</p>

<h3 id="users">Users</h3>

<p>I find that looking at information in a command line window can be a lot better on the eyes and easier to read than the GUI sometimes. For that, we use the net user command with the domain flag.</p>

<p><code class="language-plaintext highlighter-rouge">net user /domain "Active Directory Username"</code></p>

<p>This will display all of the relevant details and give you a nice display. I’m sorry, but I’m not going to show you a screenshot as the information I have is for an actual user and I don’t really have a ton of time to make a test domain at the moment. If you want to see what the command looks like, feel free to run it. If you’re scared of me giving you arbitrary commands use the /? flag in windows and it will give you the help details of the command.</p>

<h3 id="groups">Groups</h3>

<p>Getting information on groups is just as easy as the previous. To get a list of all groups on a domain controller the command would be as follows.</p>

<p><code class="language-plaintext highlighter-rouge">net group /domain</code></p>

<p>To get information on a specific group you would use the command like this:</p>

<p><code class="language-plaintext highlighter-rouge">net group /domain "Active Directory Group"</code></p>

<h2 id="modifying-things">Modifying things</h2>

<p>What day doesn’t go without modifying or managing accounts?</p>

<h3 id="user-management">User Management</h3>

<p>To change a user’s password, the command would be as follows.</p>

<p><code class="language-plaintext highlighter-rouge">net user "Active Directory Username" "password" /domain</code></p>

<p>Or we can disable the account.</p>

<p><code class="language-plaintext highlighter-rouge">net user "Active Directory Username" /active:no /domain</code></p>

<h3 id="group-management">Group Management</h3>

<p>One of the most common things I have to do on a daily basis is add and remove users from groups. To add a user it’s the net group command like this.</p>

<p><code class="language-plaintext highlighter-rouge">net group "Active Directory Group" "Active Directory Username" /add /domain</code></p>

<p>To remove a user from a group it’s almost the same.</p>

<p><code class="language-plaintext highlighter-rouge">net group "Active Directory Group" "Active Directory Username" /delete /domain</code></p>

<h2 id="powershell-tricks">Powershell tricks</h2>

<p>Also, using powershell, you can accomplish some nifty things.</p>

<h3 id="list-all-locked-user-accounts">List all locked user accounts</h3>

<p>Here’s the command to list all locked user accounts on your domain controller.</p>

<p><code class="language-plaintext highlighter-rouge">Search-ADAccount -Lockedout | Select-Object Name, SamAccountName</code></p>

<p>That will list all currently locked out accounts. So now how do we unlock them? Another powershell command.</p>

<p><code class="language-plaintext highlighter-rouge">Search-ADAccount -Lockedout | Unlock-AdAccount</code></p>]]></content><author><name>Pugnacious</name></author><category term="computer" /><category term="activedirectory" /><summary type="html"><![CDATA[Here are some tricks to managing active directory through command line.]]></summary></entry><entry><title type="html">Chaotica: Camera Spiral</title><link href="https://www.pug.fyi/chaotica/camera/spiral" rel="alternate" type="text/html" title="Chaotica: Camera Spiral" /><published>2021-05-31T00:00:00+00:00</published><updated>2021-05-31T00:00:00+00:00</updated><id>https://www.pug.fyi/chaotica/camera/choatica-camera-spiral</id><content type="html" xml:base="https://www.pug.fyi/chaotica/camera/spiral"><![CDATA[<h2 id="example">Example</h2>

<p>Here’s what we’re going to work towards.</p>

<p><a href="/assets/images/chaotica-camera-spiral/Gravity Wave.png"><img src="/assets/images/chaotica-camera-spiral/Gravity Wave.png" alt="Gravity Wave" /></a></p>

<h2 id="purpose">Purpose</h2>

<p>This tutorial will show you how to use multiple camera transforms in a chain. We’re going to build a simple fractal, and then use the camera to make it spiral.</p>

<h2 id="iterator-1">Iterator 1</h2>

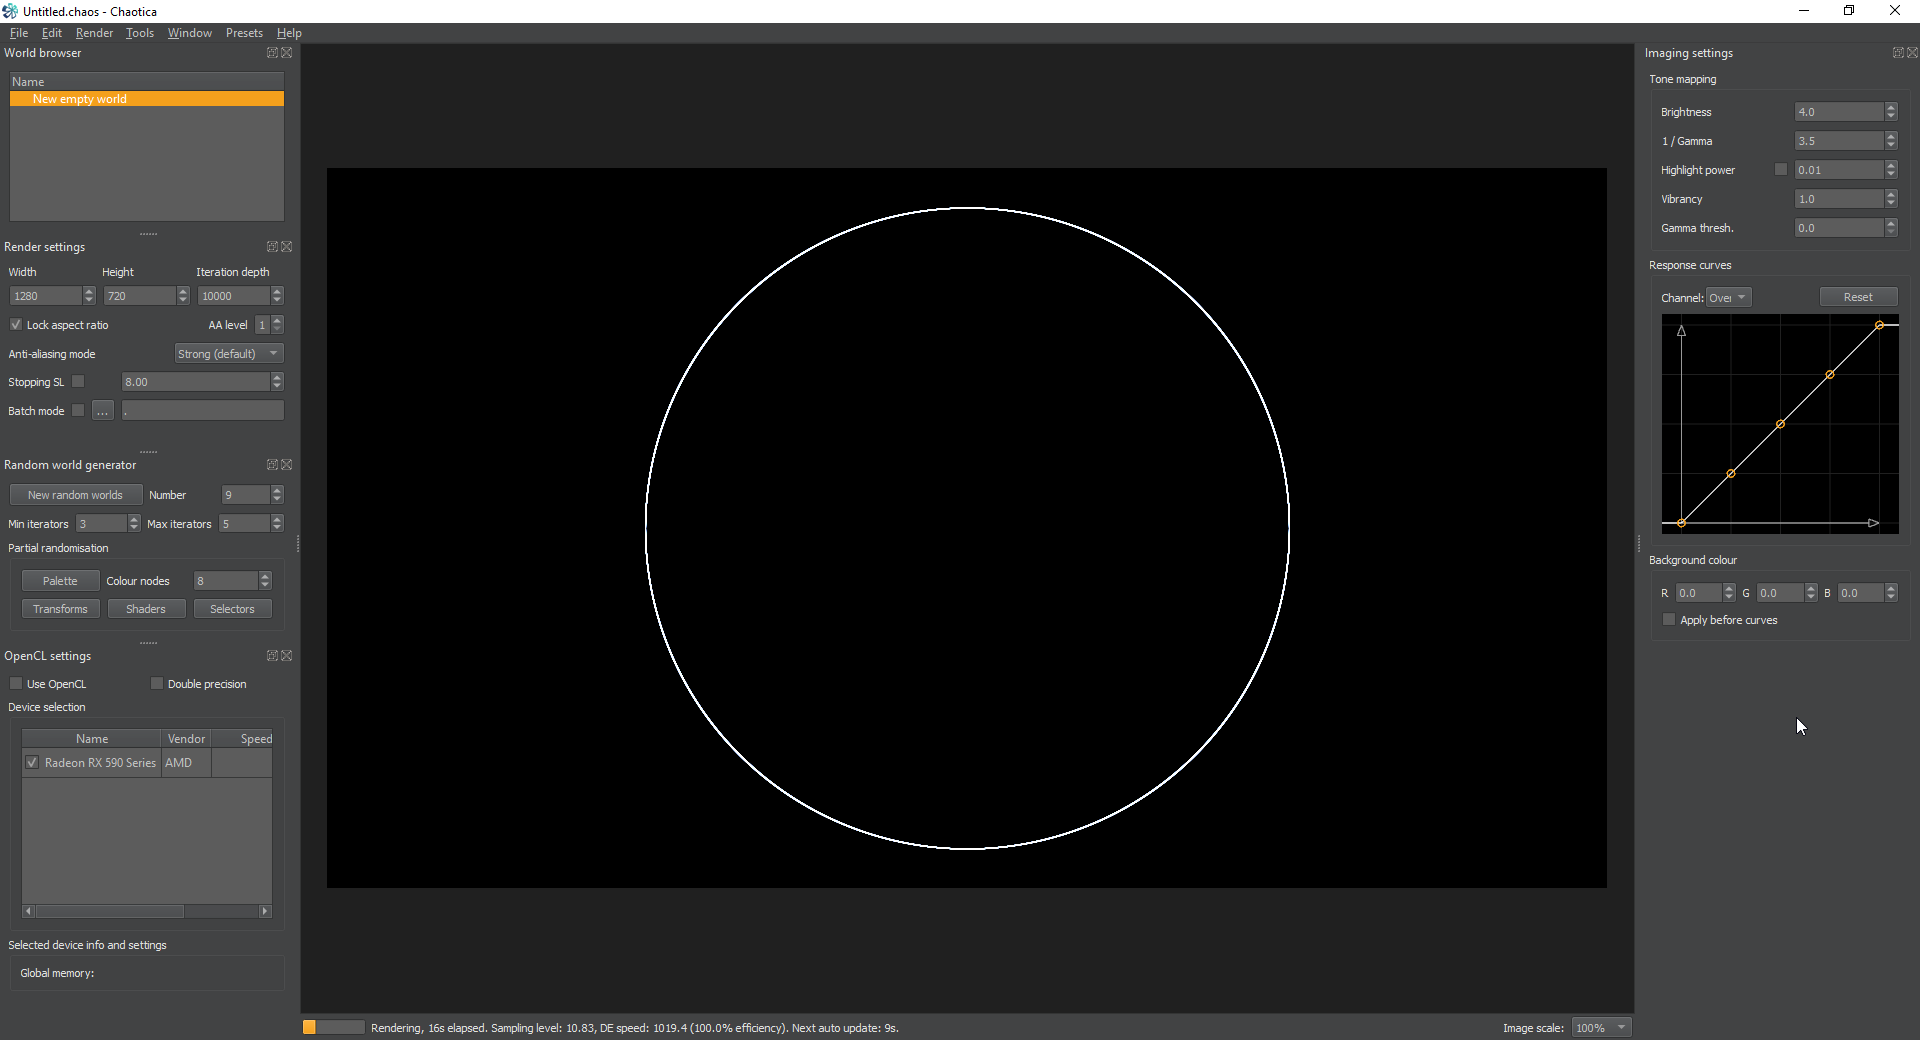
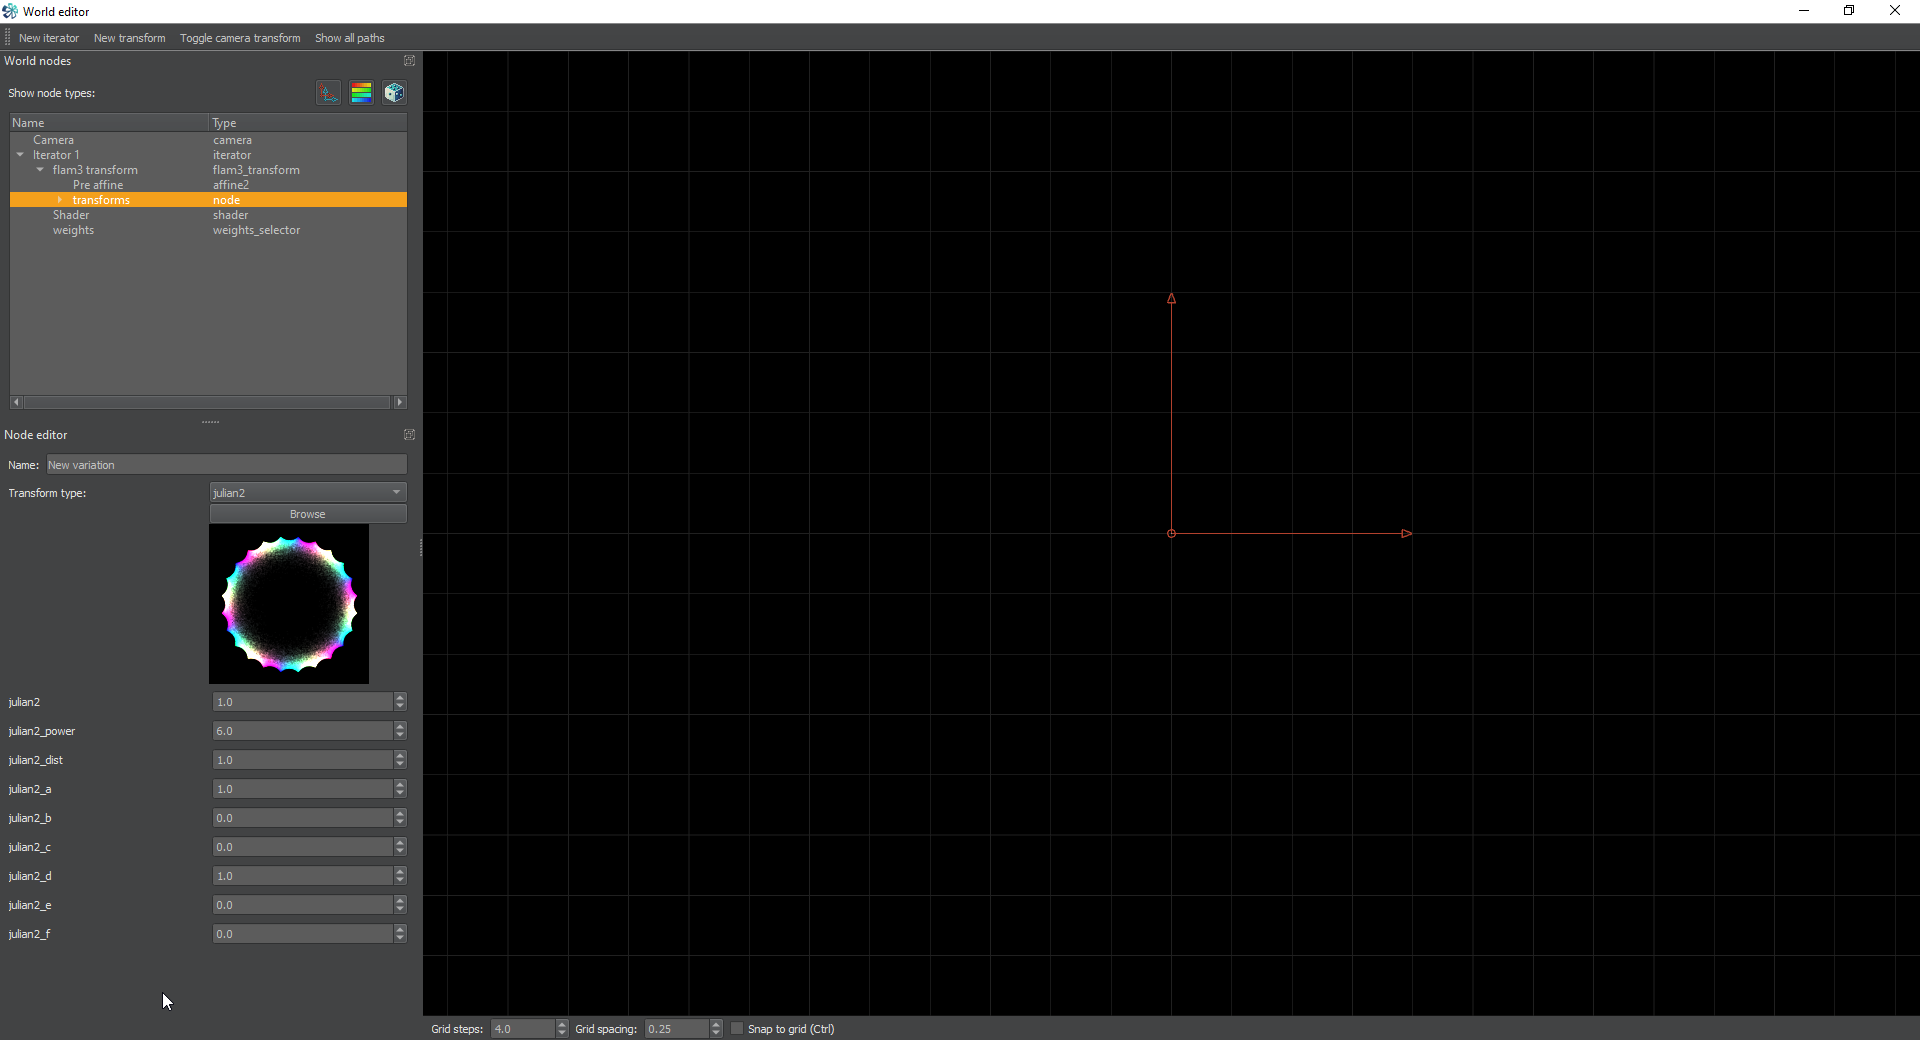
<p>On this iterator, we’re going to add a transform and set it to julian2 with a julian2_power of 6. Don’t worry if it doesn’t look like much until we’re done.</p>

<p><a href="/assets/images/chaotica-camera-spiral/chaotica_1ZRr4TXfRt.png"><img src="/assets/images/chaotica-camera-spiral/chaotica_1ZRr4TXfRt.png" alt="Iterator1" /></a> <a href="/assets/images/chaotica-camera-spiral/chaotica_GM4zLRVmua.png"><img src="/assets/images/chaotica-camera-spiral/chaotica_GM4zLRVmua.png" alt="Iterator1 Editor" /></a></p>

<h2 id="iterator-2">Iterator 2</h2>

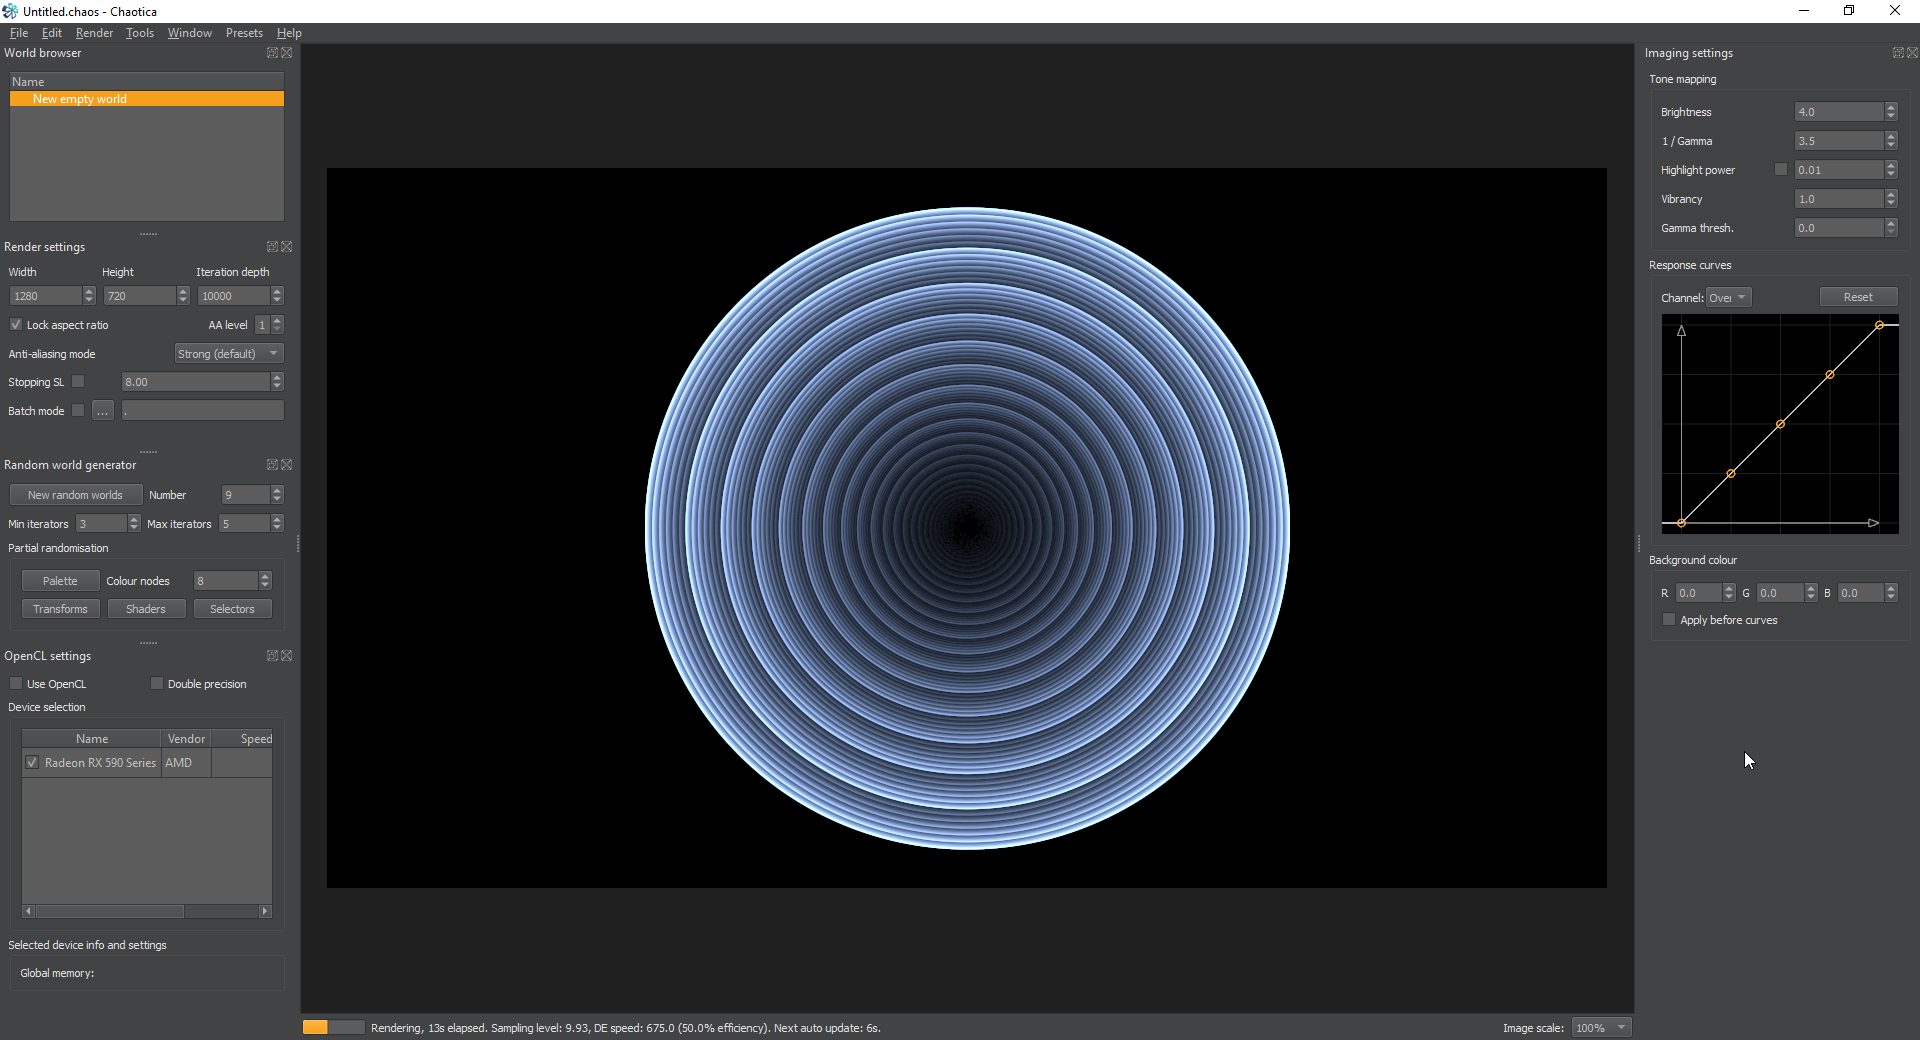
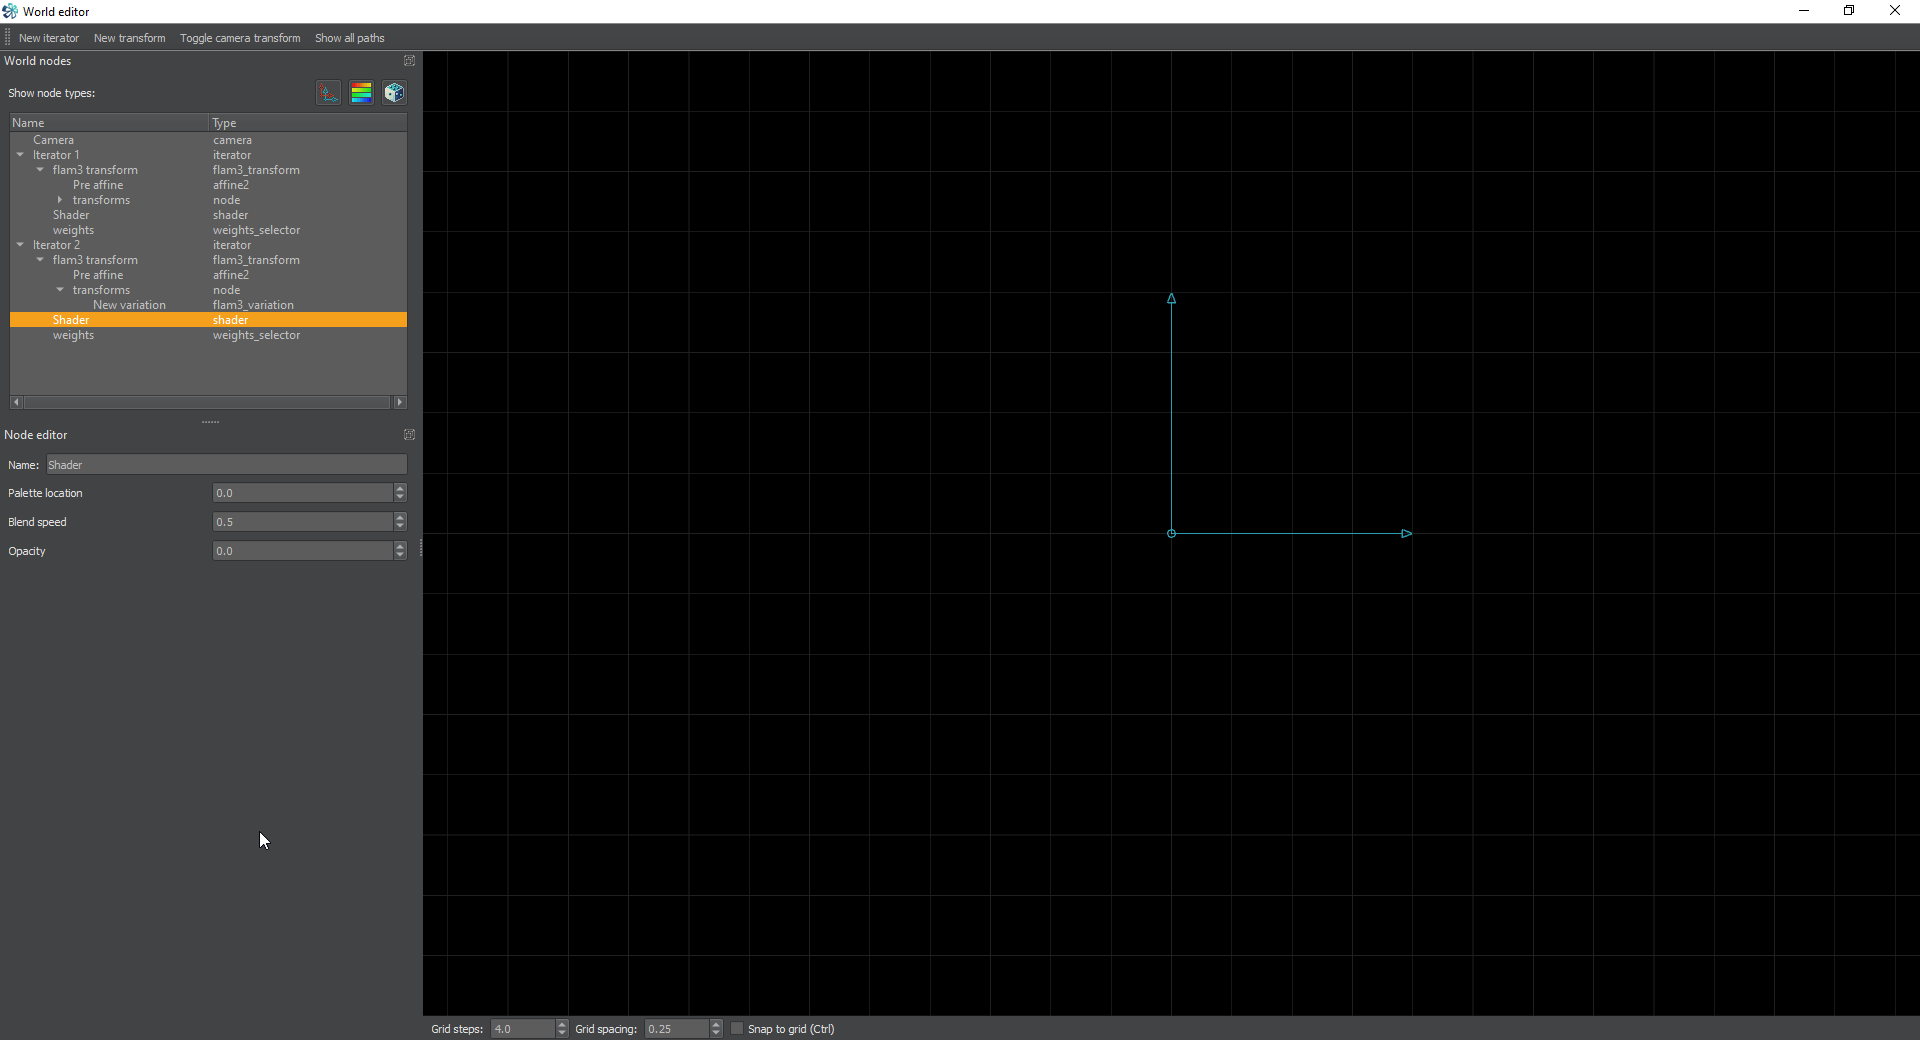
<p>On this iterator we’re going to set the transform to mobius, spiral it using a value of Im_D of -2 and we’re going to go to the shader node and set it’s opacity value to 0.</p>

<p><a href="/assets/images/chaotica-camera-spiral/chaotica_H4nn9ljVx2.png"><img src="/assets/images/chaotica-camera-spiral/chaotica_H4nn9ljVx2.png" alt="Iterator2" /></a> <a href="/assets/images/chaotica-camera-spiral/chaotica_DprPAZjZlA.png"><img src="/assets/images/chaotica-camera-spiral/chaotica_DprPAZjZlA.png" alt="Iterator2 Editor" /></a></p>

<h2 id="iterator-3">Iterator 3</h2>

<p>On this iterator we’re going to set a transform of bipolar. We’re going to then change the x and y axis length to 0.5 and then set a post transform of circlecrop and set the circlecrop_zero value to 1 to remove the crop ring. Then finally we’re going to go into the shader node and set the opacity to 0.</p>

<p><a href="/assets/images/chaotica-camera-spiral/chaotica_9cN4DI1TPa.png"><img src="/assets/images/chaotica-camera-spiral/chaotica_9cN4DI1TPa.png" alt="Iterator3" /></a> <a href="/assets/images/chaotica-camera-spiral/chaotica_aS3Kyz6yn6.png"><img src="/assets/images/chaotica-camera-spiral/chaotica_aS3Kyz6yn6.png" alt="Iterator3 Editor" /></a></p>

<h2 id="recap">Recap</h2>

<p>Ok, so we’ve created a neat spiral orb thing. This is literally just something I tossed together using random transforms. The next part of the tutorial is the main focus. I’m writing this bit to give you background and to let you know that you can use this on almost anything. It doesn’t have to be a circle, and you can pick whatever looks good to you. I would suggest to save a copy of this as it is right now, and come back after the rest of the tutorial and experiment with different ways to wrap this circle. Keep in mind that none of the following is needed to make it look good. It’s just one way to do it and this method is used to show you options for wrapping other things than a circle into a spiral.</p>

<h2 id="the-plan">The Plan</h2>

<p>Ok, now that we have a basic image to work with, what are we going to do next? It’s important to have a plan. We’re going to spiral this, but in order to spiral it, we need to bend it into a specific shape. In order to create the spiral, you need a hole in the middle, as well a blank area around the outside. I’m going to take it a step further and make it more interesting in this image by first creating a tiled strip and then bending that around into a donut before spiraling it. Keep in mind that this is only one way to do it and there are many others.</p>

<h2 id="camera-transform">Camera Transform</h2>

<p>This is where it gets fun. Enable the camera transform. Leave linear on there and turn on post transforms. I’m going to break each step down into it’s own section and provide images so you can see how each step transforms the final image. Keep in mind that pre and post transforms operate in a top-down way. That means that it’s like coding a sequence of changes.</p>

<h3 id="arcsech">arcsech</h3>

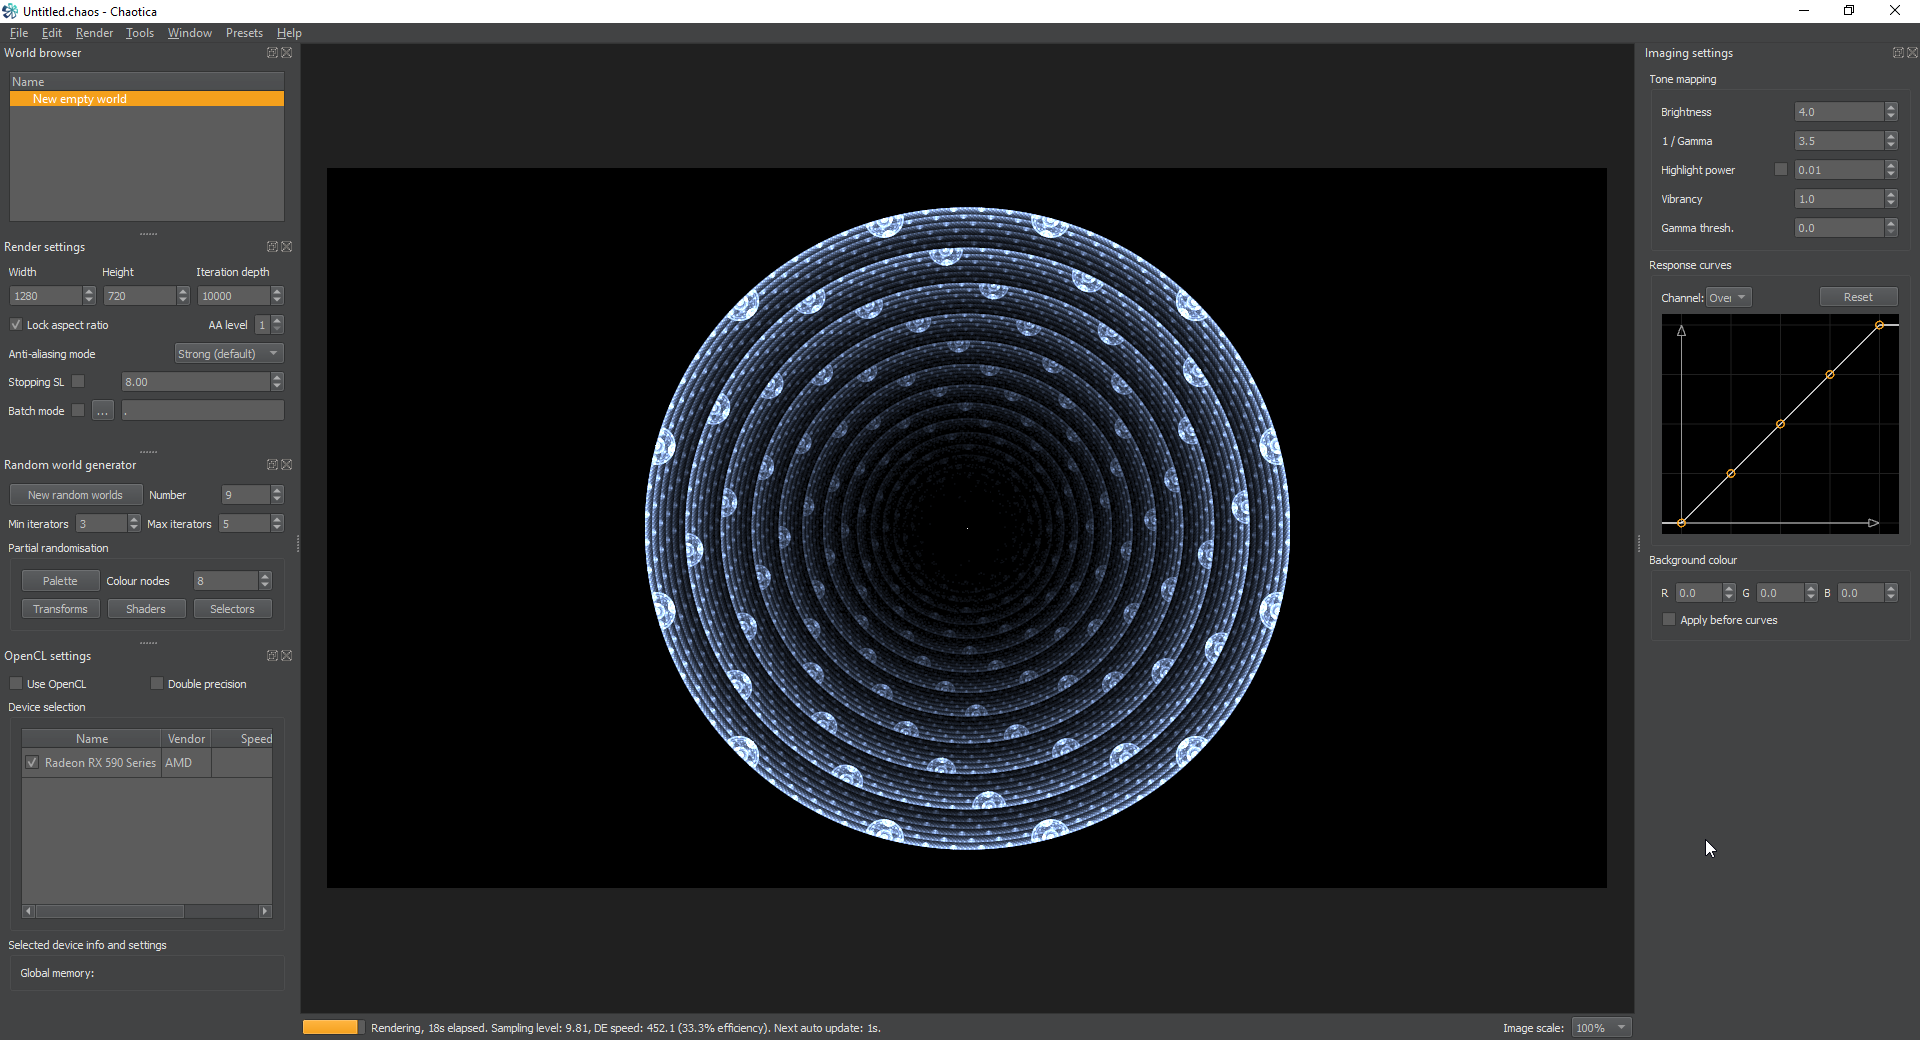
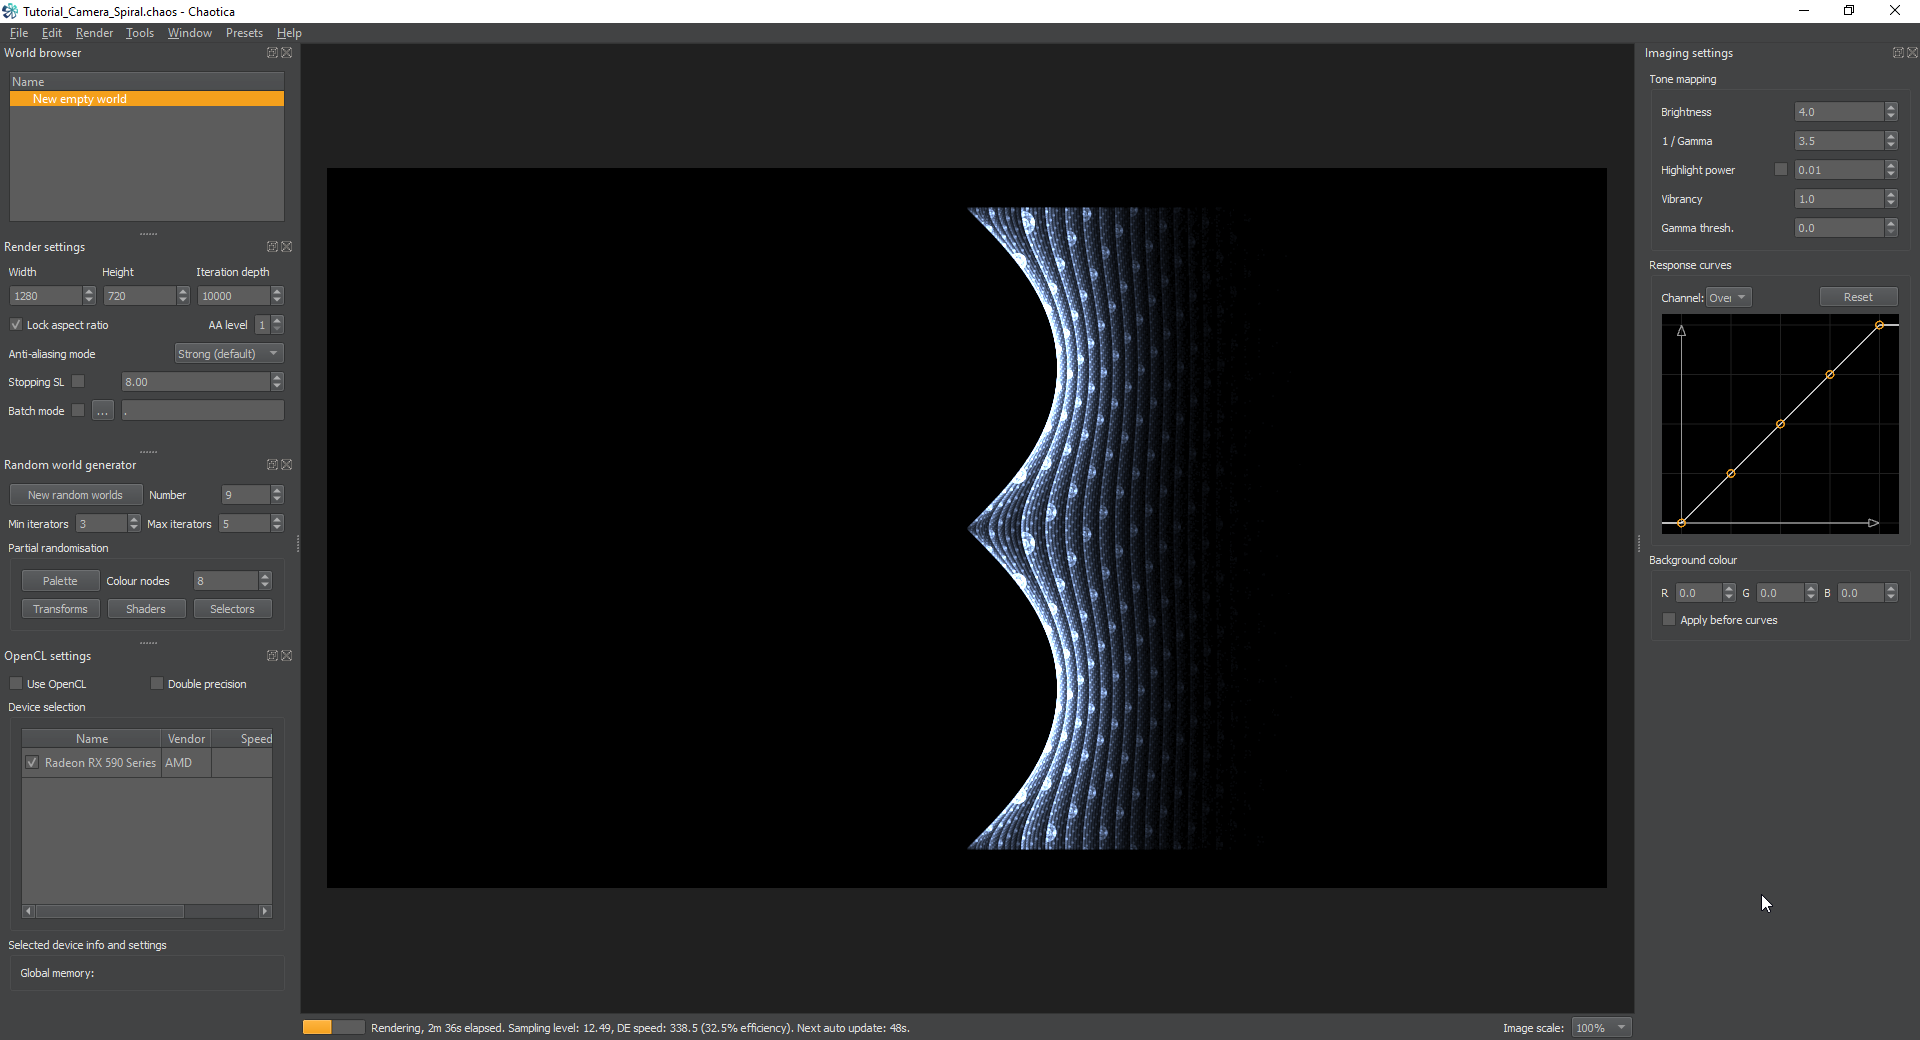
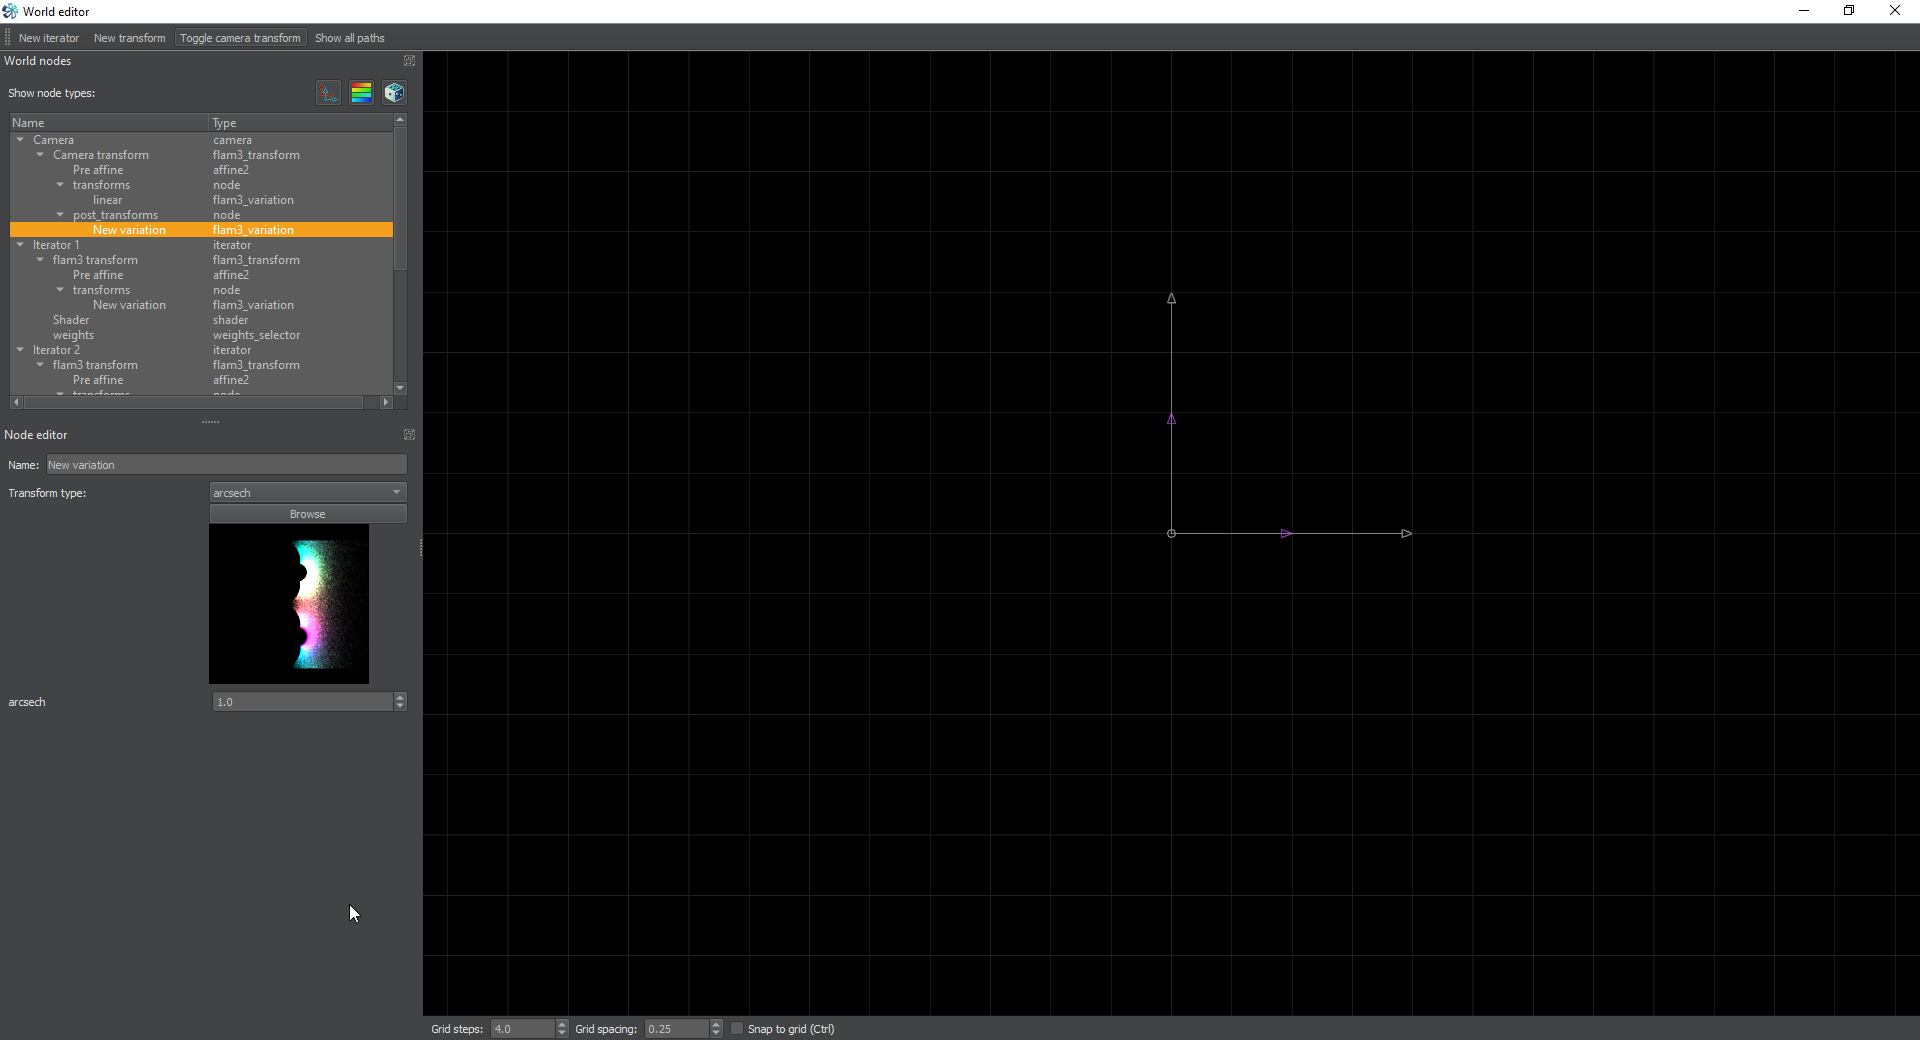
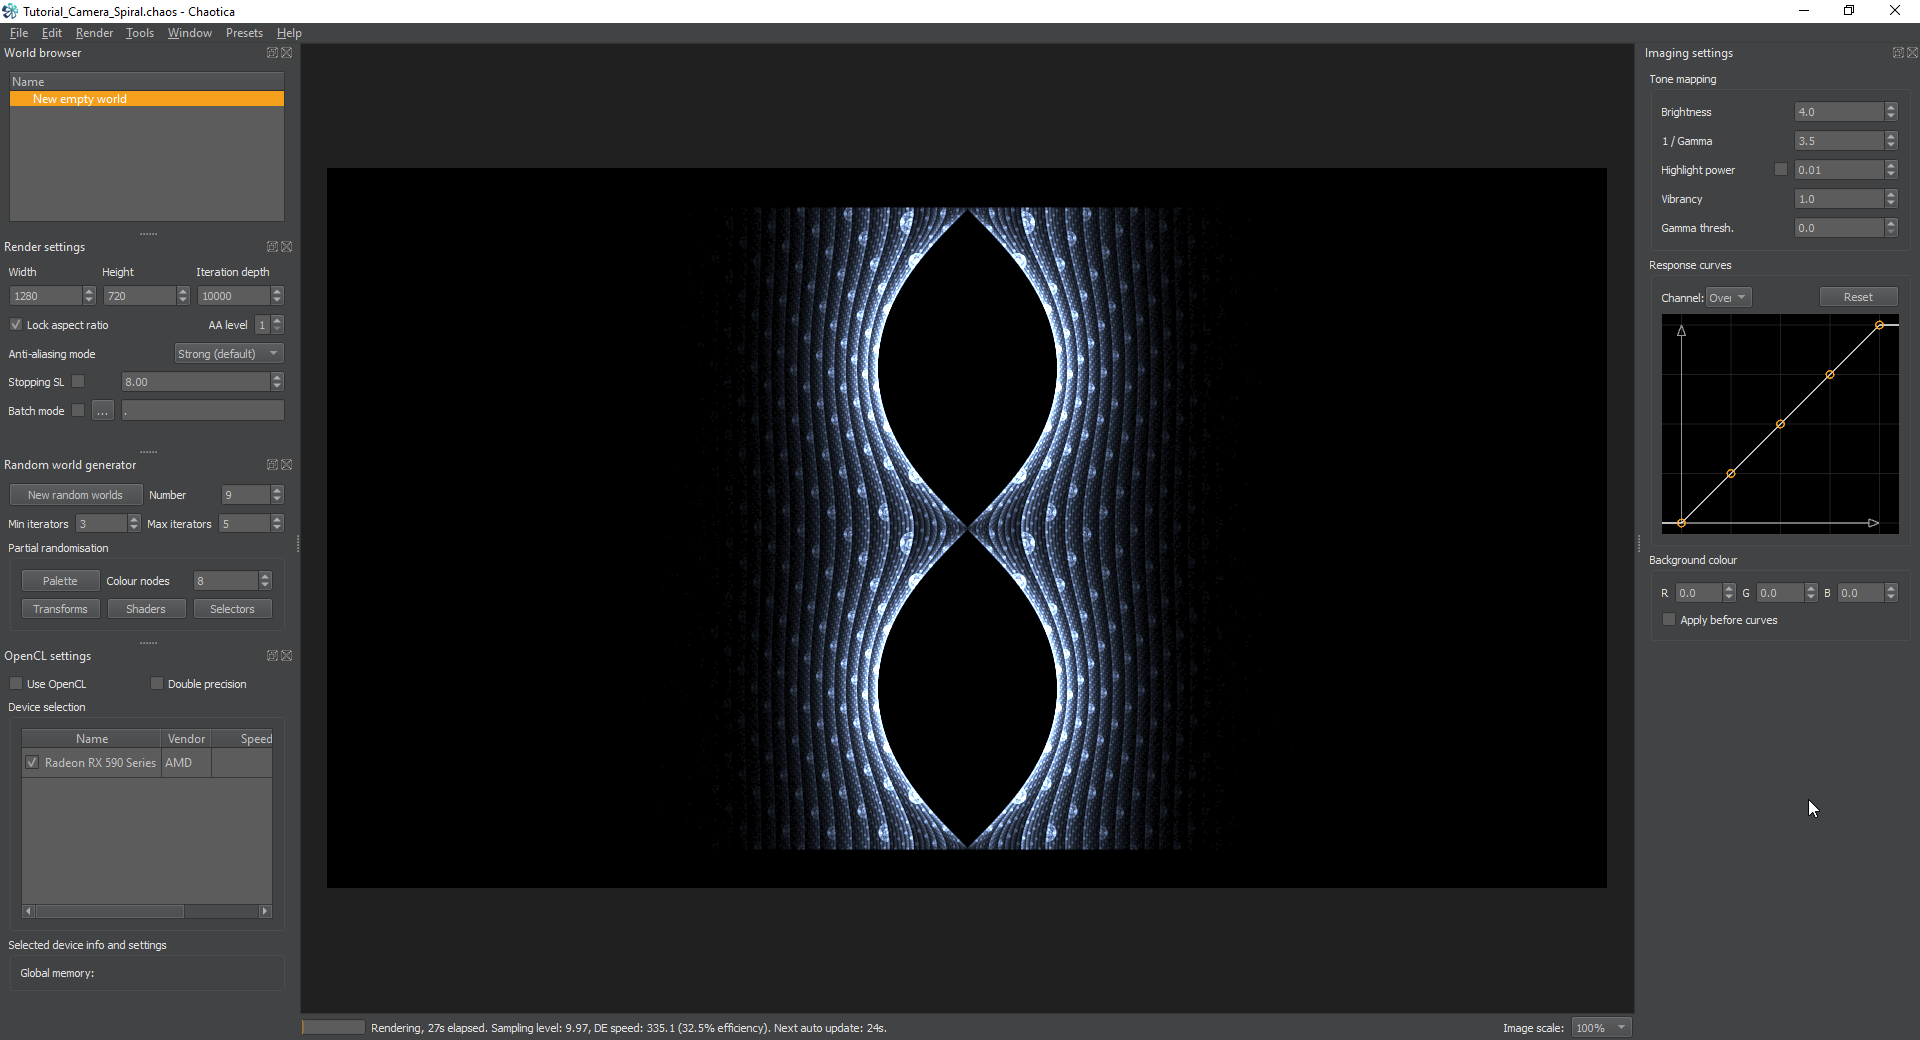
<p>I’m going to use arcsech to make it more interesting and wrap the image into a half plane.</p>

<p><a href="/assets/images/chaotica-camera-spiral/chaotica_XnEkkSuUye.png"><img src="/assets/images/chaotica-camera-spiral/chaotica_XnEkkSuUye.png" alt="arcsech" /></a> <a href="/assets/images/chaotica-camera-spiral/chaotica_ULwUHP03Om.png"><img src="/assets/images/chaotica-camera-spiral/chaotica_ULwUHP03Om.png" alt="arcsech Editor" /></a></p>

<h3 id="mirrorx">mirrorx</h3>

<p>This will mirror the image using the x axis as it’s center.</p>

<p><a href="/assets/images/chaotica-camera-spiral/chaotica_bDD3LdegrY.png"><img src="/assets/images/chaotica-camera-spiral/chaotica_bDD3LdegrY.png" alt="mirrorx" /></a> <a href="/assets/images/chaotica-camera-spiral/chaotica_DsTiQzMzZr.png"><img src="/assets/images/chaotica-camera-spiral/chaotica_DsTiQzMzZr.png" alt="mirrorx Editor" /></a></p>

<h3 id="mobius">mobius</h3>

<p>Now we’re going to use mobius to flip this 90 degrees. Set the value of Im_A to 1 and Im_D to -1.</p>

<p><a href="/assets/images/chaotica-camera-spiral/chaotica_8qEmNfJIeU.png"><img src="/assets/images/chaotica-camera-spiral/chaotica_8qEmNfJIeU.png" alt="mobius" /></a> <a href="/assets/images/chaotica-camera-spiral/chaotica_d7pjZwasYO.png"><img src="/assets/images/chaotica-camera-spiral/chaotica_d7pjZwasYO.png" alt="mobius Editor" /></a></p>

<h3 id="crop">crop</h3>

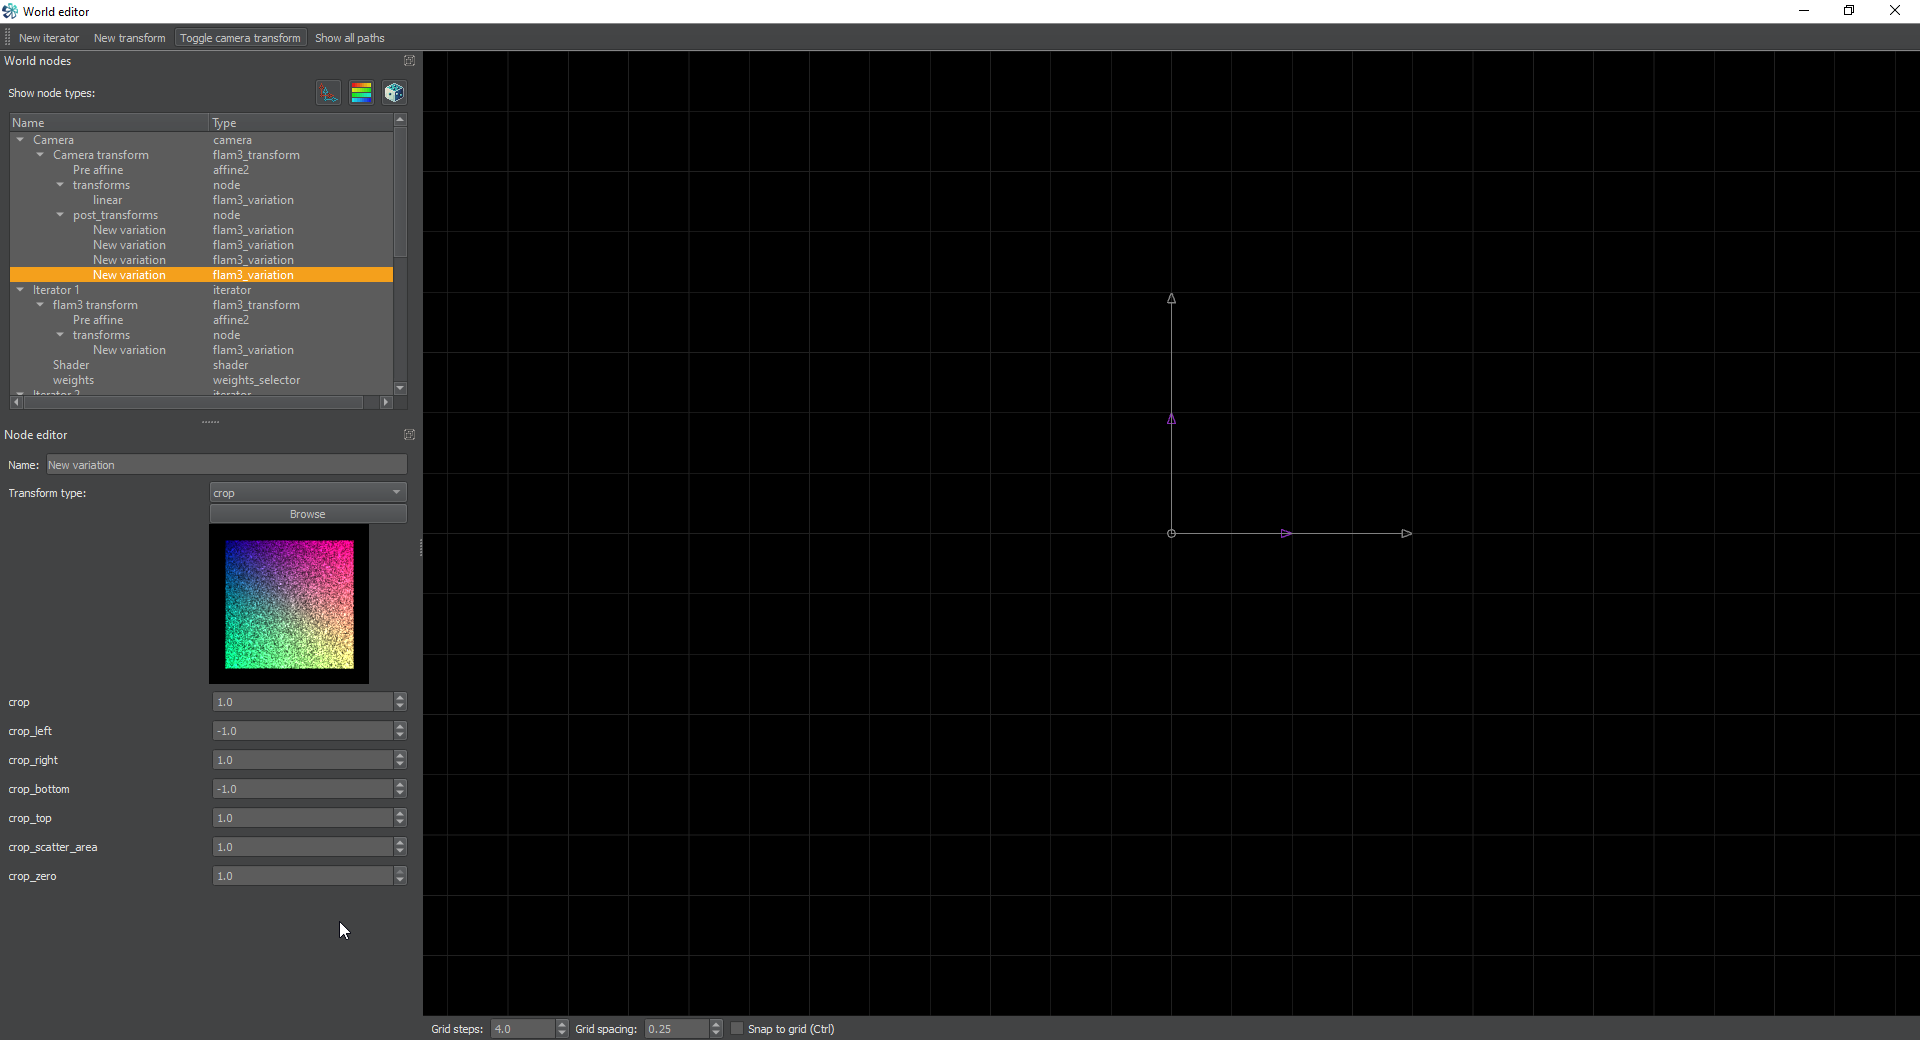
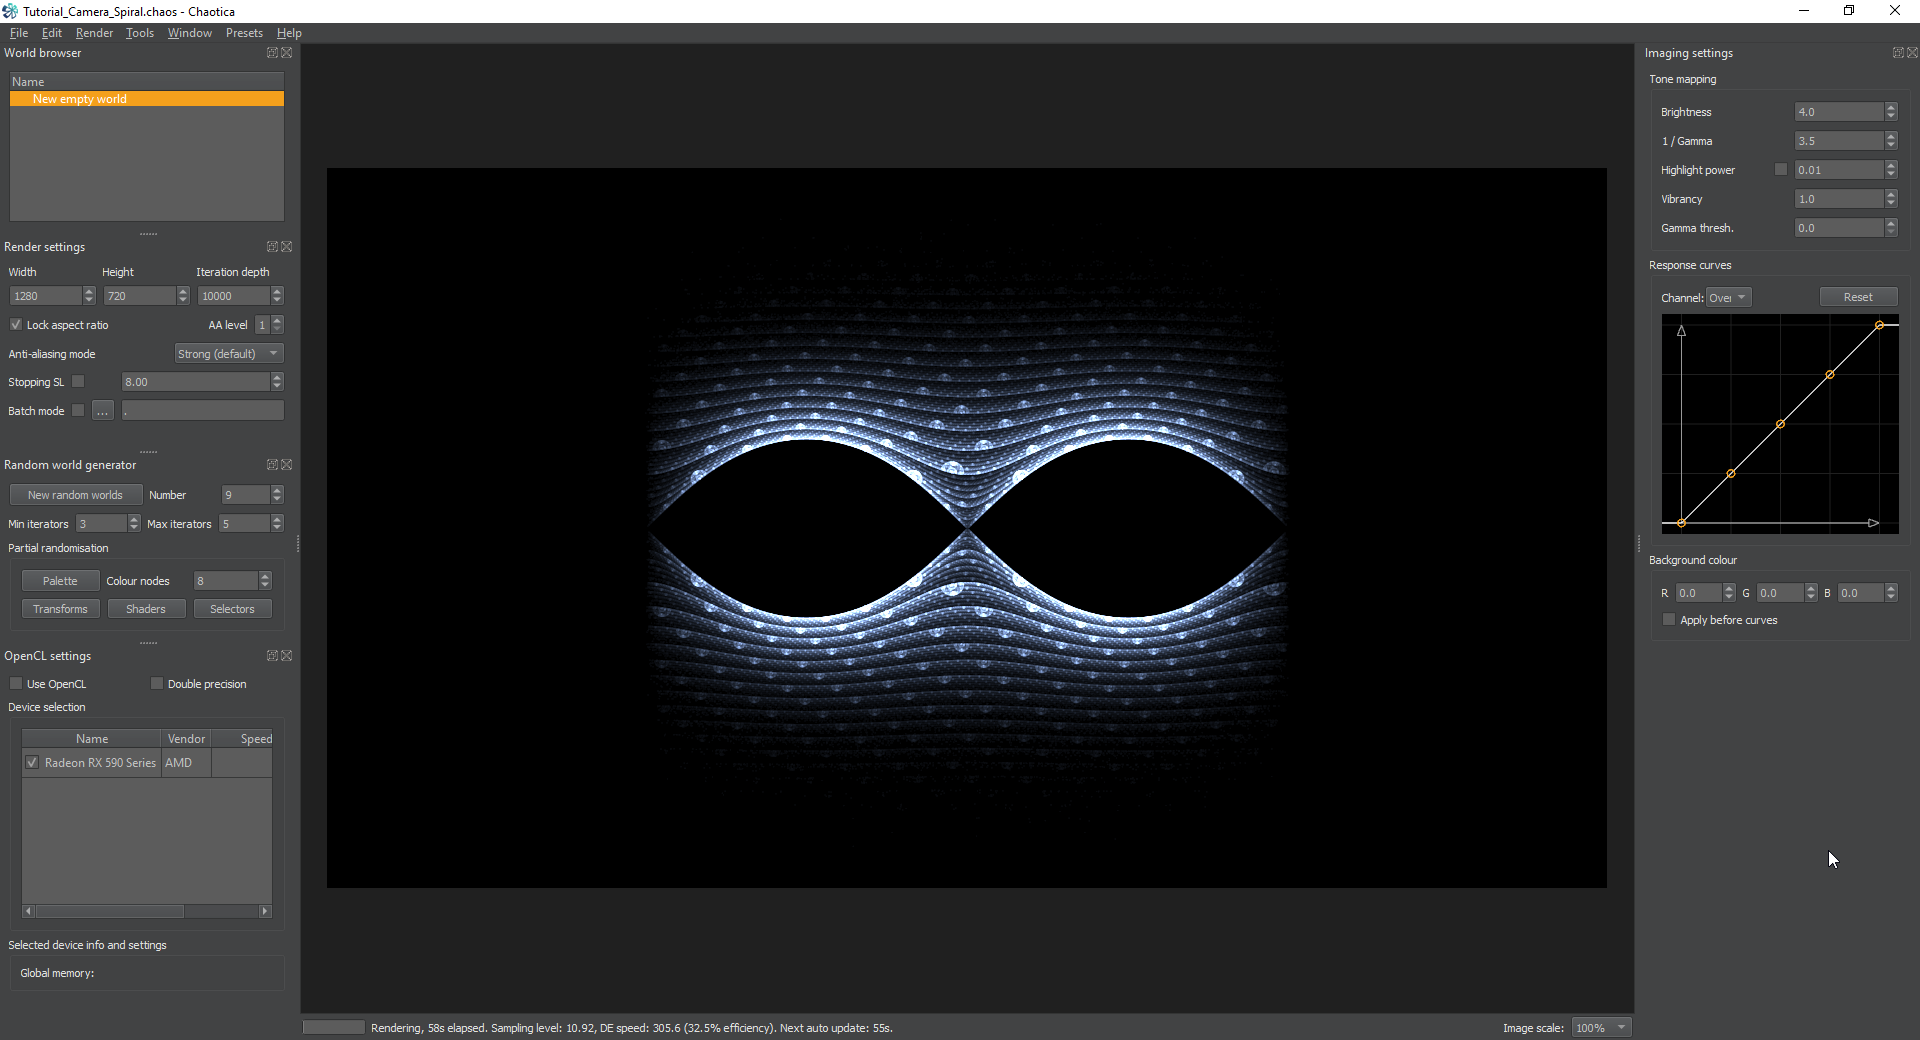
<p>Next we’re going to crop the image so it’s a perfect 1 unit. This prepares it to be tiled and isn’t always needed. It isn’t even needed here but I find it helps to double check sometimes. Especially if you aren’t sure your tile is already 1 unit by 1 unit. Make sure you set the crop_zero value to 1 to eliminate any ghosting.</p>

<p><a href="/assets/images/chaotica-camera-spiral/chaotica_1CaRPFJIsv.png"><img src="/assets/images/chaotica-camera-spiral/chaotica_1CaRPFJIsv.png" alt="crop" /></a> <a href="/assets/images/chaotica-camera-spiral/chaotica_9H3Lvy1UlF.png"><img src="/assets/images/chaotica-camera-spiral/chaotica_9H3Lvy1UlF.png" alt="crop Editor" /></a></p>

<h3 id="tile_hlp">tile_hlp</h3>

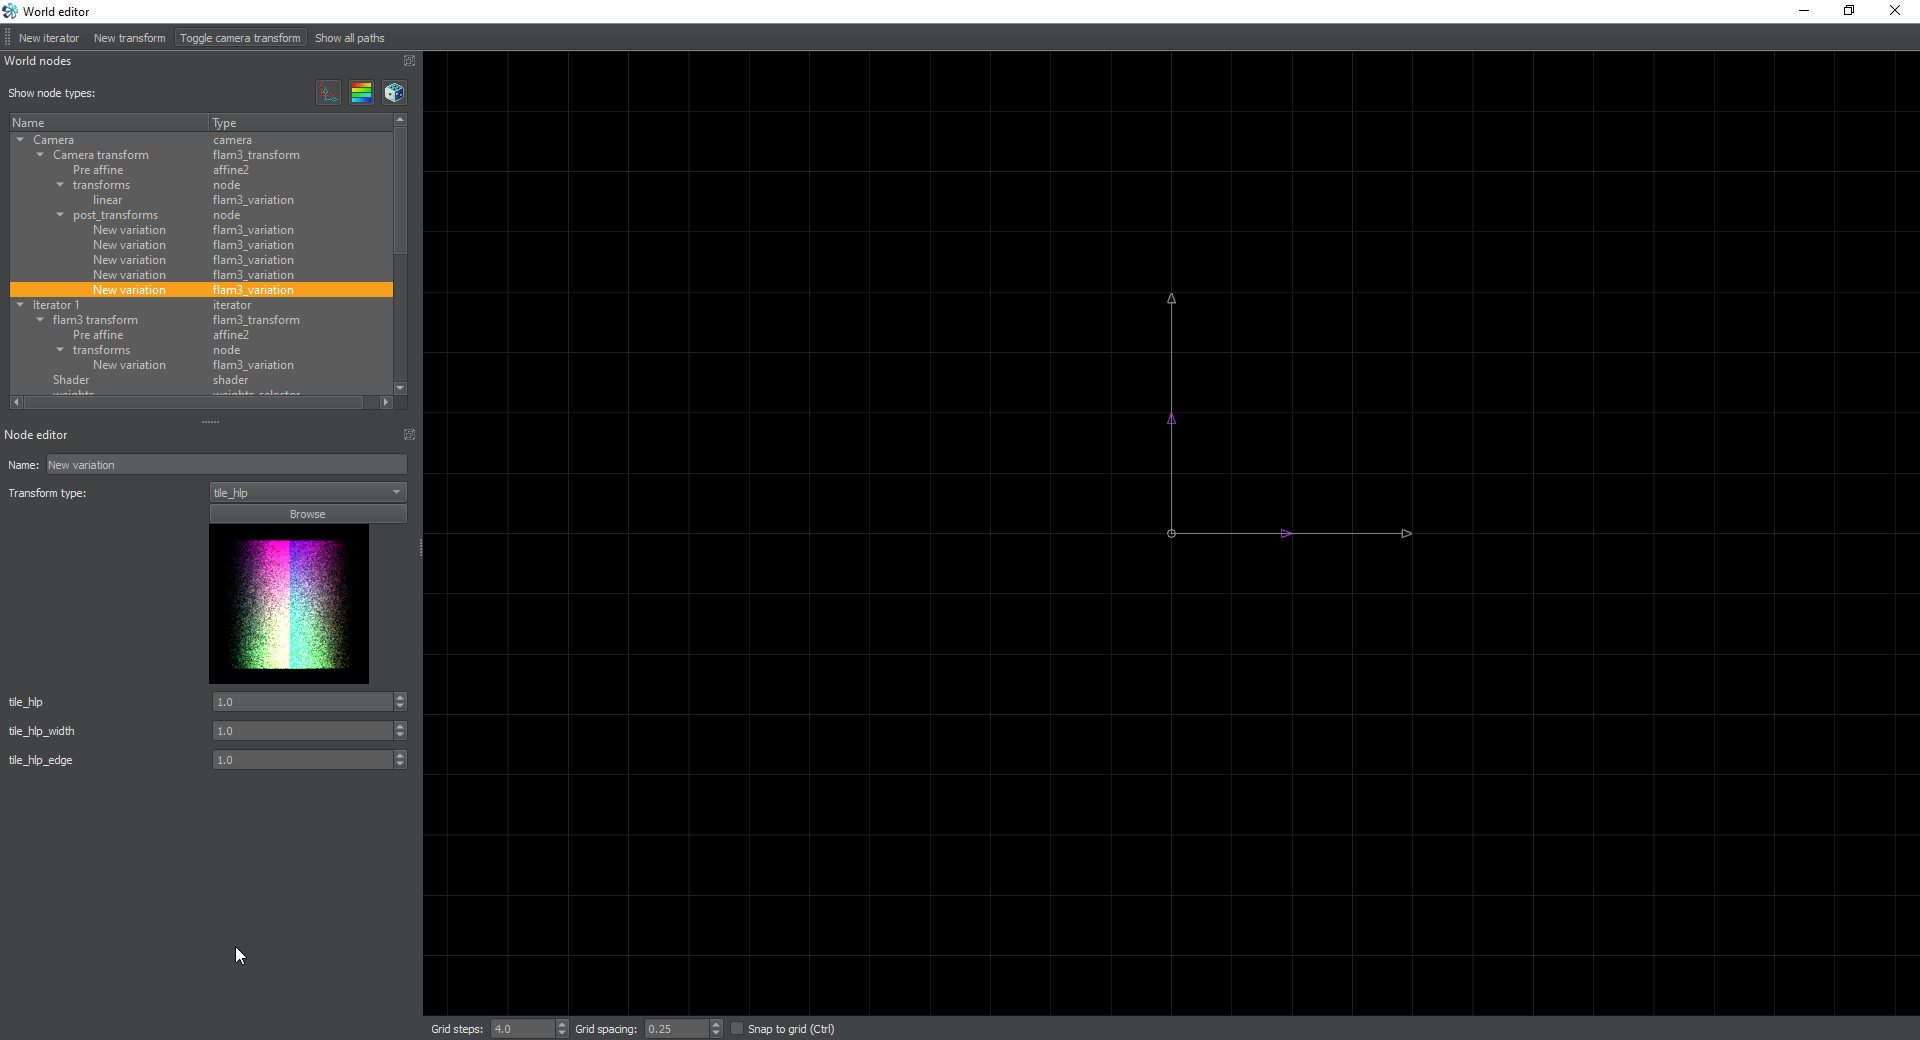
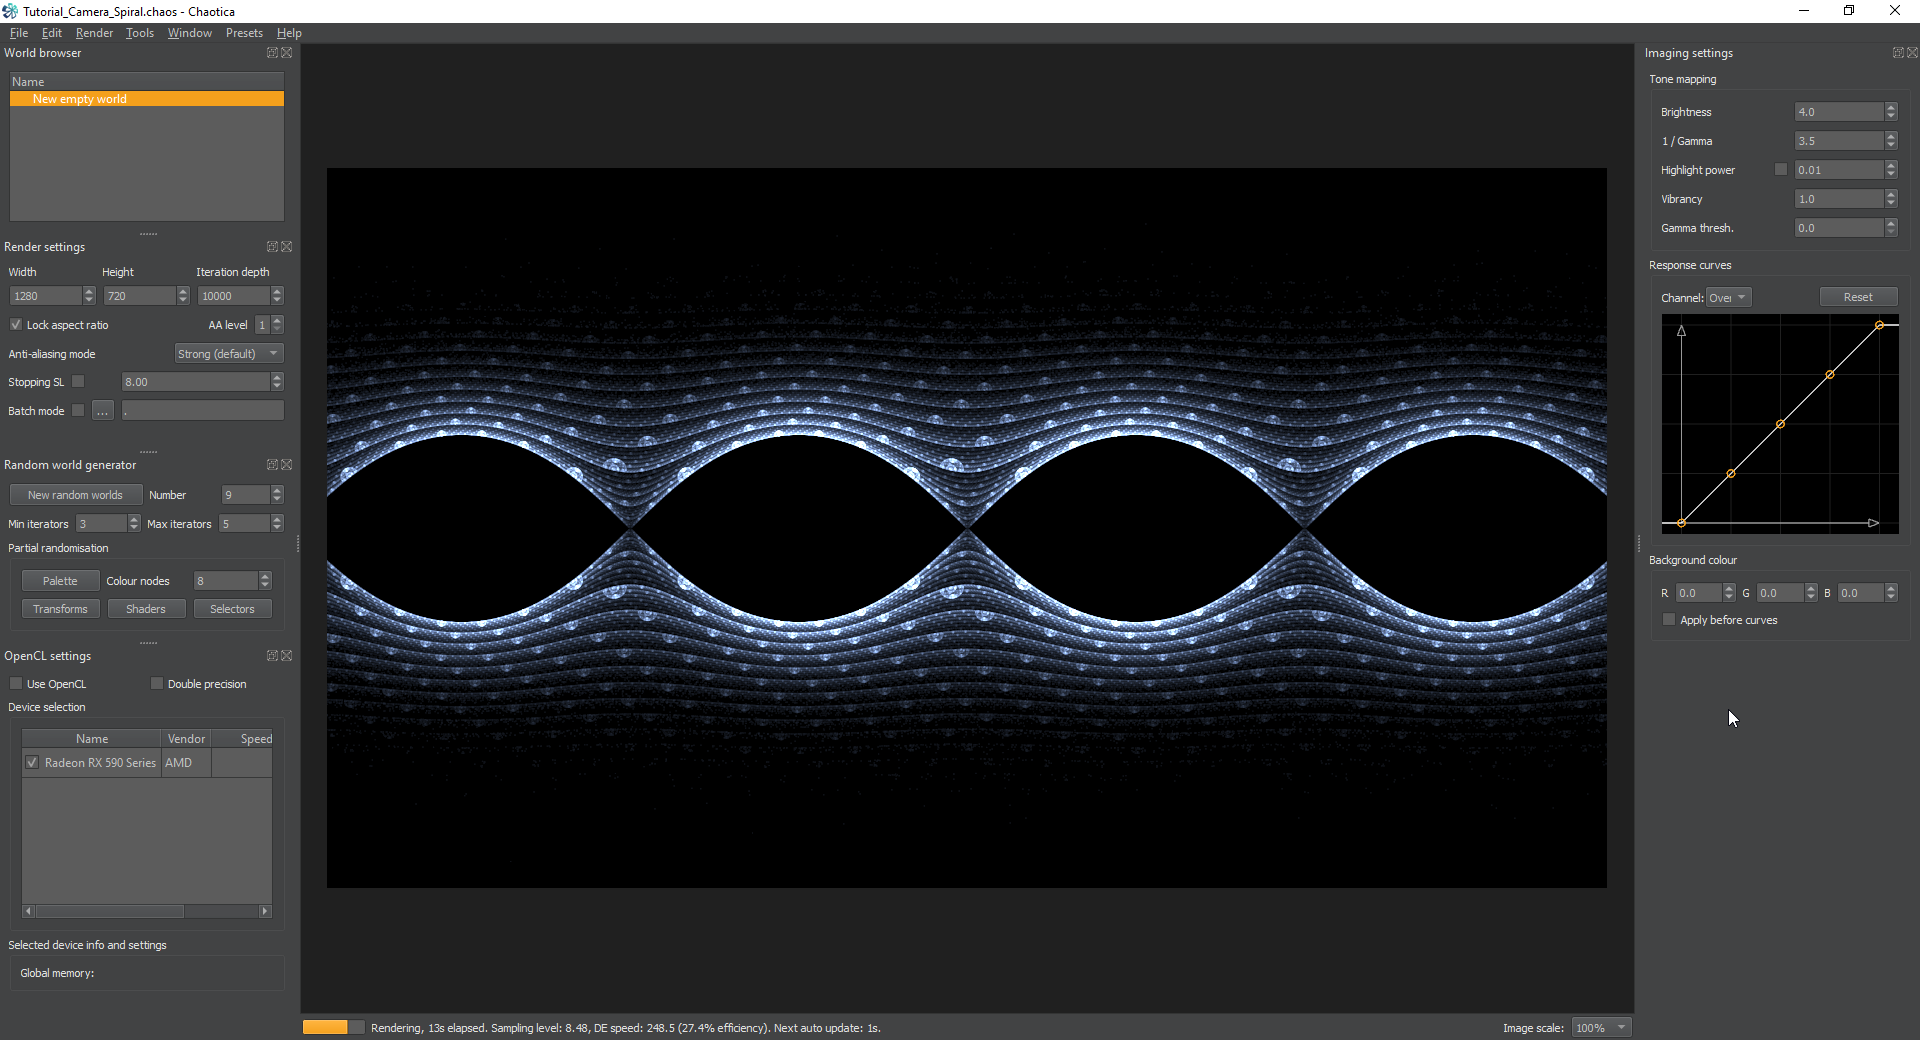
<p>Next we’re going to use tile_hlp to set this up to be tiled. This transform isn’t always needed, but sometimes it can prove invaluable.</p>

<p><a href="/assets/images/chaotica-camera-spiral/chaotica_DUHa2BpuLL.png"><img src="/assets/images/chaotica-camera-spiral/chaotica_DUHa2BpuLL.png" alt="tile_hlp" /></a> <a href="/assets/images/chaotica-camera-spiral/chaotica_4hcvTq5q5D.png"><img src="/assets/images/chaotica-camera-spiral/chaotica_4hcvTq5q5D.png" alt="tile_hlp Editor" /></a></p>

<h3 id="tile_log">tile_log</h3>

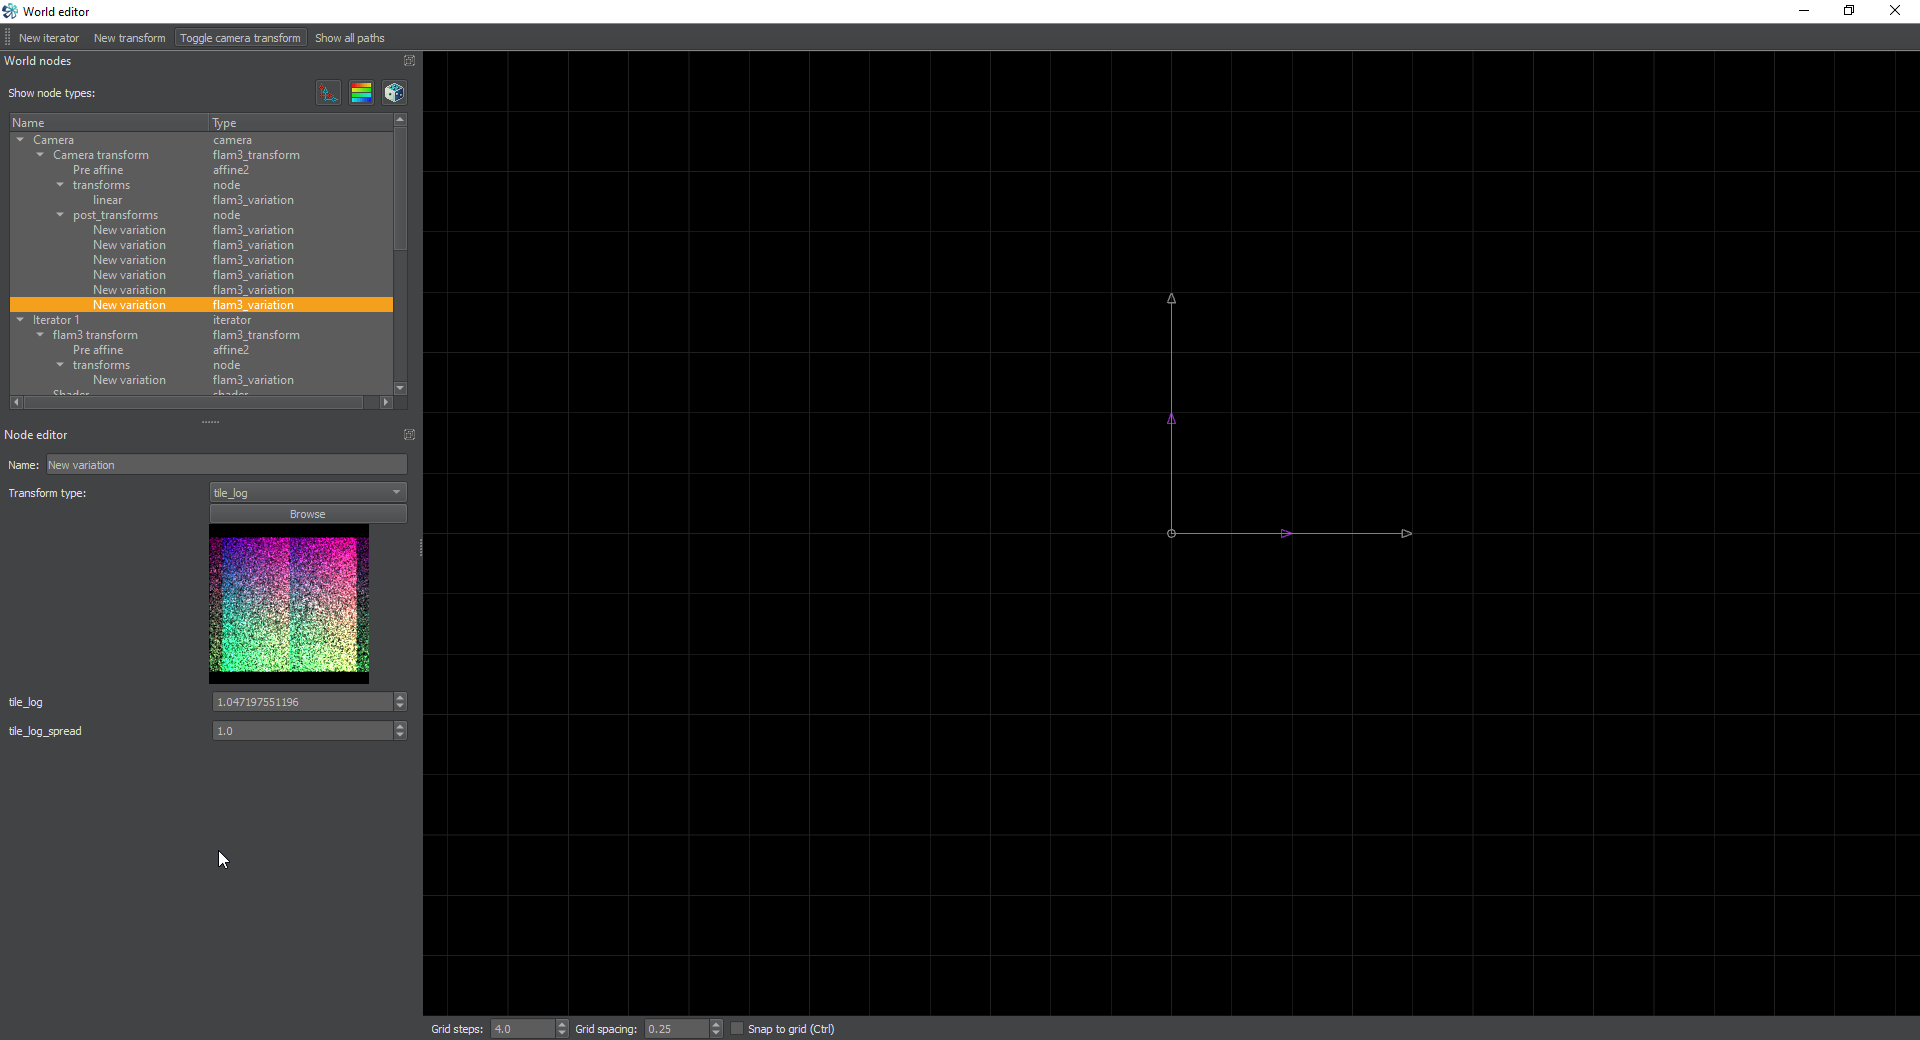
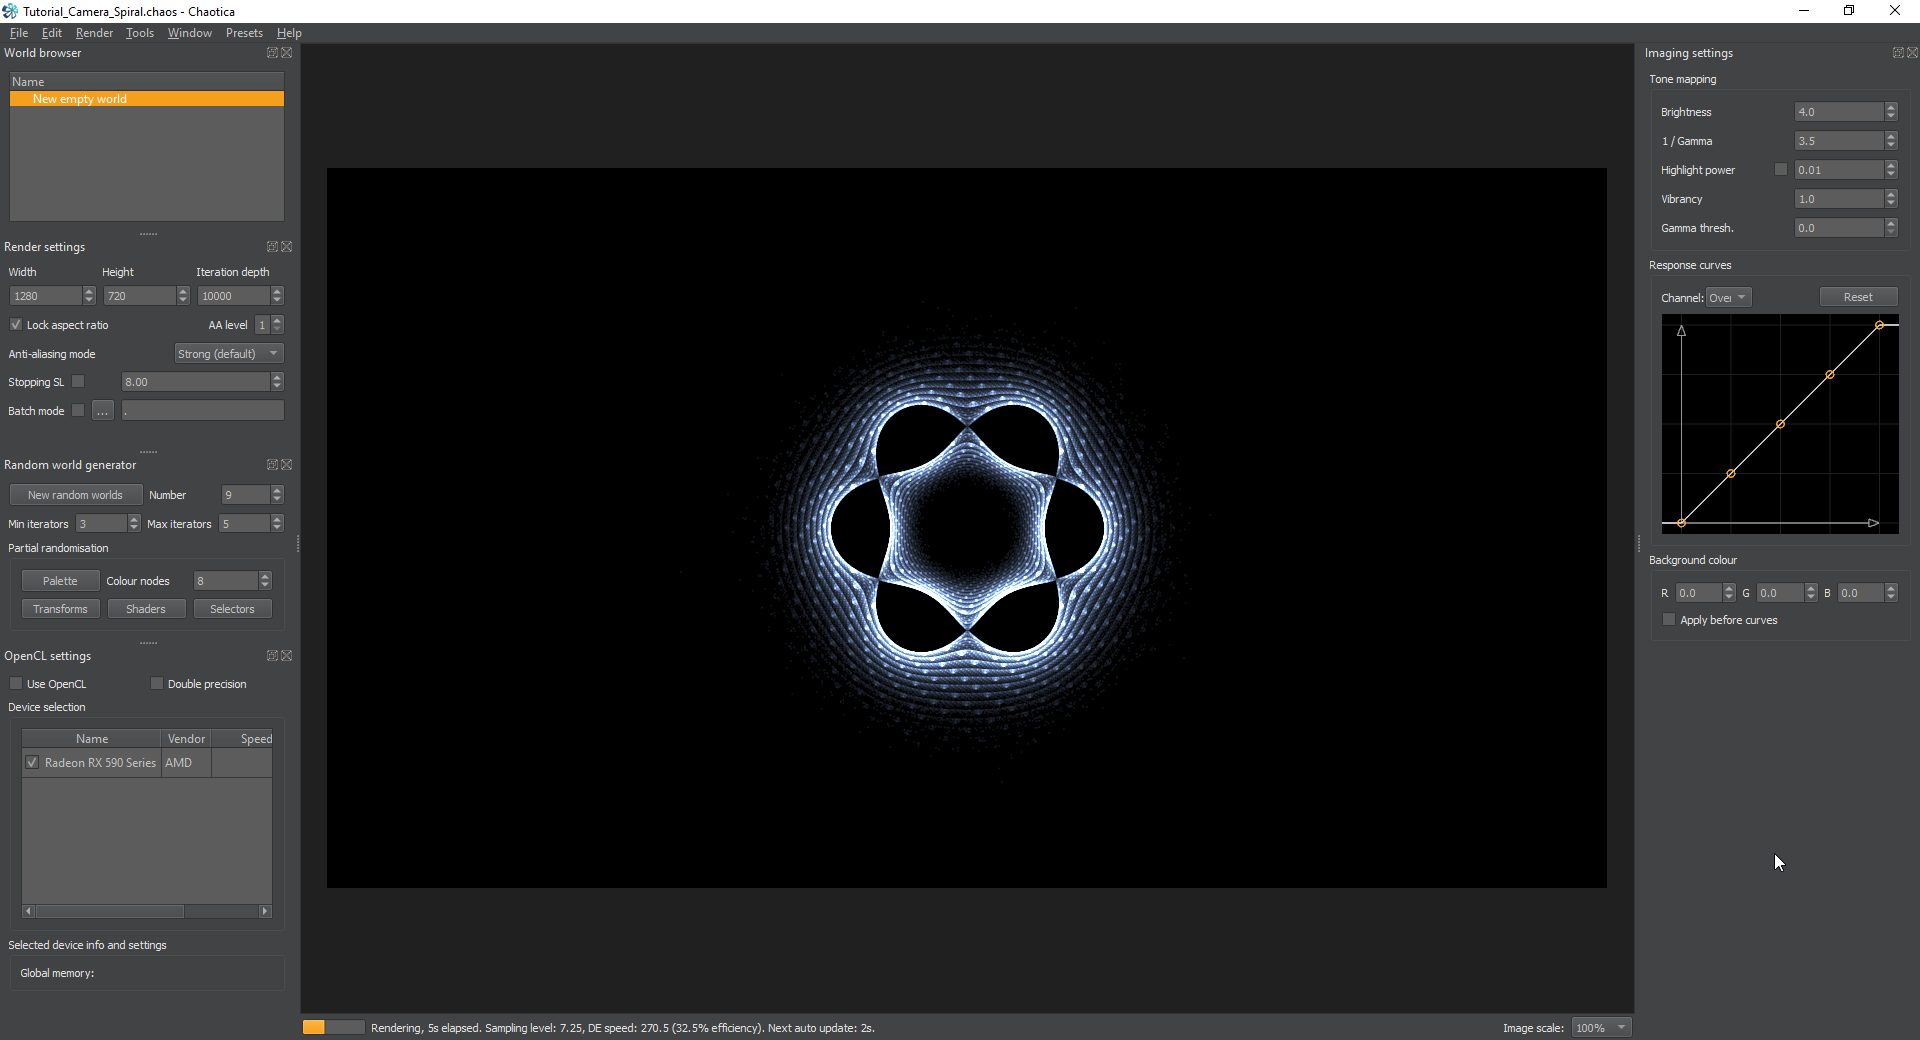
<p>This will do the actual tiling. Make sure you set the tile_log_spread to your personal preference. On this transform since we are sending it to an unpolar we have to do a little math. Unpolar needs multiples of pi/3 in order to line up right. So i’m going to set the value of this to 1.047197551196.</p>

<p><a href="/assets/images/chaotica-camera-spiral/chaotica_07p9sVYB3J.png"><img src="/assets/images/chaotica-camera-spiral/chaotica_07p9sVYB3J.png" alt="tile_log" /></a> <a href="/assets/images/chaotica-camera-spiral/chaotica_iee4lx3Jvd.png"><img src="/assets/images/chaotica-camera-spiral/chaotica_iee4lx3Jvd.png" alt="tile_log Editor" /></a></p>

<h3 id="unpolar">unpolar</h3>

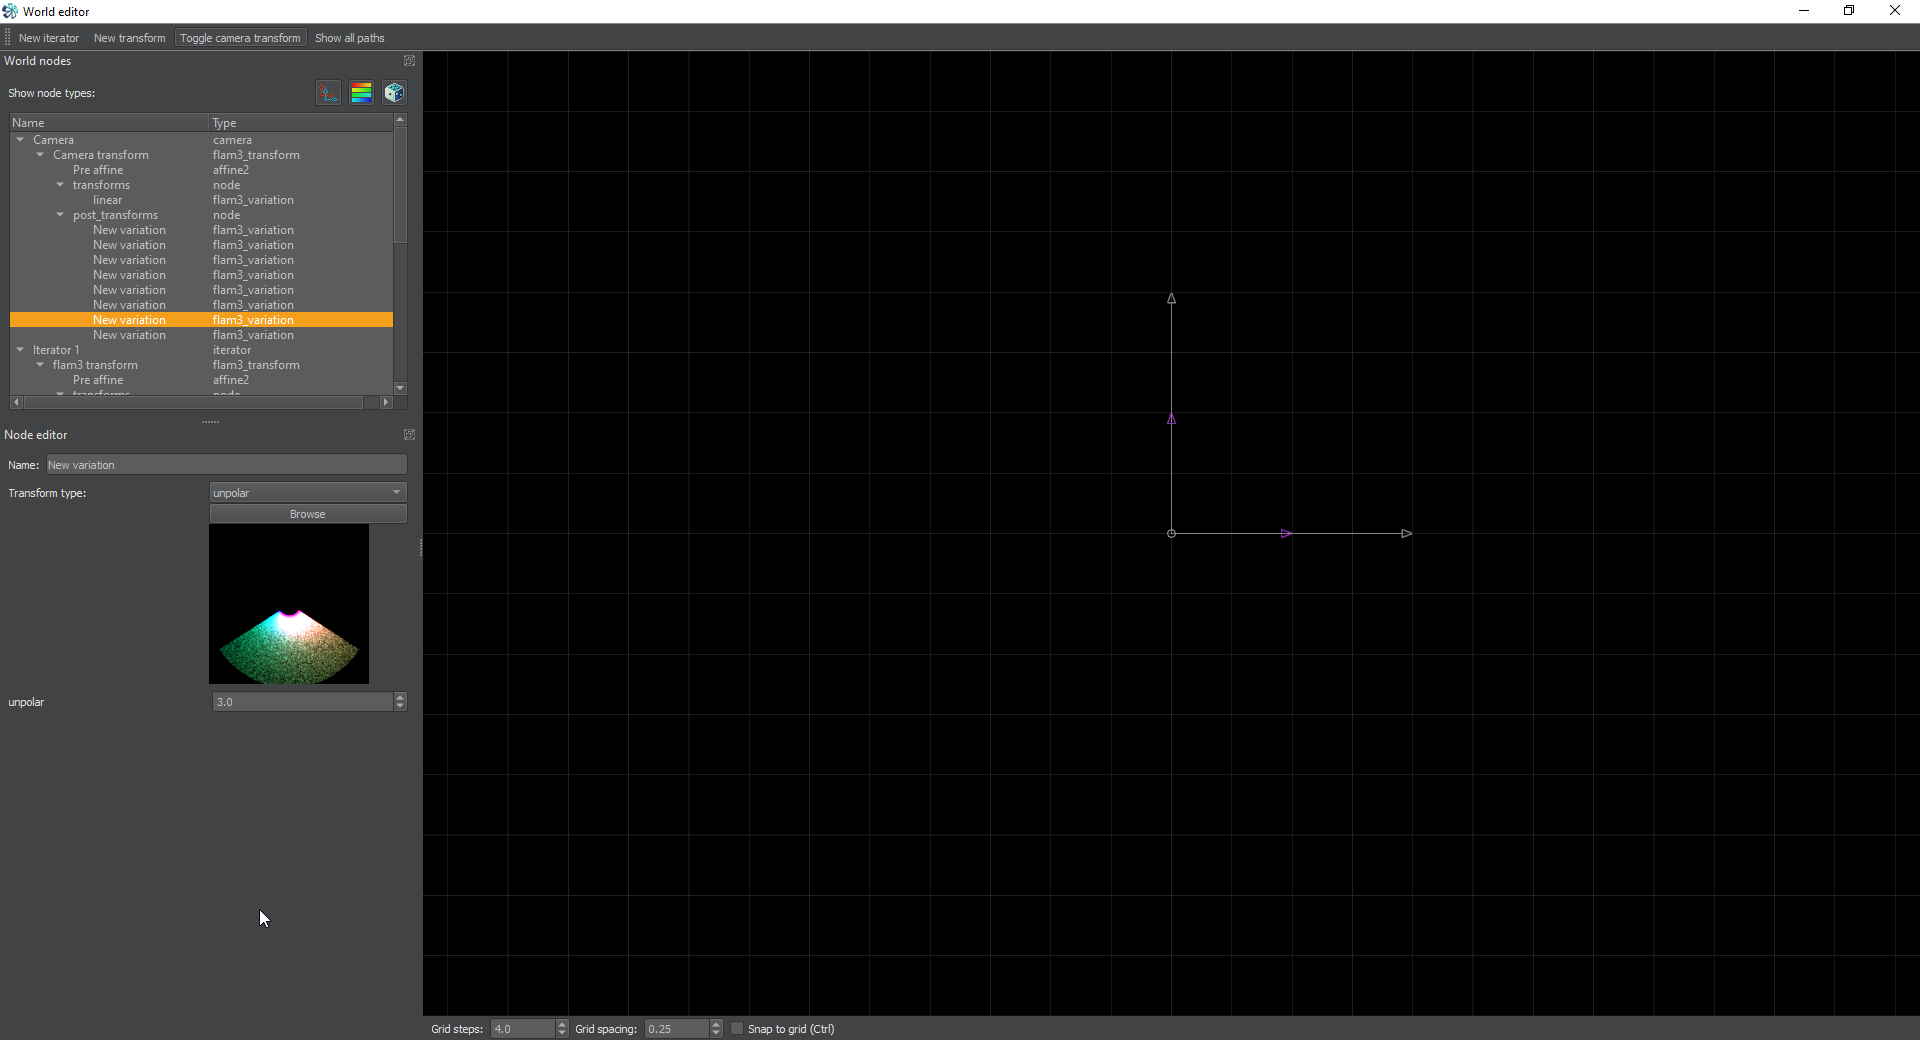
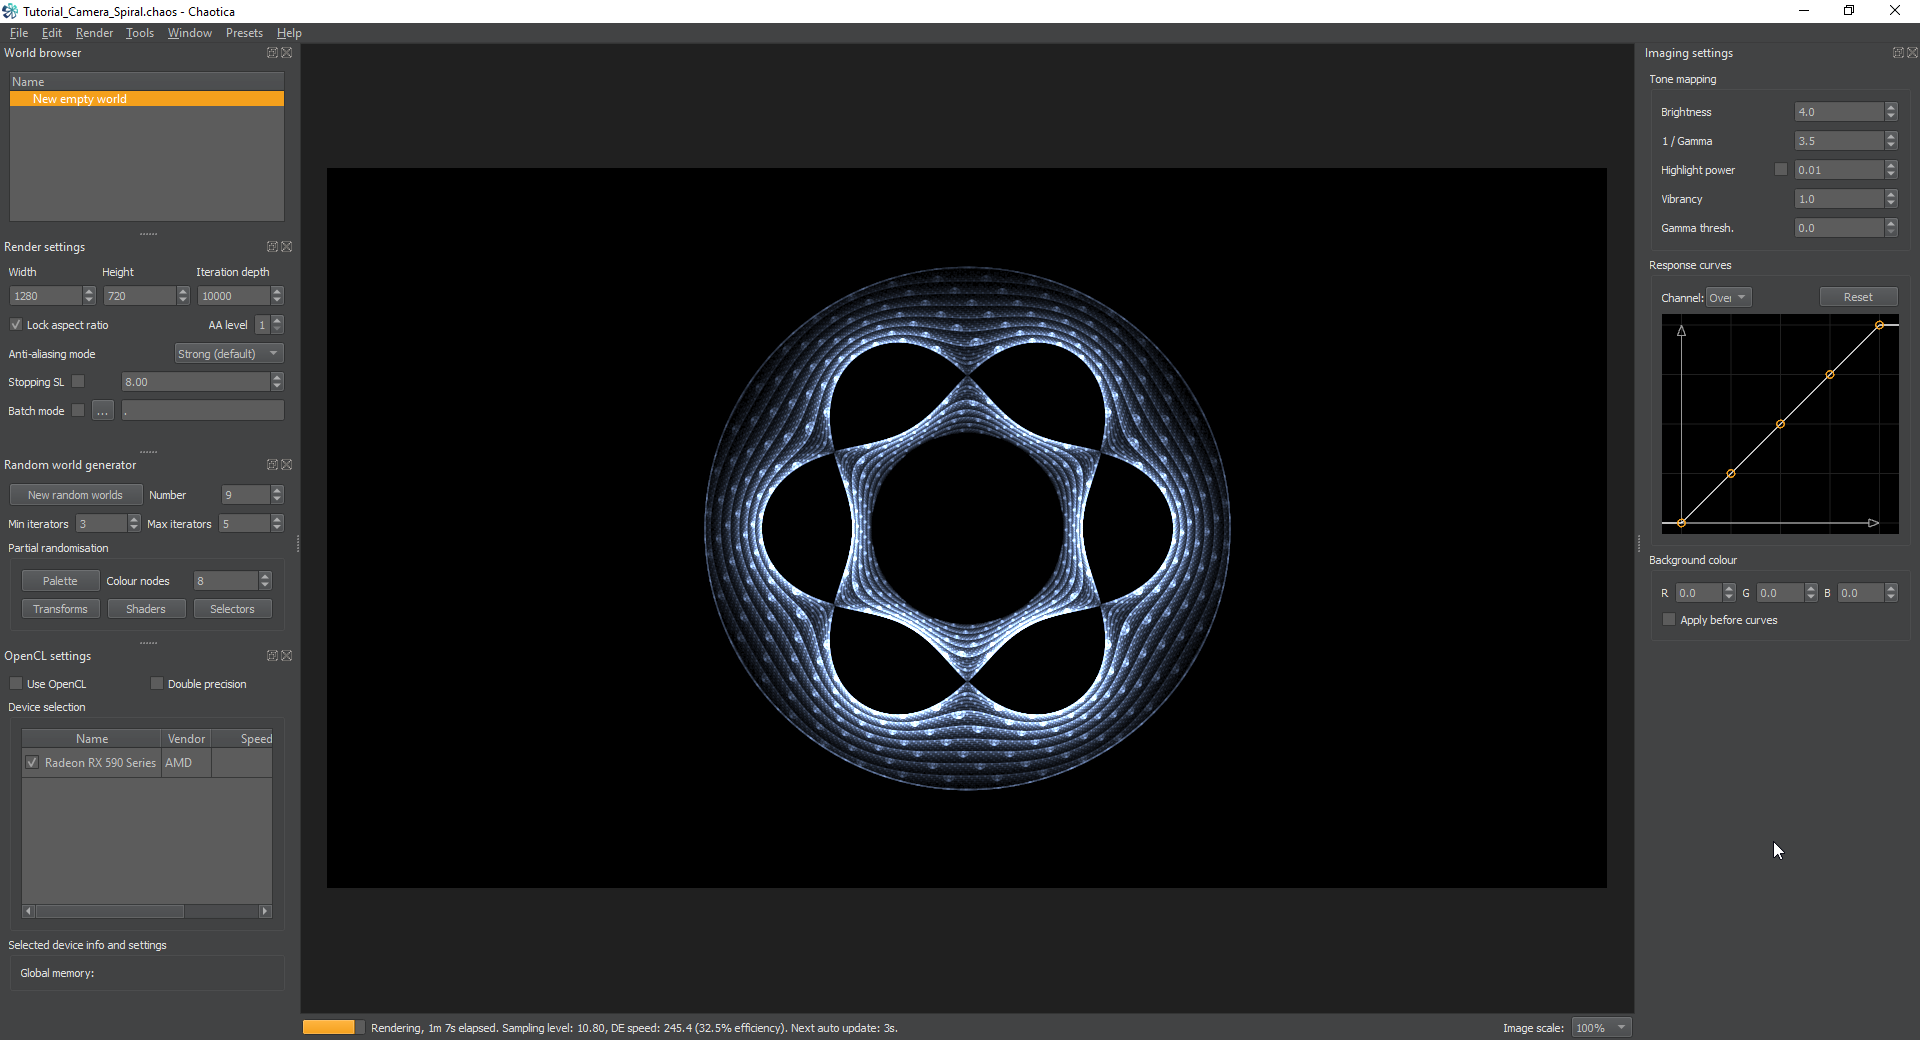
<p>The next transform should be set to unpolar and have a value of 3. You can change this value if you want, but I used 3 and if you pick something else, you’ll need to tweak the next two transforms to make it line up right.</p>

<p><a href="/assets/images/chaotica-camera-spiral/chaotica_0c5zG4bSOi.png"><img src="/assets/images/chaotica-camera-spiral/chaotica_0c5zG4bSOi.png" alt="unpolar" /></a> <a href="/assets/images/chaotica-camera-spiral/chaotica_b56GcxR8DY.png"><img src="/assets/images/chaotica-camera-spiral/chaotica_b56GcxR8DY.png" alt="unpolar Editor" /></a></p>

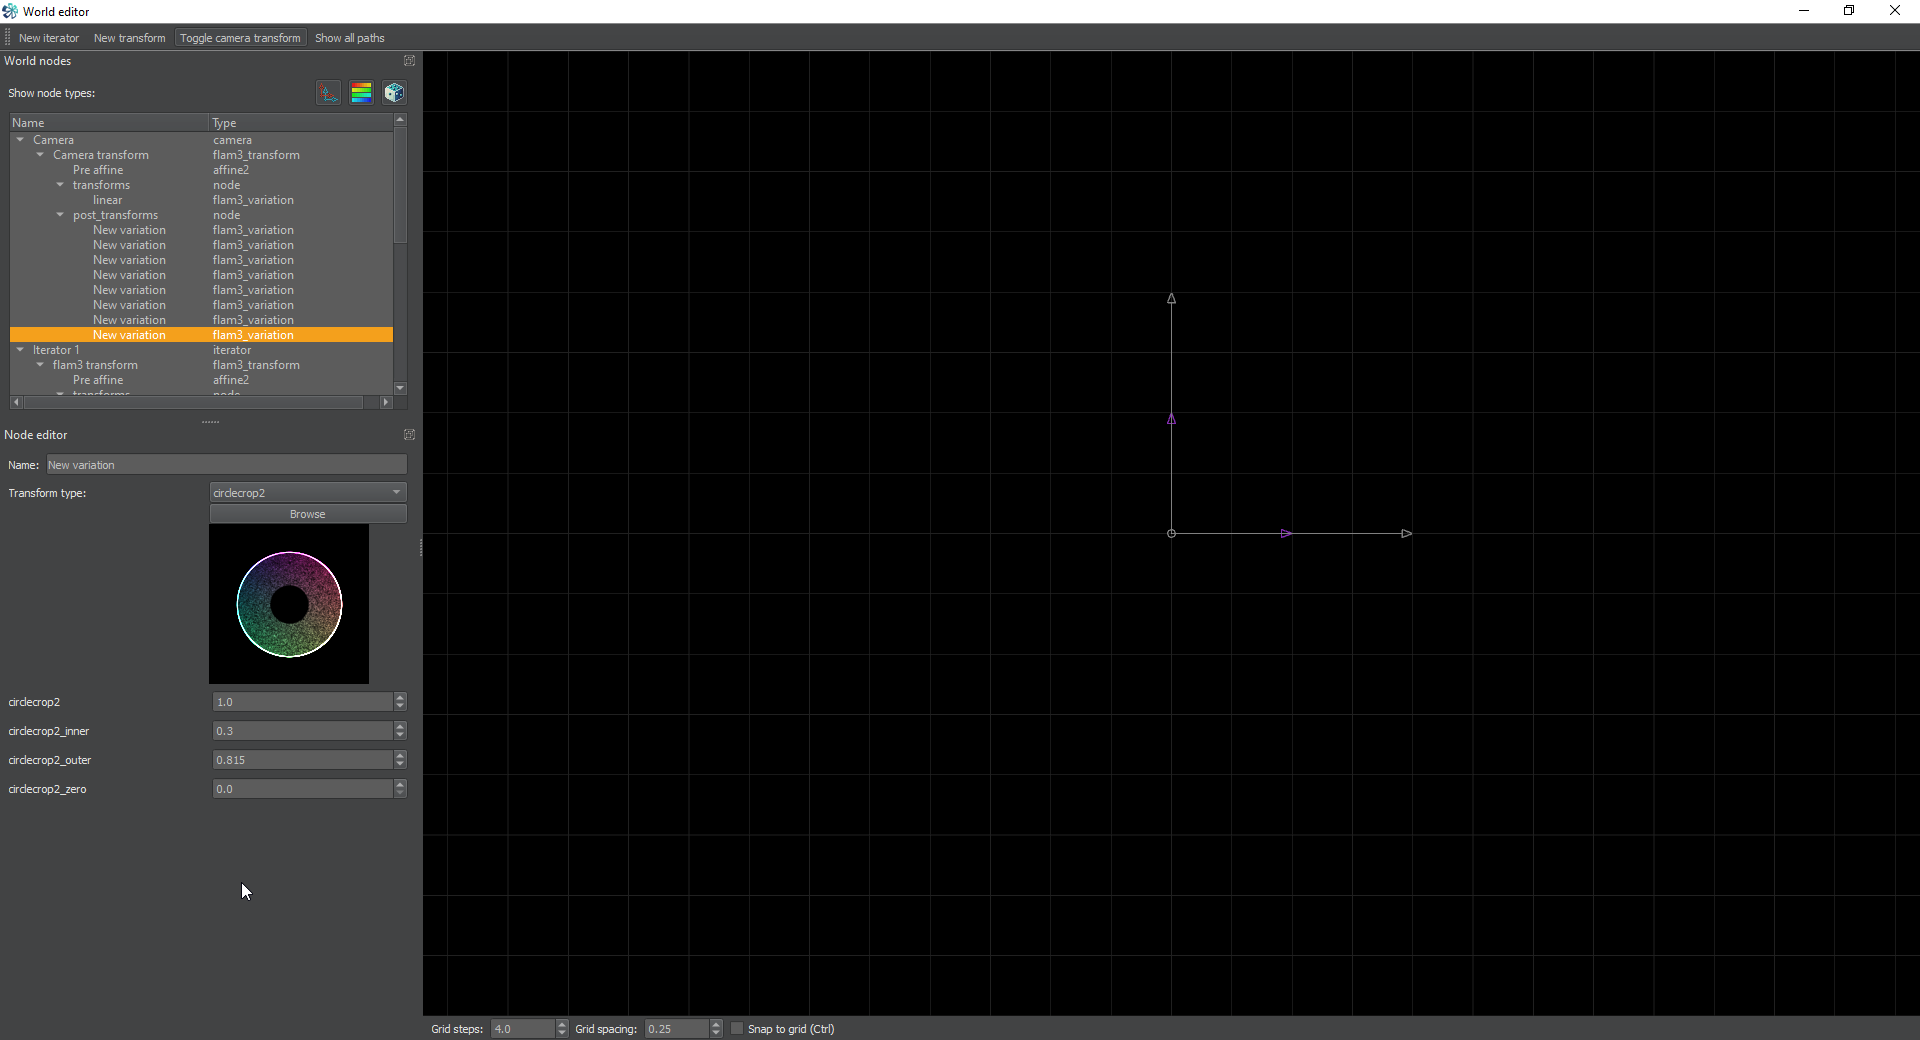
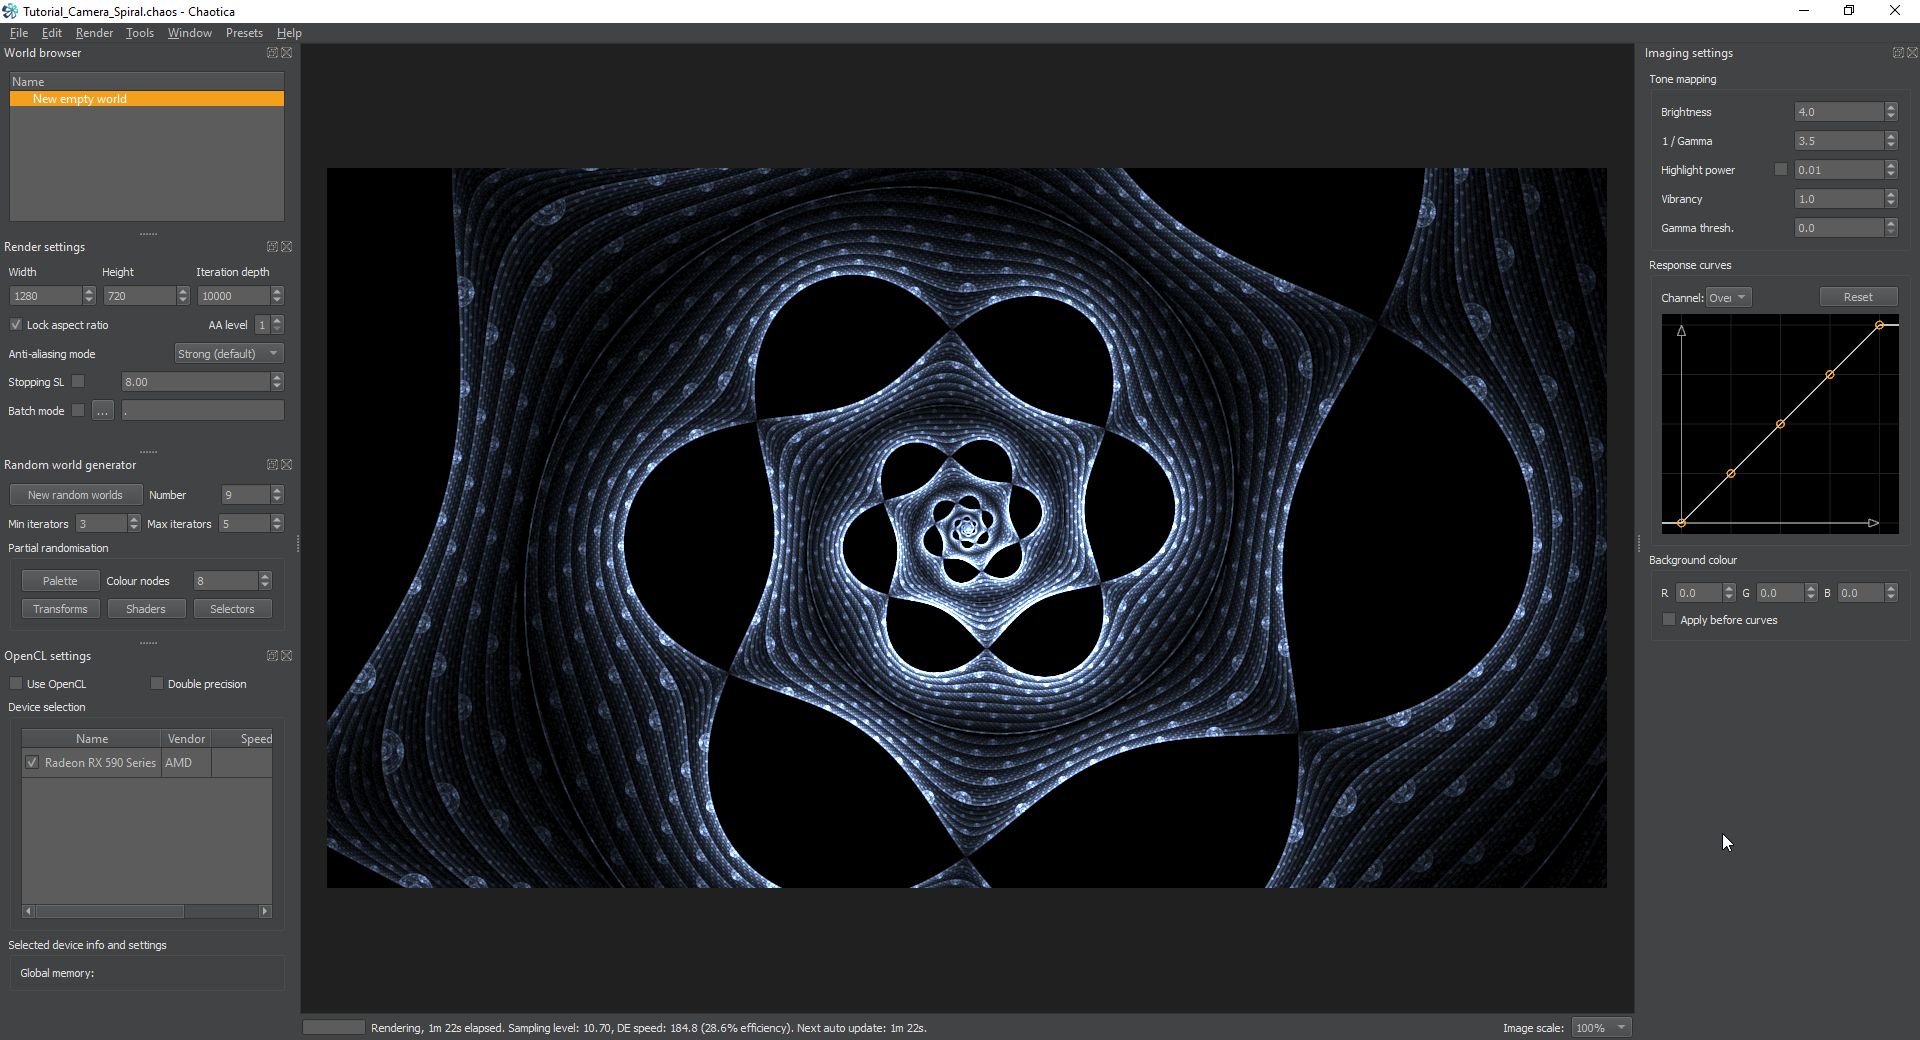
<h3 id="circlecrop2">circlecrop2</h3>

<p>Next we’re going to use circlecrop2 to clean up the inner and outer edges and make it more uniform. I used 0.3 for the inner and 0.815 for the outer, but depending on your preference feel free to change this.</p>

<p><a href="/assets/images/chaotica-camera-spiral/chaotica_EvDh7vFazK.png"><img src="/assets/images/chaotica-camera-spiral/chaotica_EvDh7vFazK.png" alt="circlecrop2" /></a> <a href="/assets/images/chaotica-camera-spiral/chaotica_GUWkqipZNk.png"><img src="/assets/images/chaotica-camera-spiral/chaotica_GUWkqipZNk.png" alt="circlecrop2 Editor" /></a></p>

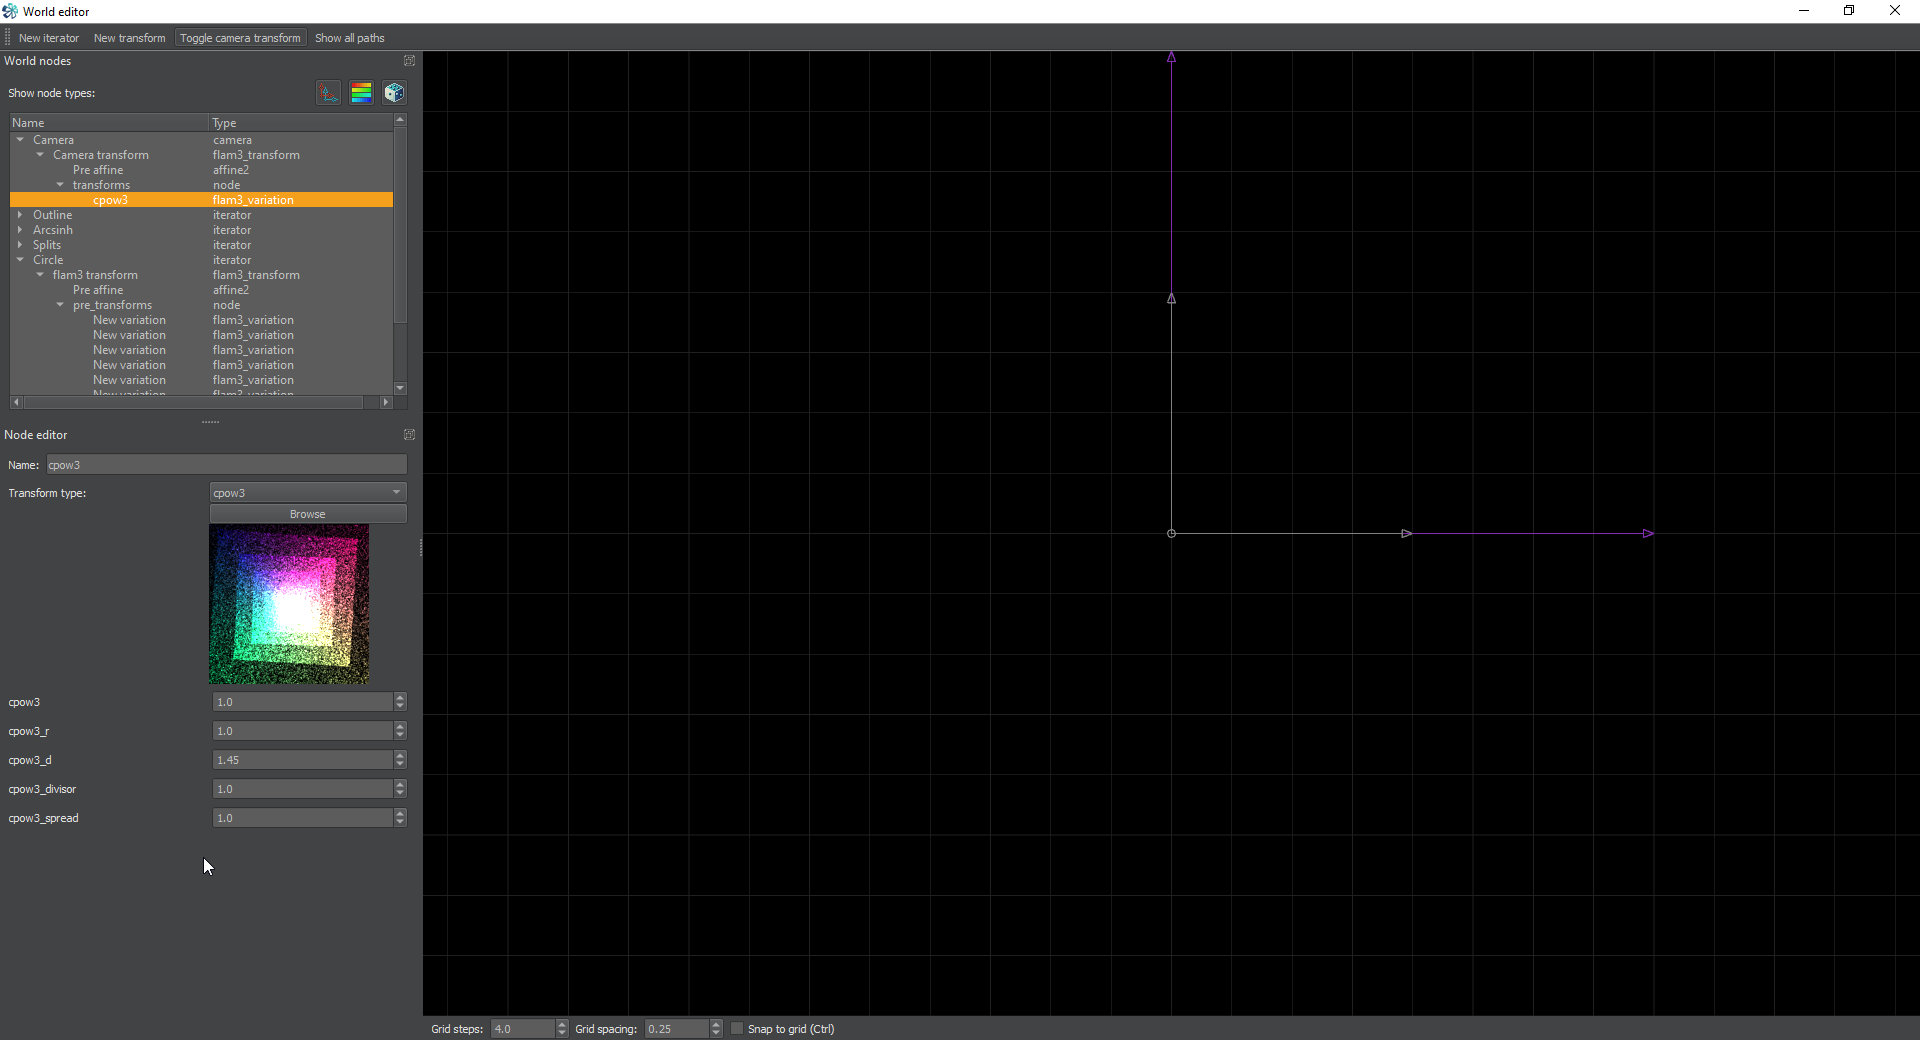
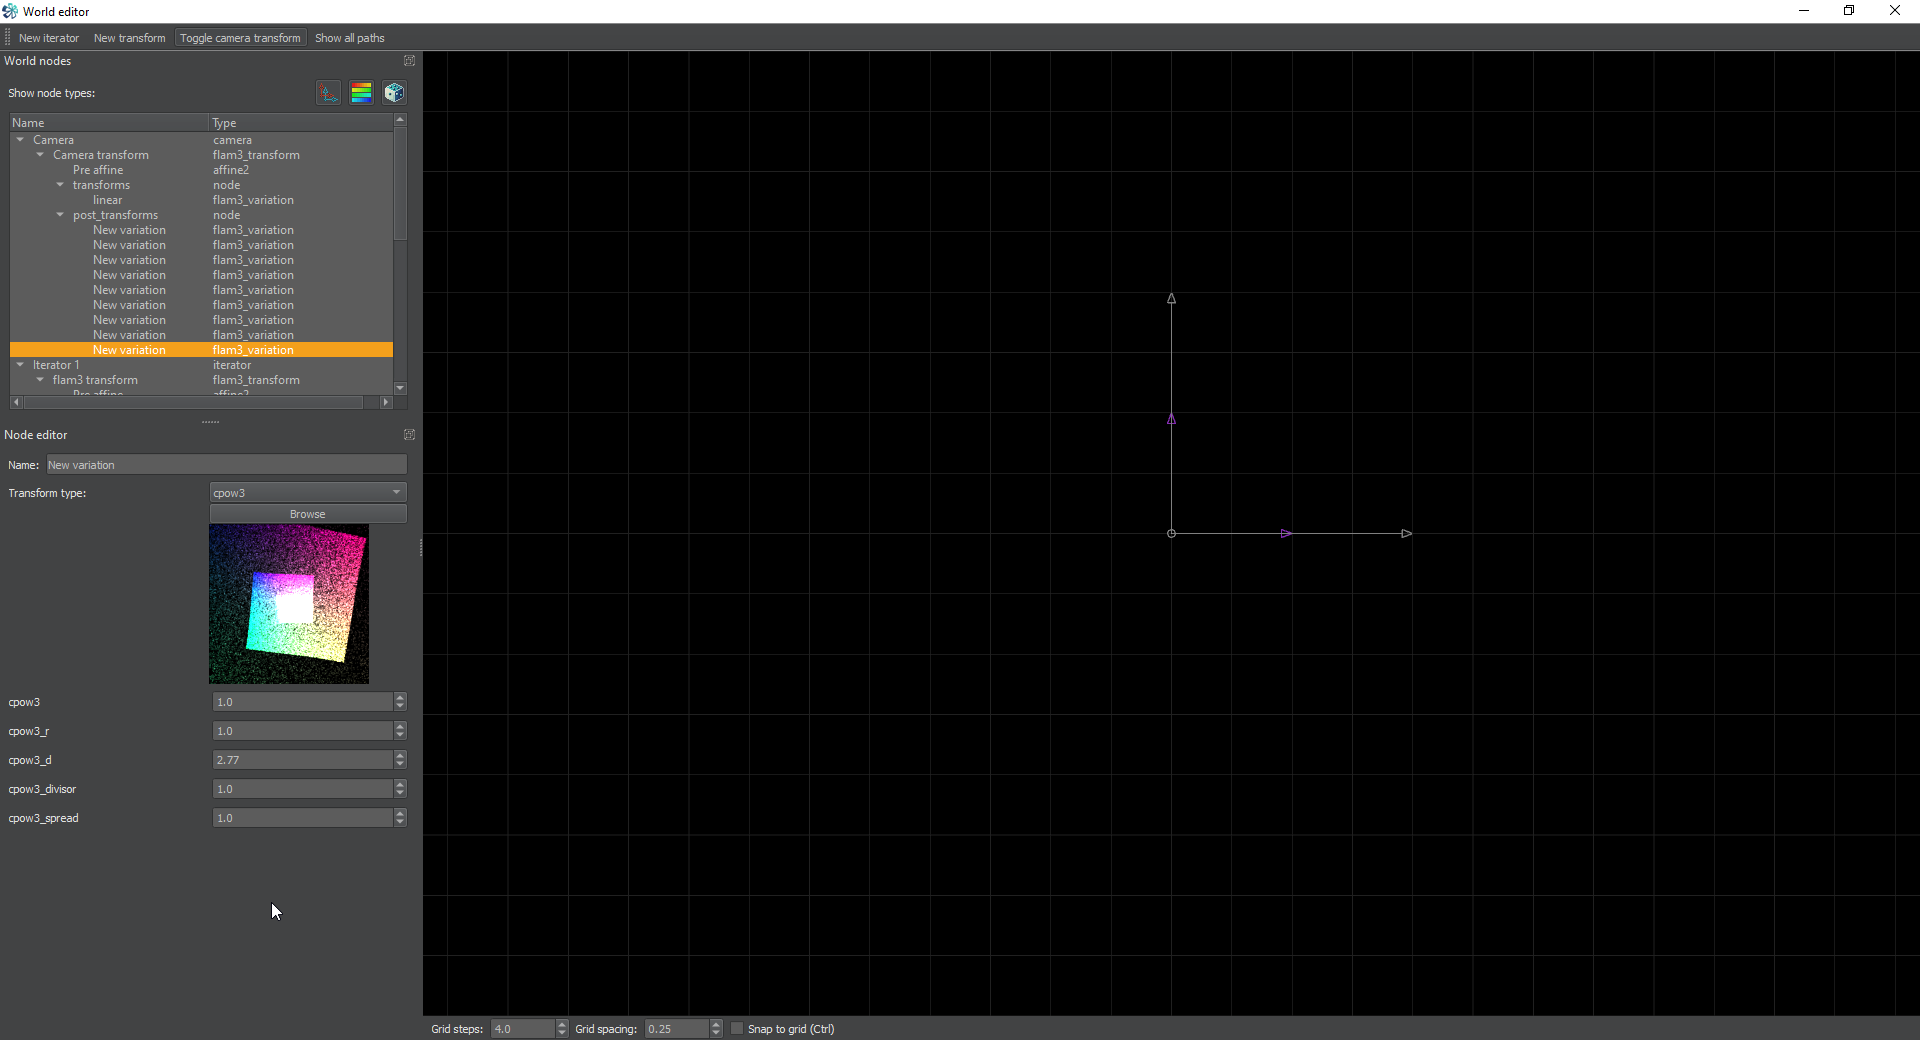
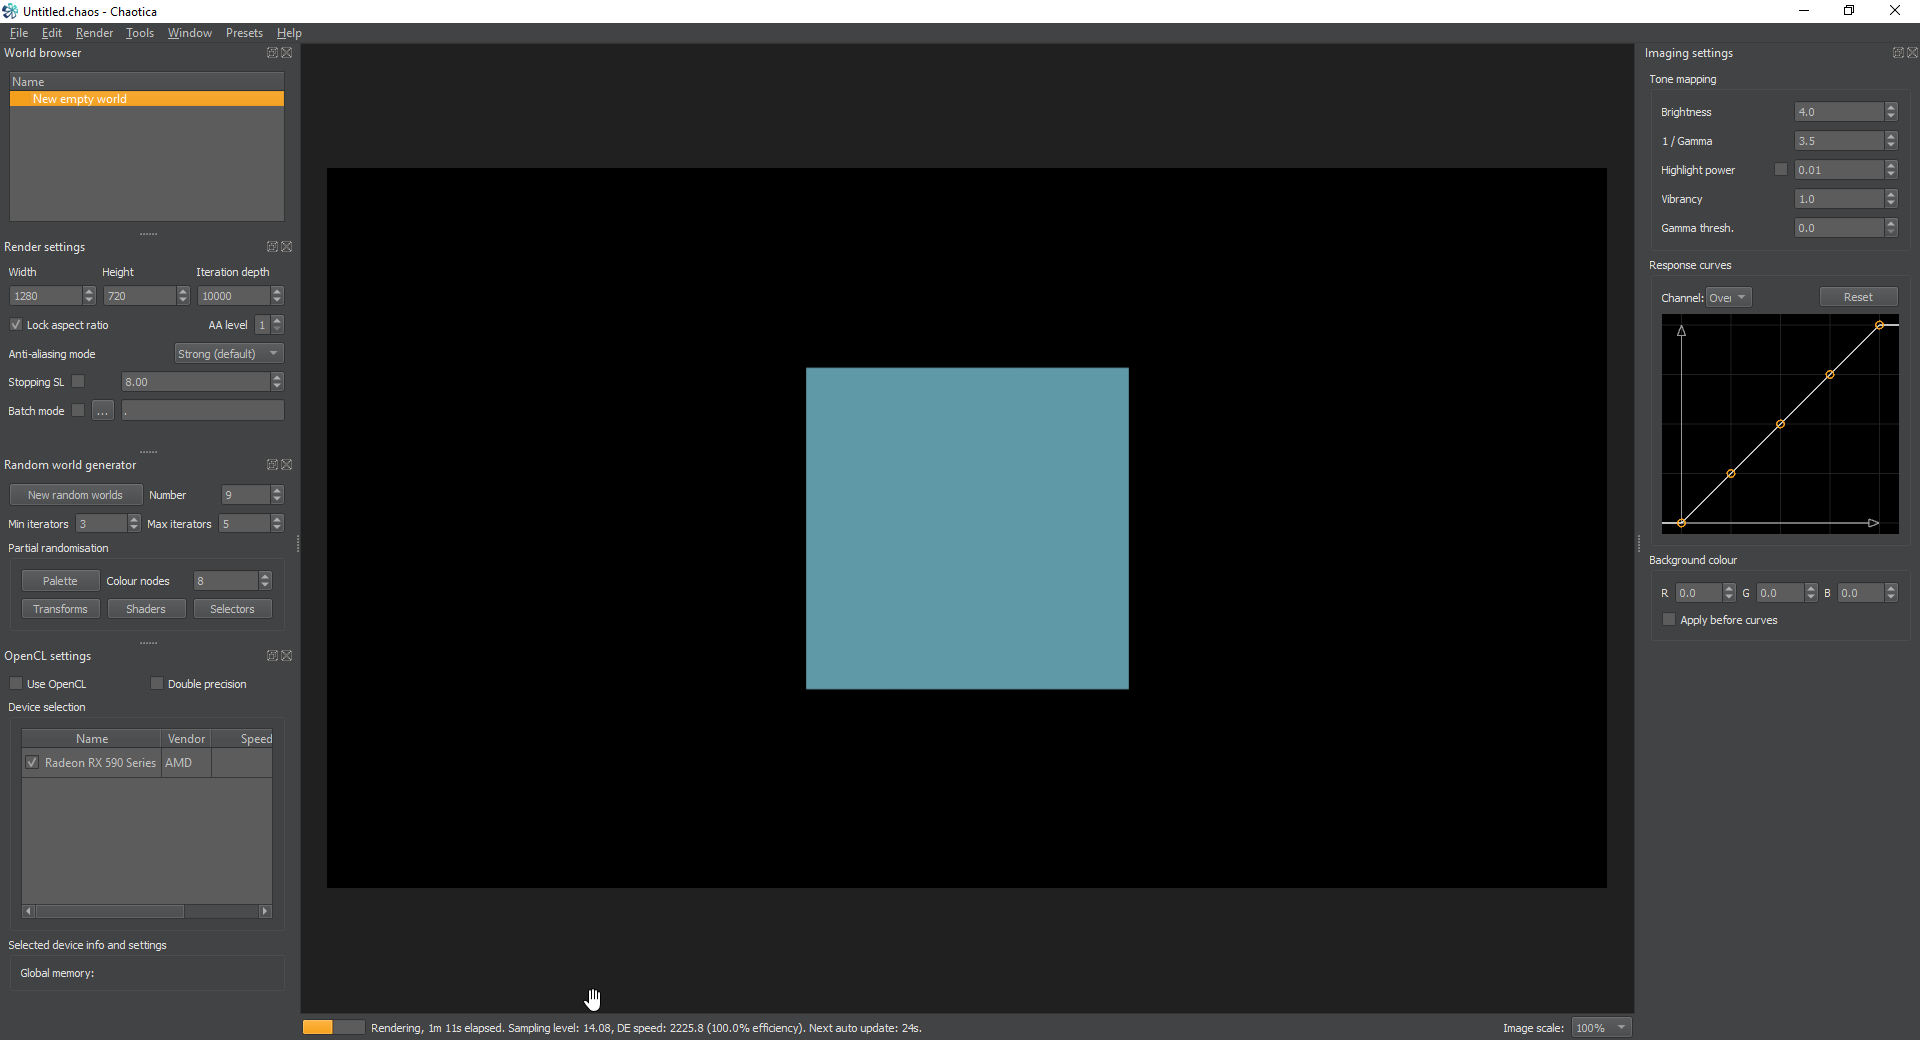
<h3 id="cpow3">cpow3</h3>

<p>Lastly we’re going to set a new transform up as cpow3 and set the cpow3_d value to 2.77. This transform is very useful and can do a lot of things. In this example we’re just going to adjust the d value, but you could adjust the others and play with them. Feel free to experiment. This is what we end up with.</p>

<p><a href="/assets/images/chaotica-camera-spiral/chaotica_pxy3Z5NBsg.png"><img src="/assets/images/chaotica-camera-spiral/chaotica_pxy3Z5NBsg.png" alt="cpow3" /></a> <a href="/assets/images/chaotica-camera-spiral/chaotica_n1PUBC2bfw.png"><img src="/assets/images/chaotica-camera-spiral/chaotica_n1PUBC2bfw.png" alt="cpow3 Editor" /></a></p>

<h2 id="final-tweaks-and-thoughts">Final Tweaks and Thoughts</h2>

<p>Next simply give it a shader and palette scheme that you’re happy with. This is what I ended up with.</p>

<p><a href="/assets/images/chaotica-camera-spiral/Gravity Wave.png"><img src="/assets/images/chaotica-camera-spiral/Gravity Wave.png" alt="Gravity Wave" /></a></p>

<p>Feel free to tweak things and play with things. Hopefully you see how this type of thing can lend itself to some really amazing images. Some things to try would be to send the whole thing to an ejulia or mobius or julian2 or even a bipolar. Feel free to play around. The possibilities are endless. Happy Fractaling!</p>]]></content><author><name>Pugnacious</name></author><category term="fractal" /><category term="chaotica" /><summary type="html"><![CDATA[This tutorial will show you how to create a golden spiral camera effect.]]></summary></entry><entry><title type="html">Chaotica: Transform Examples</title><link href="https://www.pug.fyi/chaotica/transform/examples" rel="alternate" type="text/html" title="Chaotica: Transform Examples" /><published>2021-05-30T00:00:00+00:00</published><updated>2021-05-30T00:00:00+00:00</updated><id>https://www.pug.fyi/chaotica/transform/Transform_Examples</id><content type="html" xml:base="https://www.pug.fyi/chaotica/transform/examples"><![CDATA[<h2 id="what-do-the-transforms-do">What do the transforms do?</h2>

<p>When I first started working with fractals, I didn’t start from a math perspective. I started from a “oh this is cool software” perspective. The biggest question I had was, what do these transforms do and how do I make use of that? This is a common question. I hang around in the fractal chat discord and I’m active on DeviantArt and I answer questions in both places. The most asked question is, how the heck do I see what transforms actually do? In this tutorial, I’m not going to go through every transform and tell you what it does. That would defeat the purpose of learning. I’m instead going to teach you how to build a chaotica world that you can use as a testing grounds. This method was originally created by Tatasz on DeviantArt and she mentioned it in one of her journals. I’ve expanded on it and now I’m releasing the updated method.</p>

<h2 id="credits">Credits</h2>

<p>The original idea came from Tatasz, and I bounced part of this off Crystalize. A big thanks also goes out to the community as a whole. Thanks guys!</p>

<blockquote>
  <p><em>If I have seen further than others, it is by standing upon the shoulders of giants. - Isaac Newton</em></p>
</blockquote>

<h2 id="building-the-basics">Building the Basics</h2>

<p>Ok, to start off with, we’re going to create a single iterator that creates an infinite chessboard plane. This method can also be used to create infinite tiles if you’re paying attention. If you’re read the rest of the tutorials you’ll see some methods here that build on what you’ve already learned, but this tutorial is written in a way to make the rest of them not really required. If you don’t understand why something works the way it does, or you have any questions, please contact me and let me know so I can clarify that part of the tutorial.</p>

<h3 id="iterator-1">Iterator 1</h3>

<p>Create an iterator and add a transform. Set this transform to square with all the default values.</p>

<p><a href="/assets/images/chaotica-transform-examples/chaotica_f1ICjfaKx4.png"><img src="/assets/images/chaotica-transform-examples/chaotica_f1ICjfaKx4.png" alt="Square" /></a> <a href="/assets/images/chaotica-transform-examples/chaotica_v8NPRsOaAJ.png"><img src="/assets/images/chaotica-transform-examples/chaotica_v8NPRsOaAJ.png" alt="Square_Editor" /></a></p>

<p>Next, create a post-transform and pick polynomial for the transform. Set the polynomial_lcx and polynomial_lcy to -0.5. This will shrink the square by half. Next change the polynomial_scx and polynomial_scy to -0.25. This will move the square back to the top left corner of where the original square was. Now, we could have done this a different way, but this gives me the opportunity to illustrate a new way of doing things. The idea is to create a tile. This tile will have a unit size of 1. The original square has a unit size of 1. When we tile anything, it’s vastly easier to tile it, if it stays to a 1 unit size.</p>

<p><a href="/assets/images/chaotica-transform-examples/chaotica_tjtEWFCrfR.png"><img src="/assets/images/chaotica-transform-examples/chaotica_tjtEWFCrfR.png" alt="Small Square" /></a> <a href="/assets/images/chaotica-transform-examples/chaotica_8BqbH9VCcg.png"><img src="/assets/images/chaotica-transform-examples/chaotica_8BqbH9VCcg.png" alt="Small Square Editor" /></a></p>

<p>Now we’re going to create a second square in the opposite corner. Create a new post-transform and set it to mirror_x. This will mirror the X axis across the y axis.</p>

<p><a href="/assets/images/chaotica-transform-examples/chaotica_pRbjXZVQe2.png"><img src="/assets/images/chaotica-transform-examples/chaotica_pRbjXZVQe2.png" alt="Mirrored Square" /></a> <a href="/assets/images/chaotica-transform-examples/chaotica_s7AyYmrGmA.png"><img src="/assets/images/chaotica-transform-examples/chaotica_s7AyYmrGmA.png" alt="Mirrored Square Editor" /></a></p>

<p>Next create a new post-transform and set it to flipy. This will flip everything top to bottom and uses the Y axis as it’s centerline.</p>

<p><a href="/assets/images/chaotica-transform-examples/chaotica_8lEYfiSTLu.png"><img src="/assets/images/chaotica-transform-examples/chaotica_8lEYfiSTLu.png" alt="Flipped Square" /></a> <a href="/assets/images/chaotica-transform-examples/chaotica_Wz8FFcVp7Y.png"><img src="/assets/images/chaotica-transform-examples/chaotica_Wz8FFcVp7Y.png" alt="Flipped Square Editor" /></a></p>

<p>Next, create yet another post-transform and set it to tile_hlp. This will set it up to create a very nice tile both left and right. The transform tile_hlp is a helper transform and is designed to be used with the next one we’re going to add.</p>

<p><a href="/assets/images/chaotica-transform-examples/chaotica_wR13YVUq5I.png"><img src="/assets/images/chaotica-transform-examples/chaotica_wR13YVUq5I.png" alt="tile_hlp" /></a> <a href="/assets/images/chaotica-transform-examples/chaotica_XXukLvuFAV.png"><img src="/assets/images/chaotica-transform-examples/chaotica_XXukLvuFAV.png" alt="tile_hlp Editor" /></a></p>

<p>Next create another post-transform and set it to tile_log. This transform will tile the target both left and right and you can use the tile_log_spread to control how much it spreads out.</p>

<p><a href="/assets/images/chaotica-transform-examples/chaotica_uPE8xBdNd4.png"><img src="/assets/images/chaotica-transform-examples/chaotica_uPE8xBdNd4.png" alt="tile_log" /></a> <a href="/assets/images/chaotica-transform-examples/chaotica_4WZyce1Nsn.png"><img src="/assets/images/chaotica-transform-examples/chaotica_4WZyce1Nsn.png" alt="tile_log Editor" /></a></p>

<p>Now comes the fun part. We’re going to create another post-transform, but this time set it to mobius. Mobius is like a linear, but we can do a lot of nifty things with it. it’s extremely useful, but in this specific case, we’re going to use it to rotate the entire tile 90 degrees. Set the Im_A to 1. This will make it larger, and rotate it 45 degrees. Next set the Im_D to -1.0. This will lower the size back to normal, and finish the rotation to a full 90.</p>

<p>For more information on Mobius, check the calculator here:  <a href="https://www.desmos.com/calculator/dniytt9jrt">Desmos Calculator</a></p>

<p><a href="/assets/images/chaotica-transform-examples/chaotica_YgXDimlalG.png"><img src="/assets/images/chaotica-transform-examples/chaotica_YgXDimlalG.png" alt="First mobius" /></a> <a href="/assets/images/chaotica-transform-examples/chaotica_OZzZuJVZf1.png"><img src="/assets/images/chaotica-transform-examples/chaotica_OZzZuJVZf1.png" alt="First mobius Editor" /></a></p>

<p>Next, create two more post-transforms. Can you guess what they will be? We’re creating a checkerboard, so we have to tile it the rest of the way. It will be a tile_hlp and then a tile_log. This will complete the checkerboard pattern.</p>

<p><a href="/assets/images/chaotica-transform-examples/chaotica_7cg34JrJNL.png"><img src="/assets/images/chaotica-transform-examples/chaotica_7cg34JrJNL.png" alt="Tile Again" /></a> <a href="/assets/images/chaotica-transform-examples/chaotica_OLnKh5SomN.png"><img src="/assets/images/chaotica-transform-examples/chaotica_OLnKh5SomN.png" alt="Tile Again Editor" /></a></p>

<h2 id="checkerboard-complete">Checkerboard Complete!</h2>

<p>Ok, now we know how to create a checkerboard pattern with a single iterator. The techniques illustrated here may be useful later in many things. Where does that take us though? You’ll find out, we’re almost done. I promise!</p>

<h2 id="camera-transform">Camera Transform.</h2>

<p>Next, turn on the camera transform. It will default to linear. Start by picking any transform. This setup is ideal for seeing how transforms behave and testing variables. Try bipolar. All you have to do to see what something does is change the camera transform and the image will shift to show you. Simple right? Play, learn and have fun!</p>

<p><a href="/assets/images/chaotica-transform-examples/chaotica_tL0BibWOEe.png"><img src="/assets/images/chaotica-transform-examples/chaotica_tL0BibWOEe.png" alt="Camera Transform" /></a> <a href="/assets/images/chaotica-transform-examples/chaotica_kNklAnJkuS.png"><img src="/assets/images/chaotica-transform-examples/chaotica_kNklAnJkuS.png" alt="Camera Transform Editor" /></a></p>]]></content><author><name>Pugnacious</name></author><category term="fractal" /><category term="chaotica" /><summary type="html"><![CDATA[This is a tutorial on how to find out what each transform does.]]></summary></entry><entry><title type="html">Chaotica: Elliptic-Splits</title><link href="https://www.pug.fyi/chaotica/elliptic/splits" rel="alternate" type="text/html" title="Chaotica: Elliptic-Splits" /><published>2021-05-12T00:00:00+00:00</published><updated>2021-05-12T00:00:00+00:00</updated><id>https://www.pug.fyi/chaotica/elliptic/Choatica-Elliptic-Splits</id><content type="html" xml:base="https://www.pug.fyi/chaotica/elliptic/splits"><![CDATA[<p><a href="/assets/images/chaotica-elliptic-splits/Dancing in the Dark.png"><img src="/assets/images/chaotica-elliptic-splits/Dancing in the Dark.png" alt="Intro Image" /></a></p>

<h1 id="credits">Credits</h1>

<p>This is a collaboration between myself and Crystalize but a huge thanks to the fractal community is also in order. The first method is mine and based on apophysis. The second is Crystalize’s and is something I thought worth including as it’s very well built.</p>

<blockquote>
  <p><em>If I have seen further than others, it is by standing upon the shoulders of giants. - Isaac Newton</em></p>
</blockquote>

<h1 id="elliptic-splits-method-1">Elliptic splits Method 1</h1>

<p>This tutorial will teach you two different ways to create the effect and a few ways to tweak it.</p>

<h2 id="iterator-1">Iterator 1</h2>

<p>First we’re going to setup the Elliptic transform. Set the value to around 1 and you can tweak it later.</p>

<div class="language-plaintext highlighter-rouge"><div class="highlight"><pre class="highlight"><code>Transform: elliptic
    value: 1
</code></pre></div></div>

<h3 id="pre-affine">Pre-affine</h3>

<p>This needs to get flipped 90 degrees counterclockwise. In Chaotica, I much prefer to set the values directly.</p>

<div class="language-plaintext highlighter-rouge"><div class="highlight"><pre class="highlight"><code>pre-affine:
    x-axis: 90
    y-axis: 180
</code></pre></div></div>

<p>We also need to lower the size of this. This is where it gets a bit uncertain. Throughout the whole process you will change the size of this pre-affine and the one for the splits iterator until you’re happy with the result. I set my initial values at 0.469182796955 for the X and Y length.</p>

<h3 id="post-affine">Post-affine</h3>

<p>Add a post-affine to this iterator and we’re going to flip it 90 degrees counterclockwise as well, so set the x and y axis.</p>

<div class="language-plaintext highlighter-rouge"><div class="highlight"><pre class="highlight"><code>post-affine:
    x-axis: 90
    y-axis: 180
</code></pre></div></div>

<h2 id="iterator-2">Iterator 2</h2>

<p>This is going to be our splits iterator. Setup the transform like so.</p>

<div class="language-plaintext highlighter-rouge"><div class="highlight"><pre class="highlight"><code>Transform: Splits
    value: 1
    splits_x: 1
    splits_y: 0.05
</code></pre></div></div>

<h3 id="pre-affine-1">Pre-affine</h3>

<p>No changes need to be made to the pre-affine beyond changing the size. In my example I raised the size. I’m including sample values.</p>

<div class="language-plaintext highlighter-rouge"><div class="highlight"><pre class="highlight"><code>Pre-affine:
    X-axis: 1.909124568362
    Y-axis: 1.909124568362
</code></pre></div></div>

<h3 id="post-affine-1">Post-affine</h3>

<p>We’re going to flip this 90 degrees clockwise</p>

<div class="language-plaintext highlighter-rouge"><div class="highlight"><pre class="highlight"><code>post-affine:
    x-axis: -90
    y-axis: 0
</code></pre></div></div>

<h2 id="review-so-far">Review So Far</h2>

<p>Ok, lets review what we have so far. Here’s what everything looks like.</p>

<p><a href="/assets/images/chaotica-elliptic-splits/chaotica_aWNnZsiE9a.png"><img src="/assets/images/chaotica-elliptic-splits/chaotica_aWNnZsiE9a.png" alt="Elliptic Splits" /></a> <a href="/assets/images/chaotica-elliptic-splits/chaotica_EfZCH1SQ6O.png"><img src="/assets/images/chaotica-elliptic-splits/chaotica_EfZCH1SQ6O.png" alt="Elliptic Splits Editor" /></a></p>

<h2 id="review-of-tweaks">Review of tweaks</h2>

<p>Keep in mind that you can change the size of the pre-affines for both transforms to get a totally different look. You can also tweak the size of the splits x and y values to change how this looks as well. I encourage you to play with this and figure out how everything links together. This is a great point to do that.</p>

<h1 id="adding-effects">Adding effects</h1>

<p>Now, lets make this truly stand out. Lets add a cylinder transform. We’re going to insert it into the chain in such a way as to use it to outline the edges.</p>

<h2 id="cylinder-iterator">Cylinder Iterator</h2>

<p>Setup the cylinder transform like this.</p>

<div class="language-plaintext highlighter-rouge"><div class="highlight"><pre class="highlight"><code>pre-transforms:
    transform: gaussian
        value: 10

transform: Cylinder
    value 0.25
</code></pre></div></div>

<p>The guassian is to provide a blur though, you can change this to whatever you like. I just find that a blur gives it a nice soft edge.</p>

<h3 id="pre-affine-2">Pre-affine</h3>

<p>No changes are needed to the pre-affine, but feel free to play with it.</p>

<h3 id="post-affine-2">Post-affine</h3>

<p>Lets lower the size of the cylinder to give it a better edge. I’m going to set the X and Y axis length at 0.315558045641</p>

<p><a href="/assets/images/chaotica-elliptic-splits/chaotica_KdcomIMgYy.png"><img src="/assets/images/chaotica-elliptic-splits/chaotica_KdcomIMgYy.png" alt="Cylinder" /></a> <a href="/assets/images/chaotica-elliptic-splits/chaotica_TiTZYV269A.png"><img src="/assets/images/chaotica-elliptic-splits/chaotica_TiTZYV269A.png" alt="Cylinder Editor" /></a></p>

<p>At this point it looks ok, but it overlaps quite a bit. Lets fix that.</p>

<h2 id="making-things-line-up">Making things line up</h2>

<p>Add post transform to the Elliptic iterator and set the transform to splits with y value of 0.08</p>

<p>This will make a gap in it to fit the cylinder into. Then we want to tweak the splits iterator and set the splits y value to 0.08</p>

<p>The effect is we’re moving the pattern aside to insert the cylinder into the middle.</p>

<p><a href="/assets/images/chaotica-elliptic-splits/chaotica_LPj9q8UoAL.png"><img src="/assets/images/chaotica-elliptic-splits/chaotica_LPj9q8UoAL.png" alt="Cylinder Tweak" /></a> <a href="/assets/images/chaotica-elliptic-splits/chaotica_kgdRSN6UIn.png"><img src="/assets/images/chaotica-elliptic-splits/chaotica_kgdRSN6UIn.png" alt="Cylinder Tweak Editor" /></a></p>

<h2 id="final-tweaks">Final Tweaks</h2>

<p>Next, grab yourself some shaders and a palette you’re happy with. Here’s what I chose.</p>

<p><a href="/assets/images/chaotica-elliptic-splits/chaotica_csKV68oFSX.png"><img src="/assets/images/chaotica-elliptic-splits/chaotica_csKV68oFSX.png" alt="Shader and Palette" /></a></p>

<p>You can leave it here if you want, but it can look downright epic if you choose a good camera transform. Also if you add a pre-transform to the elliptic you can get some stunning results. Here’s a camera transform of bipolar and a pre-transform on the elliptic of waves2.</p>

<p><a href="/assets/images/chaotica-elliptic-splits/chaotica_HZaSkWATPL.png"><img src="/assets/images/chaotica-elliptic-splits/chaotica_HZaSkWATPL.png" alt="Final Editor" /></a></p>

<h1 id="elliptic-splits-method-2">Elliptic Splits Method 2</h1>

<p>This one was created by Crystalize and all credit for the method goes to him. I’m going to build the tutorial with my own tweaks and values, but the basis came from his brain. This method uses arcsinh instead of elliptic but the effect is very close to the same at the end. It’s not identical, but it’s close enough to make some awesome happen.</p>

<p>This iterator creates lines to frame everything. You’re going to build it using the chain method from one of my other tutorials. This is an intermediate technique and you can find the tutorial on it <a href="https://www.pug.fyi/chaotica/transform/chains">HERE</a> or just click on the tutorials menu on the top right.</p>

<h2 id="iterator-1-1">Iterator 1</h2>

<div class="language-plaintext highlighter-rouge"><div class="highlight"><pre class="highlight"><code>pre-transform:
    transform: square
    transform: tile_hlp
    transform: tile_log
        tile_log_spread: 10
    transform: polynomial
        polynomial_lcy: -0.8
    transform: splits
        splits_y: 0.9

transform: linear
</code></pre></div></div>

<p>The pre-affine shaders and weights can all stay default, or feel free to play with them.</p>

<h2 id="iterator-2-1">Iterator 2</h2>

<div class="language-plaintext highlighter-rouge"><div class="highlight"><pre class="highlight"><code>transform: arcsinh
    value: 0.9
</code></pre></div></div>

<p>Again, everything else can stay default.</p>

<h2 id="iterator-3">Iterator 3</h2>

<h3 id="pre-affine-3">Pre-affine</h3>

<p>You’ll want to raise the size. Vales I’m using are X and Y axis of 2</p>

<h3 id="transform">Transform</h3>

<p>This should be splits with a value of 1 and a splits_y of 1</p>

<h2 id="recap">Recap</h2>

<p>Ok, now we’re at the point where you should see something like this.</p>

<p><a href="/assets/images/chaotica-elliptic-splits/chaotica_KqEijUEpvh.png"><img src="/assets/images/chaotica-elliptic-splits/chaotica_KqEijUEpvh.png" alt="Crystalize Elliptic" /></a> <a href="/assets/images/chaotica-elliptic-splits/chaotica_t5Erdu3C0g.png"><img src="/assets/images/chaotica-elliptic-splits/chaotica_t5Erdu3C0g.png" alt="Crystalize Elliptic Editor" /></a></p>

<p>The first iterator creates a square, tiles it left and right, shrinks it, and then splits it in half. Then the next two iterators create the same elliptic-splits style inside them.</p>

<h2 id="tweaking-this-version">Tweaking this version</h2>

<p>Some of the same tweaks as the previous method can easily be applied. For instance, we can create a pre-transform on iterator 2 (the one that has arcsinh) and set it to wavesn with the following values</p>

<div class="language-plaintext highlighter-rouge"><div class="highlight"><pre class="highlight"><code>transform: wavesn
    value: 1
    wavesn_freqx: 1.5
    wavesn_freqy: 1.5
    wavesn_scalex: 1.1
    wavesn_scaley: -0.55
</code></pre></div></div>

<p>And we end up with this.</p>

<p><a href="/assets/images/chaotica-elliptic-splits/chaotica_J5hoQITNDr.png"><img src="/assets/images/chaotica-elliptic-splits/chaotica_J5hoQITNDr.png" alt="Crystalize Elliptic Tweaks" /></a></p>

<p>Here’s a screenshot of the values I used.</p>

<p><a href="/assets/images/chaotica-elliptic-splits/chaotica_EHDKwmp0tB.png"><img src="/assets/images/chaotica-elliptic-splits/chaotica_EHDKwmp0tB.png" alt="Tweak Values" /></a></p>

<h2 id="final-tweaks-and-camera">Final Tweaks and Camera</h2>

<p>Finally, we can apply shaders and pick a palette. Don’t forget to tweak the color curves to suit your tastes. Then we can work on the camera transform. For this, I picked a simple julian2 with default everything. This is what it looks like.</p>

<p><a href="/assets/images/chaotica-elliptic-splits/chaotica_jK5vh8z2XB.jpg"><img src="/assets/images/chaotica-elliptic-splits/chaotica_jK5vh8z2XB.jpg" alt="Tweak Values" /></a></p>

<h2 id="final-image">Final Image</h2>

<p><a href="/assets/images/chaotica-elliptic-splits/Tutorial_Elleptic_Splits_Crystalize.png"><img src="/assets/images/chaotica-elliptic-splits/Tutorial_Elleptic_Splits_Crystalize.png" alt="Crystalize Final Image" /></a></p>

<h1 id="closing-thoughts">Closing thoughts</h1>

<p>Both of these methods can be used in many different ways. I urge you to experiment and tweak to your heart’s content. There are always multiple ways to do things. There are even more than I’ve hinted at here. If your task is to find them, that’s awesome. I do hope you’ll find me on discord or Deviantart and show me the awesome you’ve made. I’ll leave you with a few images I’ve made using these techniques.</p>

<p><a href="https://www.deviantart.com/monkeyshack/art/Djinn-s-Respite-857565140"><img src="https://images-wixmp-ed30a86b8c4ca887773594c2.wixmp.com/f/c44d1498-1c89-4141-bf98-d14781623673/de6klhw-a1b512cd-d153-404d-96a5-8472cdb88c4f.png?token=eyJ0eXAiOiJKV1QiLCJhbGciOiJIUzI1NiJ9.eyJzdWIiOiJ1cm46YXBwOjdlMGQxODg5ODIyNjQzNzNhNWYwZDQxNWVhMGQyNmUwIiwiaXNzIjoidXJuOmFwcDo3ZTBkMTg4OTgyMjY0MzczYTVmMGQ0MTVlYTBkMjZlMCIsIm9iaiI6W1t7InBhdGgiOiJcL2ZcL2M0NGQxNDk4LTFjODktNDE0MS1iZjk4LWQxNDc4MTYyMzY3M1wvZGU2a2xody1hMWI1MTJjZC1kMTUzLTQwNGQtOTZhNS04NDcyY2RiODhjNGYucG5nIn1dXSwiYXVkIjpbInVybjpzZXJ2aWNlOmZpbGUuZG93bmxvYWQiXX0.I78woANvc2RM4aR1RlvpTGgm5U9XWthTTHsDBf2jdwI" alt="Djinn's Respite - By PugnaciousOne (me)" /></a> <a href="https://www.deviantart.com/monkeyshack/art/Ghost-Time-858623619"><img src="https://images-wixmp-ed30a86b8c4ca887773594c2.wixmp.com/f/c44d1498-1c89-4141-bf98-d14781623673/de77a83-71fb01cf-7e97-4c9d-922c-e241457ca71b.png?token=eyJ0eXAiOiJKV1QiLCJhbGciOiJIUzI1NiJ9.eyJzdWIiOiJ1cm46YXBwOjdlMGQxODg5ODIyNjQzNzNhNWYwZDQxNWVhMGQyNmUwIiwiaXNzIjoidXJuOmFwcDo3ZTBkMTg4OTgyMjY0MzczYTVmMGQ0MTVlYTBkMjZlMCIsIm9iaiI6W1t7InBhdGgiOiJcL2ZcL2M0NGQxNDk4LTFjODktNDE0MS1iZjk4LWQxNDc4MTYyMzY3M1wvZGU3N2E4My03MWZiMDFjZi03ZTk3LTRjOWQtOTIyYy1lMjQxNDU3Y2E3MWIucG5nIn1dXSwiYXVkIjpbInVybjpzZXJ2aWNlOmZpbGUuZG93bmxvYWQiXX0.xS5w5SCm-Iss5T02uJLYt_XoV3VR9vZo8yO9et9GJqk" alt="Ghost Time - By PugnaciousOne (me)" /></a> <a href="https://www.deviantart.com/monkeyshack/art/Vine-Whip-859215343"><img src="https://images-wixmp-ed30a86b8c4ca887773594c2.wixmp.com/f/c44d1498-1c89-4141-bf98-d14781623673/de7jysv-cd33c4dc-6632-4370-879a-488771cabbe1.png?token=eyJ0eXAiOiJKV1QiLCJhbGciOiJIUzI1NiJ9.eyJzdWIiOiJ1cm46YXBwOjdlMGQxODg5ODIyNjQzNzNhNWYwZDQxNWVhMGQyNmUwIiwiaXNzIjoidXJuOmFwcDo3ZTBkMTg4OTgyMjY0MzczYTVmMGQ0MTVlYTBkMjZlMCIsIm9iaiI6W1t7InBhdGgiOiJcL2ZcL2M0NGQxNDk4LTFjODktNDE0MS1iZjk4LWQxNDc4MTYyMzY3M1wvZGU3anlzdi1jZDMzYzRkYy02NjMyLTQzNzAtODc5YS00ODg3NzFjYWJiZTEucG5nIn1dXSwiYXVkIjpbInVybjpzZXJ2aWNlOmZpbGUuZG93bmxvYWQiXX0.ktOjh9X0lMJXNz8gwsPrBEEfp7D_NwXKPXvbbk4yNC4" alt="Vine Whip - By PugnaciousOne (me)" /></a></p>]]></content><author><name>Pugnacious</name></author><category term="fractal" /><category term="chaotica" /><summary type="html"><![CDATA[This tutorial will show you how to create a Elliptic-Splits form with chaotica.]]></summary></entry><entry><title type="html">Chaotica: Transform Chains</title><link href="https://www.pug.fyi/chaotica/transform/chains" rel="alternate" type="text/html" title="Chaotica: Transform Chains" /><published>2021-05-03T00:00:00+00:00</published><updated>2021-05-03T00:00:00+00:00</updated><id>https://www.pug.fyi/chaotica/transform/Chaotica-Transform-Chains</id><content type="html" xml:base="https://www.pug.fyi/chaotica/transform/chains"><![CDATA[<h2 id="knowledge-check">Knowledge Check</h2>

<p>This tutorial is written with the expectation that you have already read through most of the basics tutorials on my site. If you haven’t already done so, please do so now to avoid confusion. Just click on Tutorials on the upper right corner of the site.</p>

<h2 id="what-is-a-transform-chain">What is a transform chain?</h2>

<p>A transform chain is a series of transforms that get executed in top down order instead of the normal way. I’m going to give some background here so everyone can be on the same page.</p>

<h3 id="normal-transform-behavior">Normal Transform Behavior</h3>

<p>A normal iterator has pre and post transforms as well as the normal transform nodes. The normal behavior is to have your transform nodes and the transforms will kind of bounce around between all the iterators based on the weights. This isn’t exactly what happens, but it’s the mental image that I choose to assign to how this process happens. It will start with iterator 1 and the weight says how likely it is to bounce to the next iterator and so forth and so on. You can use weights to control how the iterators interact, and even choose for two iterators not to interact with each other. That however is another tutorial. The scope of this one is to teach how pre and post transforms behave and how to use this to your advantage.</p>

<h3 id="pre-and-post-transform-behavior">Pre and Post Transform Behavior.</h3>

<p>Pre and Post Transform nodes only effect the current iterator and not the rest of the world. A Pre Transform will act on the iterator before it moves on and a Post Transform will act on it after it moves on. To understand this, you need to understand the flow. Lets say you have two iterators. The first one will bounce to the second and then back over and over as long as they have normal weights. If you apply a pre transform to the first iterator, it will execute it’s change to the first iterator before anything else and then make the change from it’s transform node. The same applies to post transforms, but those will take place after the normal transform node is applied. This is a confusing subject and that’s ok. The rest of this tutorial will be designed to demonstrate how this can be used and how you can take advantage of it.</p>

<h2 id="what-were-going-to-create">What we’re going to create</h2>

<p>This tutorial will show you how to create this type of image.</p>

<p><a href="/assets/images/chaotica-transform-chains/glynnsim_tutorial.png"><img src="/assets/images/chaotica-transform-chains/glynnsim_tutorial.png" alt="Final Image" /></a></p>

<h2 id="initial-setup">Initial Setup</h2>

<p>I’m going to start this tutorial in the normal way by opening up Chaotica and starting a new blank world. Then I’m going to go to the World Editor and create my first Iterator.</p>

<p>At this point a good idea is to state your goal and keep that in mind, however as always the creative process might just work the opposite way. Too often I find that I have no goal and one appears afterwards. I will say that using this method needs some type of goal as you have to have an idea of what you’re wanting the iterator to do beforehand.</p>

<p>I’m going to start by giving it a starblur and set the value to 0.5.</p>

<p><a href="/assets/images/chaotica-transform-chains/screen_1413.png"><img src="/assets/images/chaotica-transform-chains/screen_1413.png" alt="Initial Transform" /></a> <a href="/assets/images/chaotica-transform-chains/screen_1414.png"><img src="/assets/images/chaotica-transform-chains/screen_1414.png" alt="Initial Editor" /></a></p>

<p>Now, let’s say we want the starblur to tile to the left and right. So, I’m going to enable the post transform on this iterator and add tile_hlp.</p>

<p><a href="/assets/images/chaotica-transform-chains/screen_1415.png"><img src="/assets/images/chaotica-transform-chains/screen_1415.png" alt="Tile_hlp" /></a></p>

<p>Next I’m going to add another post transform and add tile_log with all default values.</p>

<p><a href="/assets/images/chaotica-transform-chains/screen_1416.png"><img src="/assets/images/chaotica-transform-chains/screen_1416.png" alt="Tile_log" /></a></p>

<p>This will take a transform and make a tile both left and right of it. If you adjust the tile_log_spread value you can control how “bright” it is throughout the tile.  In this example, I’ve raised that value so you can see it better.  I’ve also zoomed out on the camera so you can see the full structure.</p>

<p>Next, for the sake of showing how it works, lets make that tile go up and down too.</p>

<p>Start by adding another post transform. This time mobius. mobius will allow us to tweak things. So now set Im_A to 1 and Im_D to -1. That will flip it 90 degrees without changing it’s size.</p>

<p><a href="/assets/images/chaotica-transform-chains/screen_1417.png"><img src="/assets/images/chaotica-transform-chains/screen_1417.png" alt="mobius" /></a></p>

<p>Next add two more. One tile_hlp and the next tile_log. Feel free to add them out of order to see what will happen. The entire benefit is that they are executed in a top down way.</p>

<p><a href="/assets/images/chaotica-transform-chains/screen_1418.png"><img src="/assets/images/chaotica-transform-chains/screen_1418.png" alt="Second Tile" /></a></p>

<h2 id="what-does-this-mean">What does this mean?</h2>

<p>So, now we ask ourselves, what does this tell us? It tells us that we can take an iterator, and then change how it looks before we hand it off to the next iterator. This way we can precisely control how it looks before it interacts with other iterators.</p>

<p>If you think about it, this is incredibly powerful and can be used for a LOT of different things. Lets go back to the example and take away the last three transforms to get us back to the point where we had a single line of triangles.</p>

<p><a href="/assets/images/chaotica-transform-chains/screen_1416.png"><img src="/assets/images/chaotica-transform-chains/screen_1416.png" alt="Line of Triangles" /></a></p>

<p>Once you’re back to the single line create a new iterator and set the transform as linear.</p>

<p><a href="/assets/images/chaotica-transform-chains/screen_1419.png"><img src="/assets/images/chaotica-transform-chains/screen_1419.png" alt="Iterator 2" /></a></p>

<p>Now go to the pre-affine for the new iterator and make it a bit smaller and rotate it a bit.</p>

<p><a href="/assets/images/chaotica-transform-chains/screen_1420.png"><img src="/assets/images/chaotica-transform-chains/screen_1420.png" alt="Iterator 2_rotated" /></a> <a href="/assets/images/chaotica-transform-chains/screen_1421.png"><img src="/assets/images/chaotica-transform-chains/screen_1421.png" alt="Iterator 2_editor" /></a></p>

<p>Now it’s starting to show the power of this method. Lets kick our game up a notch and create a glynnsim fill.</p>

<h2 id="glynnsim-fill">Glynnsim fill</h2>

<p>Lets start with a blank slate and create the first iterator.</p>

<p>Set the transform to hex_rand and set it’s value to 0.5.</p>

<p>Next, setup a post transform. There are multiple ways to do this, but I’m going to show you one I like to use. We’re going to take the hex_rand and then fling it out into a single side with polar2, and follow that up with an infinite tile and then send the result to unpolar to bend it into a donut.</p>

<p>So Setup the first iterator like this:</p>

<div class="language-plaintext highlighter-rouge"><div class="highlight"><pre class="highlight"><code>Transform: hex_rand
    value: 0.5

    post_transform: polar2
    post_transform: crop
        crop_bottom: -0.35
        crop_zero: 1
    post_transform: tile_hlp
    post_transform: tile_log
        value: 0.104719755
        tile_log_spread: 10
    post_transform: unpolar
        value: 6.0
</code></pre></div></div>

<p>You end up with the following.</p>

<p><a href="/assets/images/chaotica-transform-chains/screen_1422.png"><img src="/assets/images/chaotica-transform-chains/screen_1422.png" alt="hex_filler" /></a></p>

<p>This method takes a hex rand, spreads it out with polar2, crops out the oddities, and then tiles it and then wraps it around into a donut. You may be wondering why the value on the tile_log. Well, anytime you work with foci or unpolar, you want the values to be pi/3 or a multiple of that. In this case it’s (pi/3)/10.</p>

<p>Next we’re going to put this into a glynnsim. So create a new iterator, and set it’s transform to glynnsim3. You can leave it all as the default for now.</p>

<p><a href="/assets/images/chaotica-transform-chains/screen_1423.png"><img src="/assets/images/chaotica-transform-chains/screen_1423.png" alt="Glynnsim3" /></a></p>

<p>Now, add a post-affine to iterator 1 and adjust it to make the hex pattern fill as much of the glynnsim3 circle as possible without leaving the two white lines. If it does, you’ll know it. In my case, I just had to slightly make the post-affine bigger to fill more of the circle. Feel free to play with the values, or even get crazy and add in some circlecrop2. The idea is to fill as much or as little of the middle circle as possible. Glynnsim3 has three zones, the outside, middle and inside. Once you’re ready, the magic can begin. Go to the pre-affine for the glynnsim iterator and rotate and move it until you’re happy with the result. Mine is shown.</p>

<p><a href="/assets/images/chaotica-transform-chains/screen_1424.png"><img src="/assets/images/chaotica-transform-chains/screen_1424.png" alt="Glynnsim3_moved" /></a> <a href="/assets/images/chaotica-transform-chains/screen_1425.png"><img src="/assets/images/chaotica-transform-chains/screen_1425.png" alt="Glynnsim3_editor" /></a></p>

<p>And as always, change the shaders, palette, and color curves until you’re happy. This is the final image.</p>

<p><a href="/assets/images/chaotica-transform-chains/glynnsim_tutorial.png"><img src="/assets/images/chaotica-transform-chains/glynnsim_tutorial.png" alt="Final Image" /></a></p>

<h2 id="what-have-we-learned">What have we learned?</h2>

<p>We have covered the ability to create basic pre and post transform chains, and how to use them in one instance of creating a fractal. It’s up to you to use this knowledge to make something awesome. Here are some examples of this being used.</p>

<p><a href="https://www.deviantart.com/monkeyshack/art/Window-To-Infinity-856140374"><img src="https://images-wixmp-ed30a86b8c4ca887773594c2.wixmp.com/f/c44d1498-1c89-4141-bf98-d14781623673/de5q252-4b605cf9-0e91-40b4-85a6-ca91655e2ae4.png?token=eyJ0eXAiOiJKV1QiLCJhbGciOiJIUzI1NiJ9.eyJzdWIiOiJ1cm46YXBwOjdlMGQxODg5ODIyNjQzNzNhNWYwZDQxNWVhMGQyNmUwIiwiaXNzIjoidXJuOmFwcDo3ZTBkMTg4OTgyMjY0MzczYTVmMGQ0MTVlYTBkMjZlMCIsIm9iaiI6W1t7InBhdGgiOiJcL2ZcL2M0NGQxNDk4LTFjODktNDE0MS1iZjk4LWQxNDc4MTYyMzY3M1wvZGU1cTI1Mi00YjYwNWNmOS0wZTkxLTQwYjQtODVhNi1jYTkxNjU1ZTJhZTQucG5nIn1dXSwiYXVkIjpbInVybjpzZXJ2aWNlOmZpbGUuZG93bmxvYWQiXX0.XsUtH-dCHad0jIGpWCk9mqRICoZ1xls_5HNC0d5NZ94" alt="Window to Infinity - By PugnaciousOne (me)" /></a> <a href="https://www.deviantart.com/monkeyshack/art/Reactor-856232955"><img src="https://images-wixmp-ed30a86b8c4ca887773594c2.wixmp.com/f/c44d1498-1c89-4141-bf98-d14781623673/de5s1kr-52ede9b3-1079-4d9d-ab64-ad0ece89144e.png?token=eyJ0eXAiOiJKV1QiLCJhbGciOiJIUzI1NiJ9.eyJzdWIiOiJ1cm46YXBwOjdlMGQxODg5ODIyNjQzNzNhNWYwZDQxNWVhMGQyNmUwIiwiaXNzIjoidXJuOmFwcDo3ZTBkMTg4OTgyMjY0MzczYTVmMGQ0MTVlYTBkMjZlMCIsIm9iaiI6W1t7InBhdGgiOiJcL2ZcL2M0NGQxNDk4LTFjODktNDE0MS1iZjk4LWQxNDc4MTYyMzY3M1wvZGU1czFrci01MmVkZTliMy0xMDc5LTRkOWQtYWI2NC1hZDBlY2U4OTE0NGUucG5nIn1dXSwiYXVkIjpbInVybjpzZXJ2aWNlOmZpbGUuZG93bmxvYWQiXX0.IaPb7YQbPvor8bd40c0VeksnFa5oLeRvfVlWRCKo80w" alt="Reactor - By PugnaciousOne (me)" /></a> <a href="https://www.deviantart.com/monkeyshack/art/Vine-Whip-859215343"><img src="https://images-wixmp-ed30a86b8c4ca887773594c2.wixmp.com/f/c44d1498-1c89-4141-bf98-d14781623673/de7jysv-cd33c4dc-6632-4370-879a-488771cabbe1.png?token=eyJ0eXAiOiJKV1QiLCJhbGciOiJIUzI1NiJ9.eyJzdWIiOiJ1cm46YXBwOjdlMGQxODg5ODIyNjQzNzNhNWYwZDQxNWVhMGQyNmUwIiwiaXNzIjoidXJuOmFwcDo3ZTBkMTg4OTgyMjY0MzczYTVmMGQ0MTVlYTBkMjZlMCIsIm9iaiI6W1t7InBhdGgiOiJcL2ZcL2M0NGQxNDk4LTFjODktNDE0MS1iZjk4LWQxNDc4MTYyMzY3M1wvZGU3anlzdi1jZDMzYzRkYy02NjMyLTQzNzAtODc5YS00ODg3NzFjYWJiZTEucG5nIn1dXSwiYXVkIjpbInVybjpzZXJ2aWNlOmZpbGUuZG93bmxvYWQiXX0.ktOjh9X0lMJXNz8gwsPrBEEfp7D_NwXKPXvbbk4yNC4" alt="Vine Whip - By PugnaciousOne (me)" /></a></p>]]></content><author><name>Pugnacious</name></author><category term="fractal" /><category term="chaotica" /><summary type="html"><![CDATA[This tutorial will show you how to create a transform chain and what it does.]]></summary></entry><entry><title type="html">Chaotica: Circle Inversions</title><link href="https://www.pug.fyi/chaotica/circle/inversion" rel="alternate" type="text/html" title="Chaotica: Circle Inversions" /><published>2021-04-26T00:00:00+00:00</published><updated>2021-04-26T00:00:00+00:00</updated><id>https://www.pug.fyi/chaotica/circle/Chaotica-Circle-Inversion</id><content type="html" xml:base="https://www.pug.fyi/chaotica/circle/inversion"><![CDATA[<h1 id="getting-started">Getting Started</h1>

<p>On this tutorial, I’m going to demonstrate how to do a circle inversion on the camera transform. There are multiple ways to do this, and you don’t have to do it through a camera transform. This method on the other hand allows you to skip getting into weights, which is a whole other future tutorial.</p>

<p>Now that I’m done with the warnings, onwards!</p>

<p>On this tutorial, I’m going to hope you’ve read the basics on Chaotica. I’m going to skip right into the meat of things and make this short and simple.</p>

<h1 id="initial-setup">Initial Setup</h1>

<p>First, lets make a simple pattern to use. I’m going to setup two iterators with the following information.</p>

<h2 id="iterator-1">Iterator 1</h2>

<div class="language-plaintext highlighter-rouge"><div class="highlight"><pre class="highlight"><code>Transform: julian2
Variables: all defaults

Post_Transforms:
    Transform: tile_hlp
    Variables: all defaults

    Transform: tile_log
    Variables:
        tile_log: 0.2
        tile_log_spread: 10
</code></pre></div></div>

<p>This will create a simple julian and then tile it into infinity left and right.</p>

<p>Once you have it setup, go to the shader node and set the opacity to 0.</p>

<h2 id="iterator-2">Iterator 2</h2>

<div class="language-plaintext highlighter-rouge"><div class="highlight"><pre class="highlight"><code>Transform: hemisphere
Variables: all defaults
</code></pre></div></div>

<h1 id="next-steps">Next Steps</h1>

<p>This will create a shape for us to play with in the camera transform. Here’s what mine looks like at the moment.</p>

<p><a href="/assets/images/chaotica-circle-inversion/chaotica_bHnOHbJVWm.png"><img src="/assets/images/chaotica-circle-inversion/chaotica_bHnOHbJVWm.png" alt="Basic Shape" /></a></p>

<p>Now what we want to do is to crop this into a circle and then work with that. If you’ve been following my tutorials, you may be aware that I’ve mentioned transform chains. This uses a simple yet powerful method. In Chaotica, pre and post transforms can have any number of transforms. Unlike the normal behavior, they are executed in a top down way instead of mixing according to Chaos. This allows us to take the result of a transform or series of transforms and interact with it in a specific way to get a specific result. For lack of a better term, it’s a way to mix Chaos and Planning.</p>

<h1 id="camera-transform">Camera Transform</h1>

<p>Next I’m going to toggle the camera transform to on. I’m going to leave the basic transform as linear and then show the pre transforms.</p>

<p>I’m now going to create the pre transforms in this specific order.</p>

<div class="language-plaintext highlighter-rouge"><div class="highlight"><pre class="highlight"><code>Transform: circlecrop
Variables:
    circlecrop: 1
    circlecrop_radius: 0.5

Transform: Spherical
Variables:
    spherical: 0.5

Transform: spher
Variables:
    spher: 1
</code></pre></div></div>

<p>What this does is crops the image into a circle, then the spherical inverts it inside out, and then the spher creates a copy of the outside on the inside of the circle. You can adjust the value of the spherical transform to put a gap between the two parts, or even throw in some mobius or anything else in the chain to vary the effect.</p>

<p>This is after applying the camera transform.</p>

<p><a href="/assets/images/chaotica-circle-inversion/chaotica_yiqnmQyiGB.png"><img src="/assets/images/chaotica-circle-inversion/chaotica_yiqnmQyiGB.png" alt="Camera Transform" /></a></p>

<p>Don’t forget to apply some pallete and shader tweaks. You’ll be creating awesome in no time.</p>

<p><a href="/assets/images/chaotica-circle-inversion/final_image.png"><img src="/assets/images/chaotica-circle-inversion/final_image.png" alt="Final Image" /></a></p>]]></content><author><name>Pugnacious</name></author><category term="fractal" /><category term="chaotica" /><summary type="html"><![CDATA[This tutorial will show you how to create a circle inversion effect.]]></summary></entry></feed>